Concepts
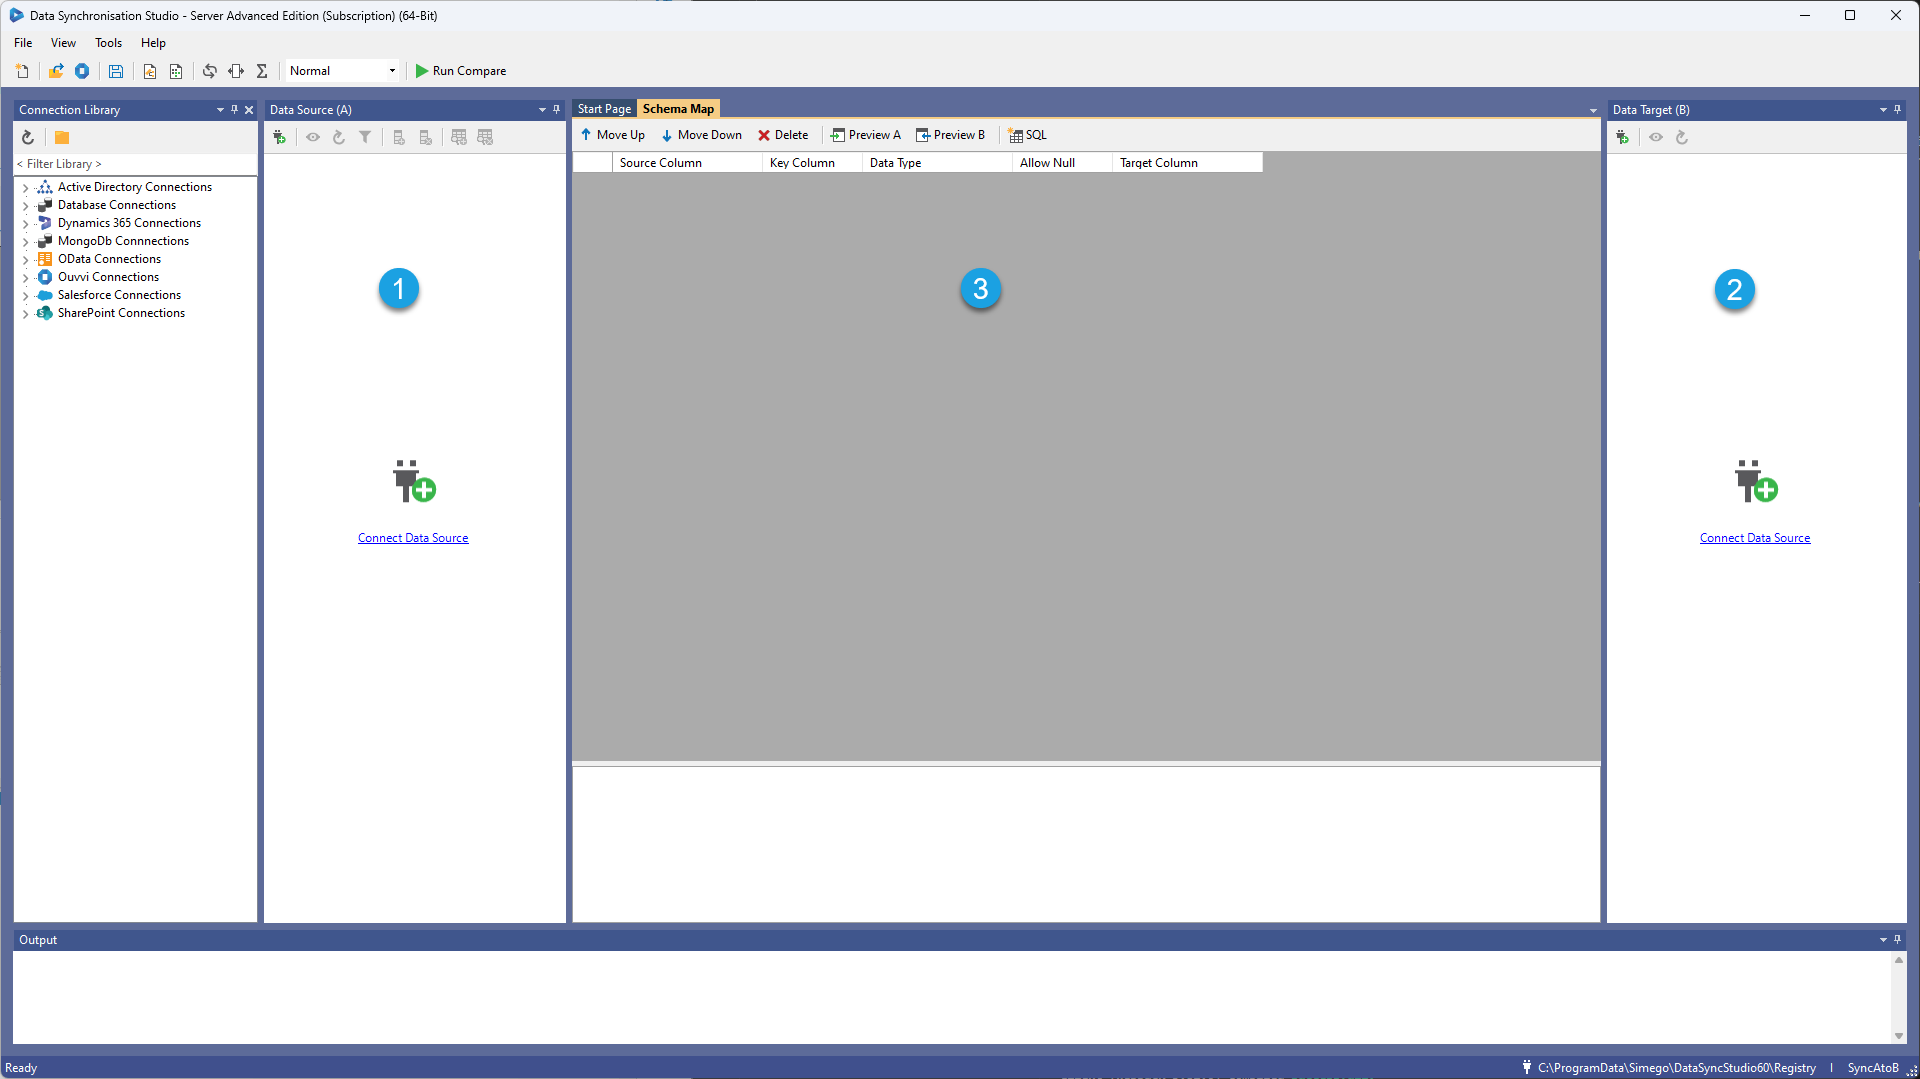
The basic steps required for any Data Sync project are as follows (highlighted in the screenshots below) :-
- Connect Source Data Source
- Connect Target Data Source
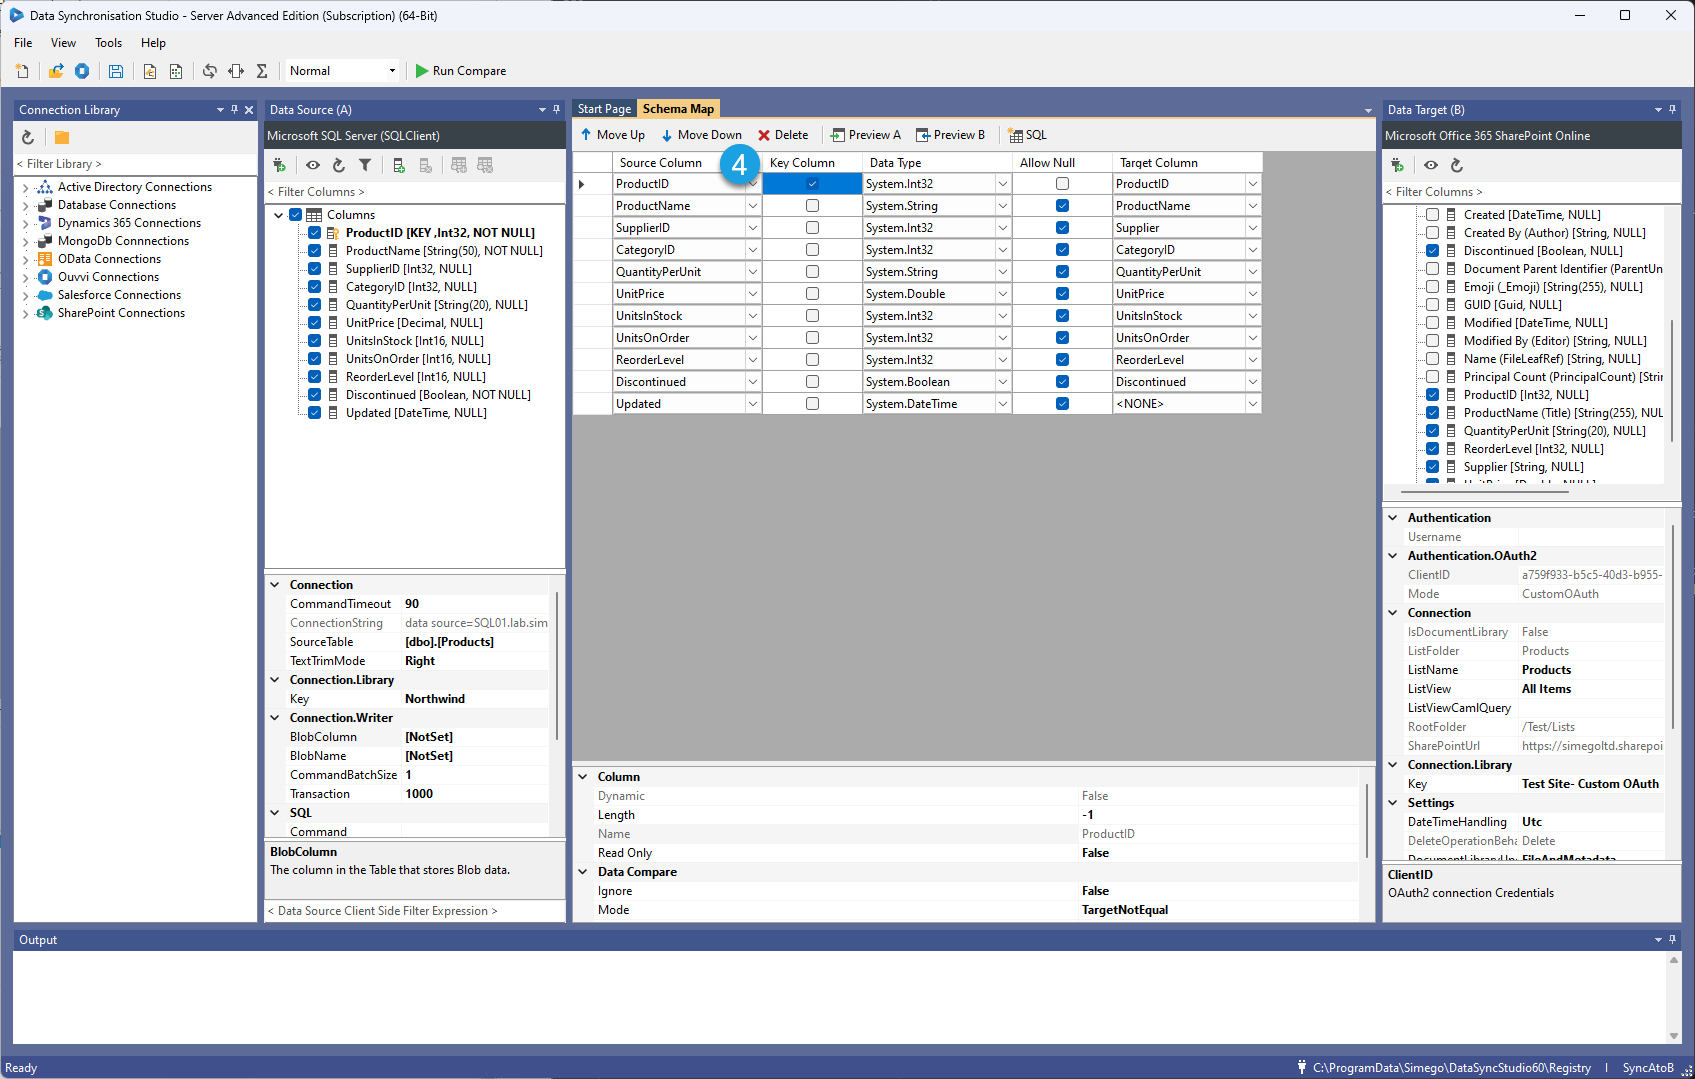
- Map the Fields from Source to Target
- Define the Key Column(s) that join the records together
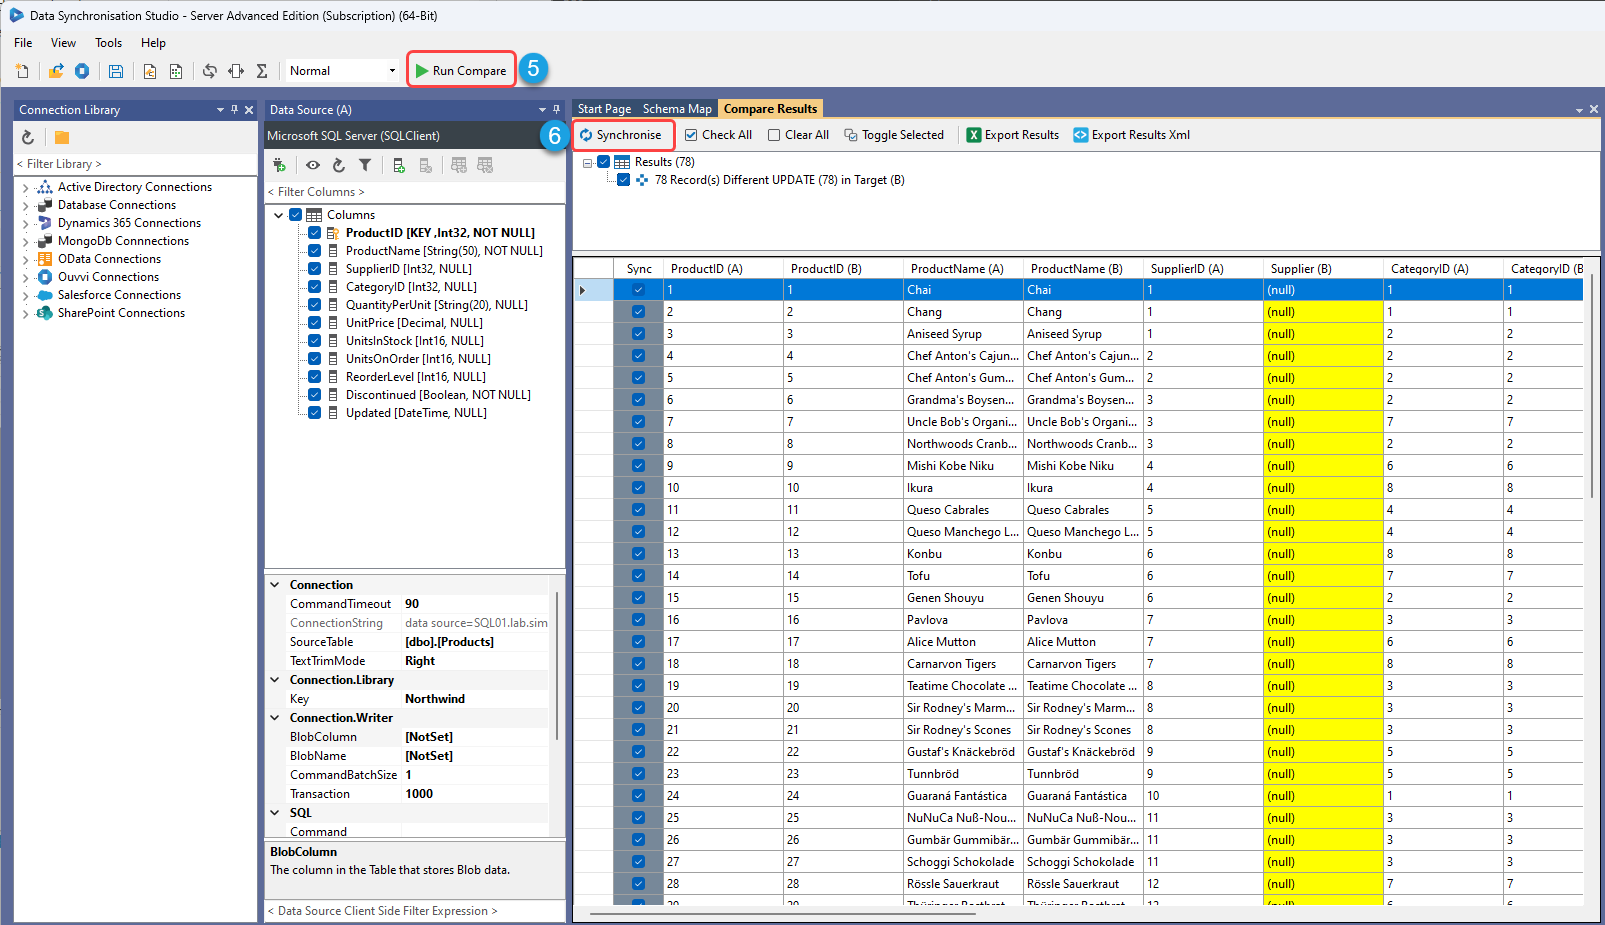
- Compare the Source to the Target
- Synchronise the Change Set to make the Target the same as the source
Connect
Connecting your data sources will show the default schema from each Data Source in each Data Source Window (1 and 2).
A default Schema Map will be displayed (3) that defines the mapping between the two systems.

Map the Fields
Adjust the Schema Map (3) and set the Key Column (4) that joins the records, the Key column is used for Data Sync to work out ADD/UPDATE and DELETE operations.
- If the Key Value exists in the Source Only it's an ADD Operation
- If the Key Value exists in both the Source and Target it's an UPDATE Operation
- If the Key Value only Exists in the Target then it's a DELETE Operation
DELETE is disabled by default via the Target property EnableDelete = False

Compare and Sync
To run the data compare press the Compare A->B (5) button on the Toolbar, this loads the Data from both sides and runs the data comparison. This does not affect your data it just reads the data to work out what changes are required to make them equal.
The Results window shows you the Changes that are required to make the Source and Target equal. You can view the changes and selectively choose which rows you want to sync via the Sync checkbox. The Update Set shows changes with a Yellow background, only those columns with a Yellow Background are updated.
Pressing the Synchronise (6) button on the results window mini-toolbar starts the process to update the data in the Target.
