First Project - SQL to SharePoint
The following guided project will cover creating and saving connections to the connection library, using those connections to add lookups, adding a calculated column to your project, and then comparing and synchronising the differences.
The guide below shows connecting to a SQL table and synchronising the data found within to a SharePoint list. Although the guide covers SQL to SharePoint you can apply the same principles to other connectors or you can reverse this example and go from SharePoint to SQL. Data Sync works on a mix and match basis so any examples shown throughout the documentation site can be reversed or customised as needed.
The main concept to keep in mind is that you want to present your source data in the way you want your target data to look.
Connect to SQL
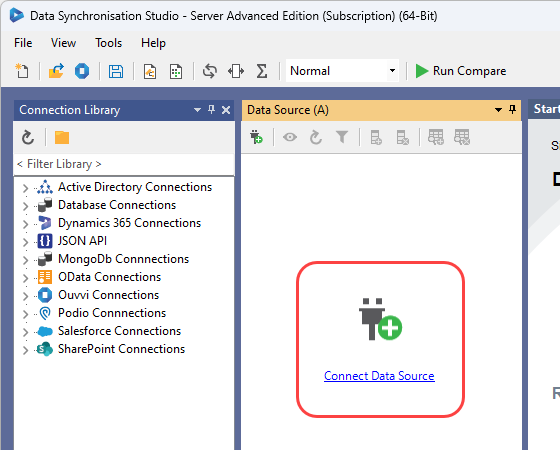
To get started we are going to connect our source to a SQL table. To do this open Data Sync and click onto the Connect Datasource link in the source window.
This will open the connection window, where you need to expand the SQL Database folder and then select Microsoft SQL Server (SQLClient).
Enter in the network name of your SQL Server. This can be a SQL instance e.g. SQL01\SQLEXPRESS or a name specifying the TCP Protocol and Port Number in the format tcp:SQL01\SQLEXPRESS, 1433.
In this example the network name is sql01.lab.simego.com.
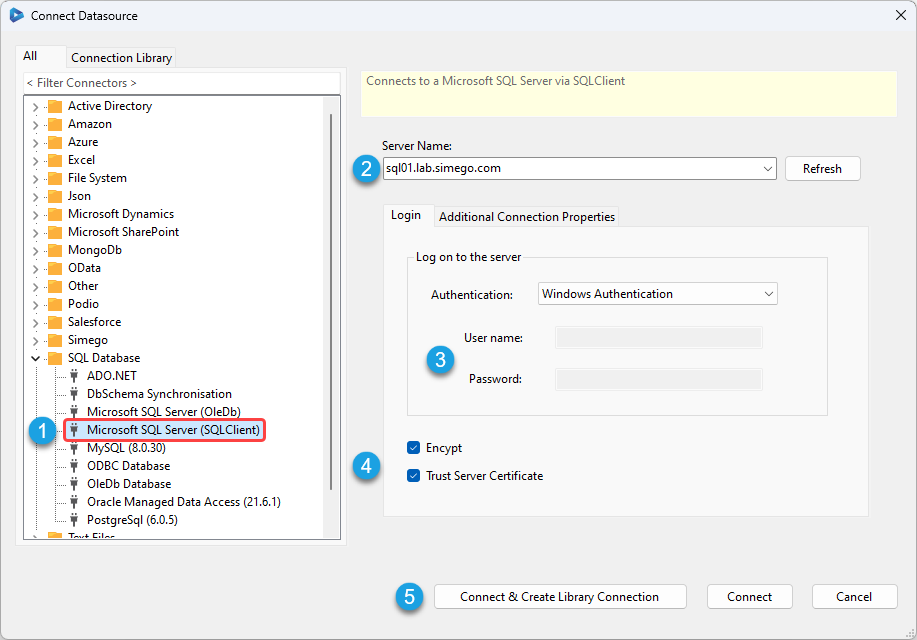
The default authentication is set to use Windows authentication, but you can change this as needed. For more detailed information on connecting to SQL please see our connection docs here.
To connect click Connect & Create Library Connection to save this connection to the connection library. Doing this will enable you to access the other tables within the Database you are connecting to in future projects without needing to re-create the connection each time.
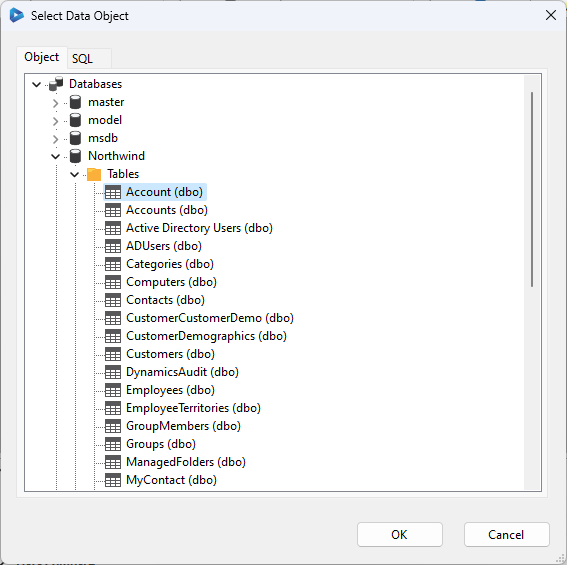
Navigate to a table within the Database you want to connect to by expanding the tree and click OK.
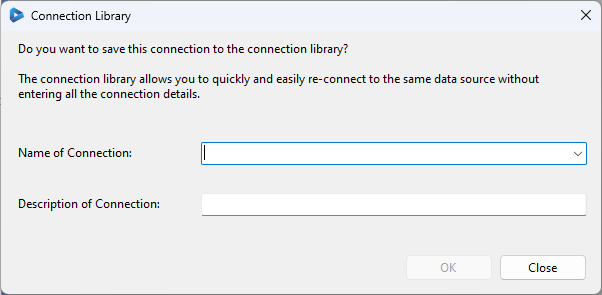
Once you have selected a table a window will appear prompting you to save the connection. Enter in a name for the connection and an optional description.
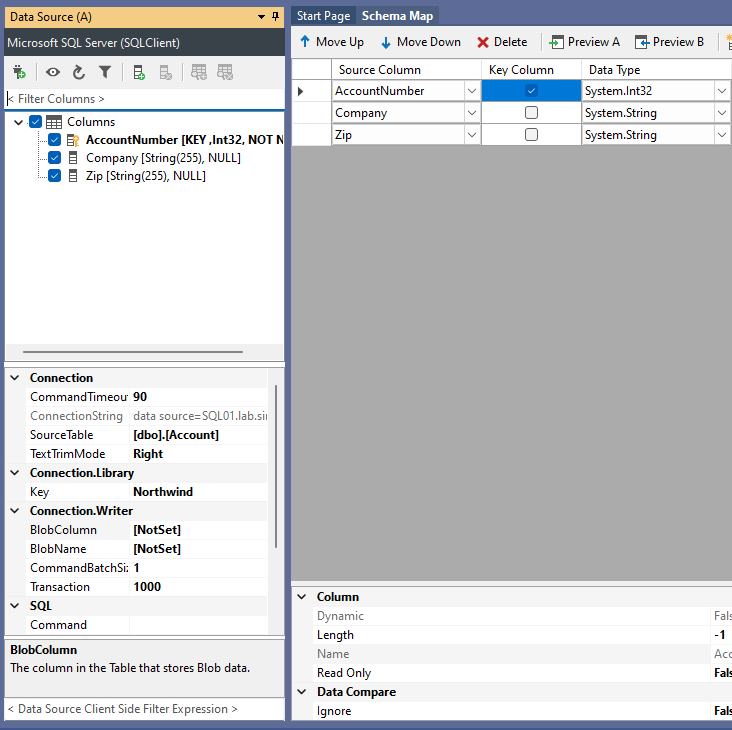
The selected SQL table will then load into the datasource (source) A window.
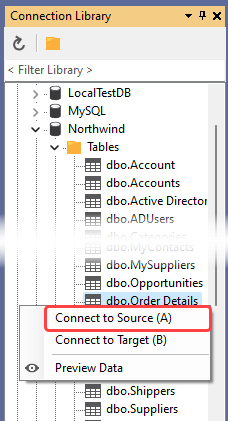
If you need to change the source table you can do so from the connection library window. As the connection was just created click onto the refresh button to reload the window.
Then expand the Database folder and the connection you created will be visible. Expand that connection, right click onto the table you need and select Connect to Source (A). This will load the selected table into the source window. In this case we have changed the source connection to be the order details table from the northwind database.
Connect to SharePoint
The next step is to connect the target window to SharePoint.
To do this open Data Sync and click onto the Connect Datasource link in the target window.
This opens the connection window where you need to expand the Microsoft SharePoint folder and select Microsoft Office 365 SharePoint Online.
For this example we are using the default Simego OAuth option. This uses a public azure app to facilitate the connection to your SharePoint site but does not pass any data. As there are multiple options for connecting to SharePoint in Data Sync please see our SharePoint Connection guides for other ways to connect outside of the Simego Default connection.
Enter in the base URL to your SharePoint site in the format https://<domain>.sharepoint.com/<site1>/<site2>, ensure that Simego OAuth Application is selected from the dropdown for Authentication mode, and then click onto Authorise Connection to sign into SharePoint.
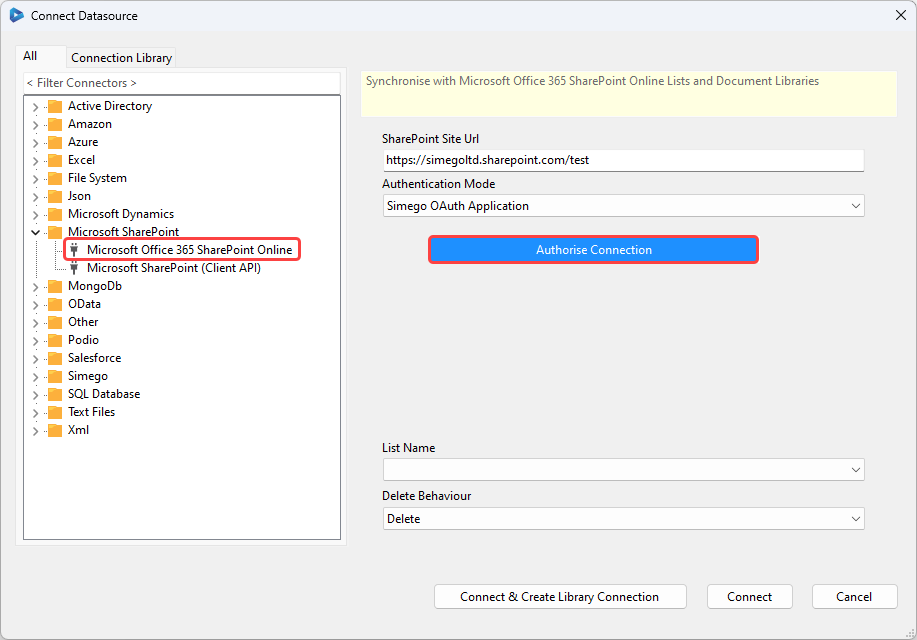
This will open up your default browser to enable you to authorise the request. Sign in to your Microsoft account or the account needed to access SharePoint and the browser will then redirect to your SharePoint site.
Now go back to Data Sync and select the list or library you want to connect to from the dropdown menu. You can also change the default delete behaviour; choose between Delete or Recycle. To finish click on to Connect & Create Library Connection to save the connection to the Connection Library.
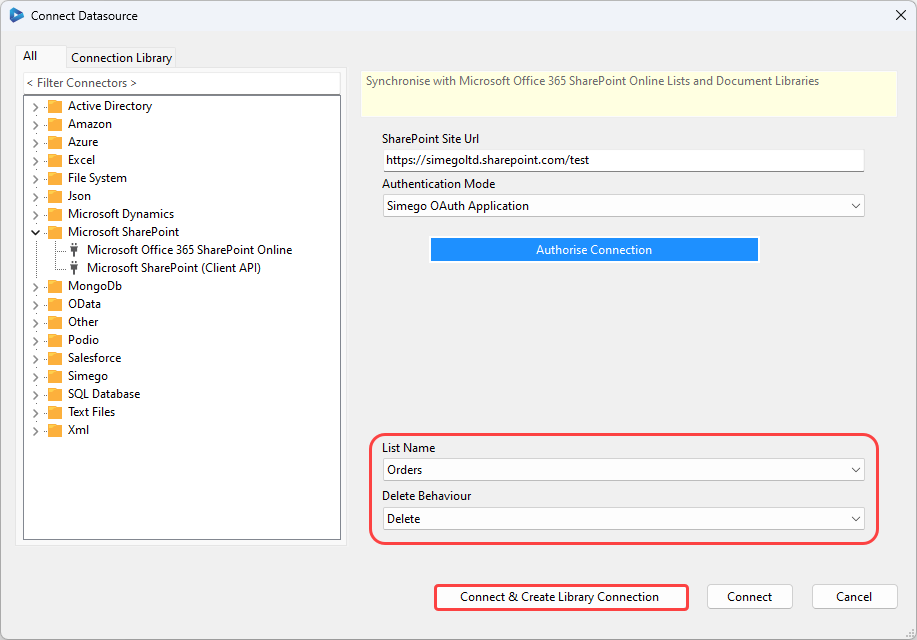
You need to save the SharePoint connection to the Connection Library as it will manage the refresh token. Without saving your project will cease to function after a day or two.
Lookup Data in another table
To decorate/add to your data you can either lookup data from additional tables so then they can be included in the synchronisation, or you can lookup values within your SharePoint site to be used within calculated columns so that data can be presented in the format SharePoint is expected (if you are connecting to a lookup column).
The lookup into SharePoint can be very specific depending on what the column looks up so will not be covered in this guide. However we do have a how to page covering examples of handling different SharePoint Lookups here
To add additional data from another table linked to the one in the source, you can simply drag and drop the table from the connection library onto the joining column.
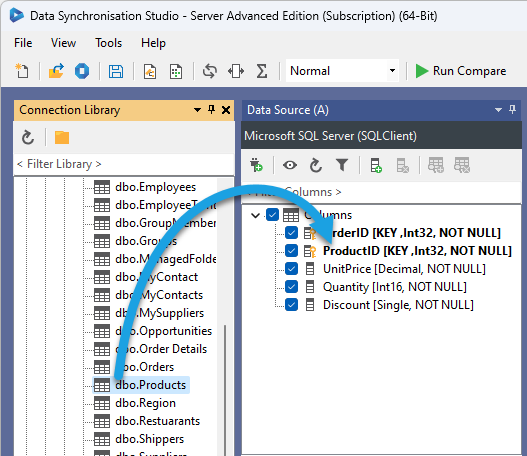
In this example we are connected to the OrderDetails table but we need to pull in the product details. To do this find your SQL connection under the Database node in the connection library tree, then select the Products table and drag this onto the ProductID column in the source window.
This will open the lookup configuration window where you can define which column in the Products Table contains the ProductID and can be used to link the two tables.
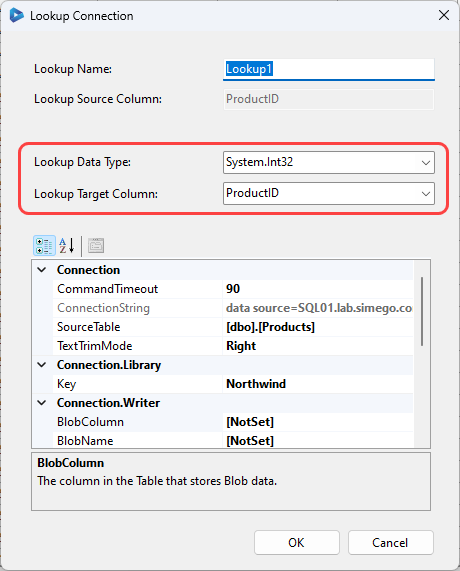
Clicking OK creates the lookup into the Products table.
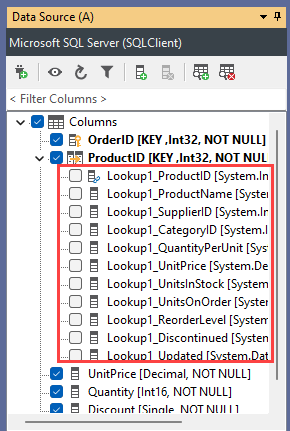
To access the lookup columns expand the tree in the source columns and you can see all of the columns found in the Products table.
Add Calculated Column
You can also decorate your data by using calculated columns. If for example a column doesn't exist, i.e you need one column to contain the data from two or more, or you need data in a certain format, or you need to do a lookup in a column not found in the source list, then you can use calculated columns to do this for you.
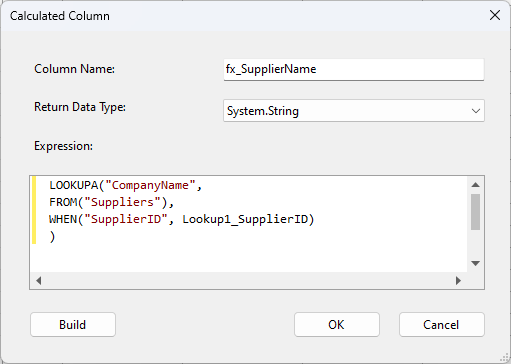
In this example we are getting the Supplier Name from the supplier table by using the LOOKUPA function and joining on the lookup column Lookup1_SupplierID from the Product lookup we did in the last step.
To create a calculated column click onto the add column button in the Datasource toolbar.
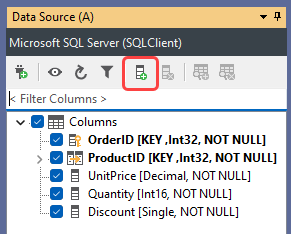
Then enter in a unique name for your column and select the appropriate data type. You can then write the function you need into the text window and click OK to create the column.
In this example the column is called fx_SupplierName, has a data type of System.String, and uses the LOOKUPA function to lookup the Company name in the Suppliers table when the ID matches the lookup1_SupplierID column. You can read more on each of the functions available to use here.
LOOKUPA("CompanyName", FROM("Suppliers"), WHEN("SupplierID", Lookup1_SupplierID))
Configure the Schema
We then need to select the columns we want to include in our synchronisation.
By default all of the original SQL table columns will have been added to the schema map. These will have been automatically mapped to columns in your SharePoint list with similar names, however we recommend checking that the mapping is correct before proceeding. In the image below we can see that both the order id and product id are marked as key columns and the product id is not linked to the correct column in SharePoint.

You can remove columns from the sync by deleting them from the schema map. Just highlight the row and either click Delete on your keyboard or the red X in the schema toolbar. We don't want to include the ProductID in the sync so we can remove this from the schema.

To add columns either drag and drop from the source window or select the checkbox next to the column name. In this case we want to add the Lookup1_ProductName and fx_SupplierName columns and map them to their corresponding SharePoint columns.

Considerations
One thing to consider is that the ID column in your SharePoint list will be different to the ID column in your SQL table. So you will need to ensure you map the SQL ID to a matching column in SharePoint.
This may mean you need to add a column to your SharePoint list to hold the ID column from SQL. In this case we have a column titled OrderID in SharePoint which holds the OrderID column from the SQL table.
A unique ID column is needed to identify each record as unique and a separate line. If you do not use a unique column then there is the risk that rows will appear as duplicate data and be excluded or the wrong item it synchronised to the target.
Compare Results
To view the differences between the source and target (SQL and SharePoint) click onto the Run Compare button in the toolbar.
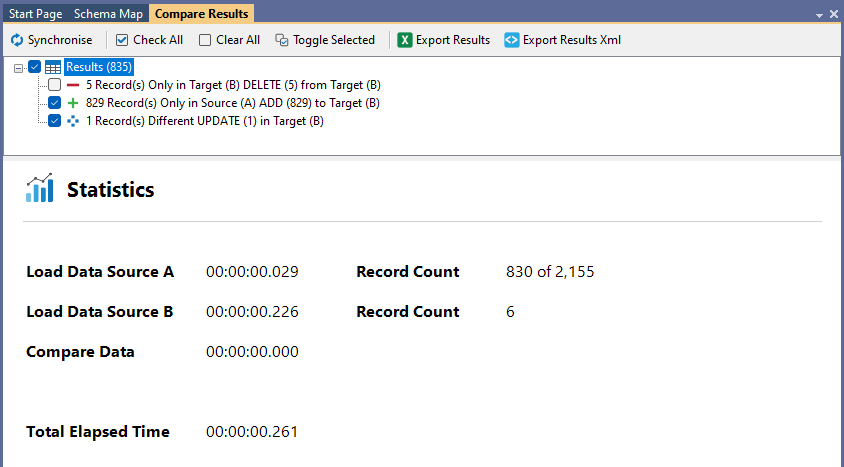
This will open a new tab where you can see all of the changes that need to be made to make the target the same as the source. Clicking onto each option shown in the results will show you a preview of the changes to be made.
Additions
Clicking onto the add section will show the records that do not exist in the target and need to be added.

Updates
Clicking onto the update section will show the records that exist in both the source and target but have differences between the two systems.
The changes that will be applied are highlighted in yellow to make it clear what will change in the target dataset.

Deletes
Deletes are disabled by default to help prevent any accidental deletions. These are items that are found in the target dataset but are not found in the source dataset. They might be excluded because of a filter or they may just not exist in the source system.
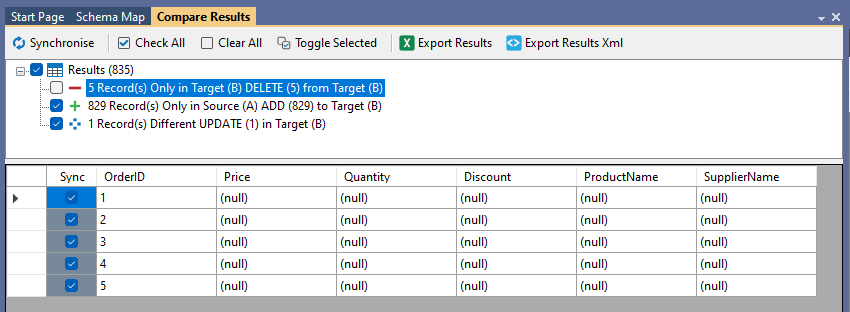
If you want to enable deletes change the EnableDelete property in the target connection property section to True and then check the checkbox next to the deletes in the compare results.
Synchronise Results
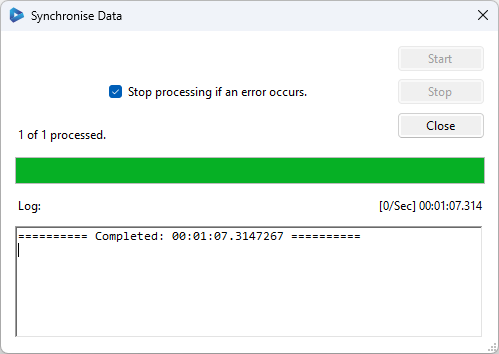
To Synchronise the compare results click onto the Synchronise button and then click Start in the window that opens.
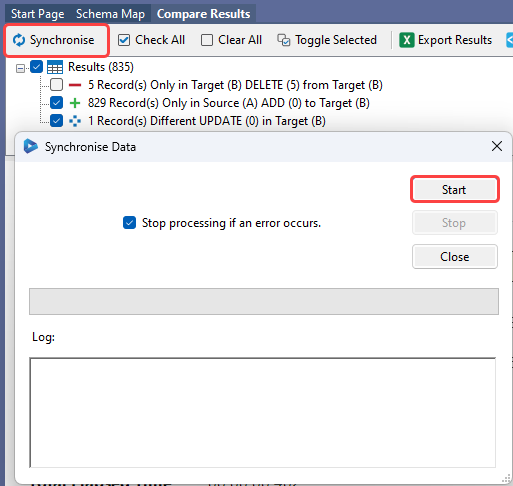
The sync will then run and show a completed message once done.
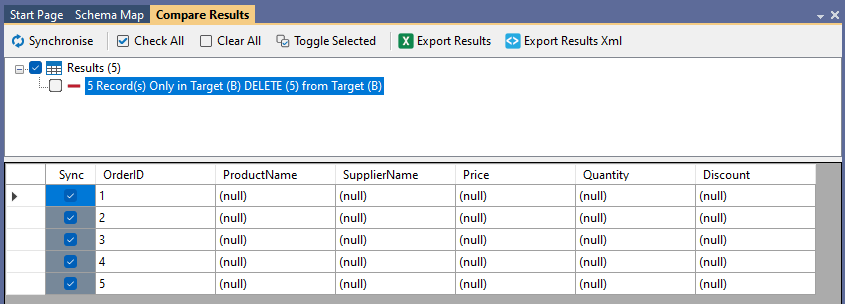
To check the sync ran as expected run the compare again and you should now have 0 records to synchronise. If deletes were disabled they will still show in the results like below. However we can see that there are no add or update actions to be made.
Don't forget to save your project so that you can use it again at a later date. Or if you want it to run on a regular basis then you can schedule it to run either using Ouvvi (with its own scheduling) or the Run Tool (in combination with Windows Task Scheduler).
We have more information on getting started with Ouvvi here or the Run Tool here.
Remember you can mix and match the connectors as you need to meet your requirements. So although this specific example connects SQL to SharePoint you can do Active Directory to SharePoint, SQL or Dynamics as another example.
If you have any questions please send us an email and we will be happy to help.