Salesforce SOQL Query
Salesforce queries use SOQL DateTime and Date Literals, please see the Salesforce page for more information.
Connection
Data Synchronisation Studio (Data Sync) contains the Salesforce SOQL provider which connects to an object inside of your Salesforce instance.
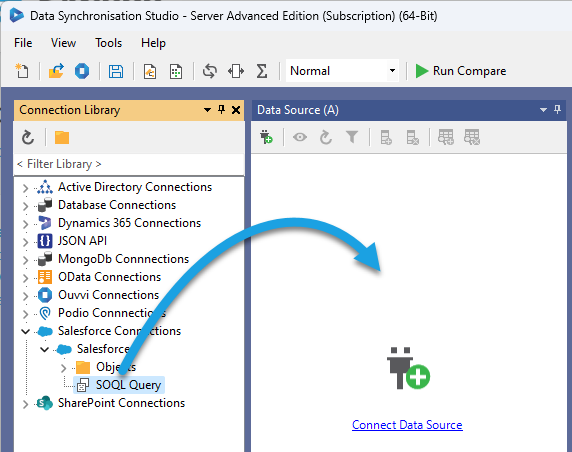
You can connect to the SOQL provider by either drag and dropping from the connection tree view, or right clicking and choosing Connect to Source or Connect to Target.
Drag and Drop
The drag and drop method to connect to Salesforce is quick and easy. Simply drag and drop the SOQL Query object from the connection library tree onto the data source.

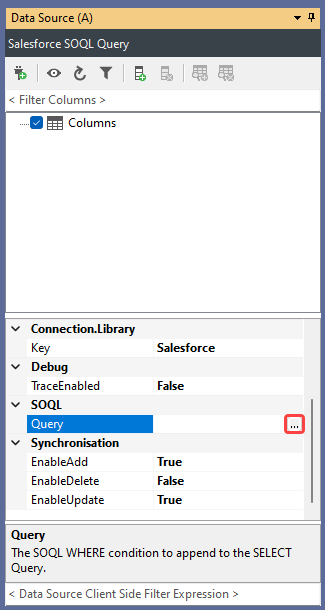
You can then enter in the query by finding Query in the connection properties and clicking onto the ellipsis to open the query editor.

Right Click
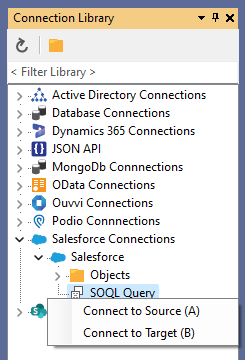
If you right click onto the SOQL Query object in the connections tree you will be given an option of either Connect to Source (A) or Connect to Target (B). Select the one you need and the SOQL provider will be loaded into the chosen window.

You can then enter in the query by finding Query in the connection properties and clicking onto the ellipsis to open the query editor.

Add the Query to the Project
Connect to the SOQL Query connector following the previous instructions and paste the desired query into the property box.
You can expand the query by clicking on the ellipsis (...) and either type the required query or upload a query statement, using the Open From File button.

An example of a SOQL Query you could use could be, to select all records in the contact object that have a first name of "Dave":
SELECT Id, FirstName
FROM Contact
WHERE FirstName = "Dave"
Preview the Data
To preview the data being returned by the query, press 'Preview A' in the schema map tab.
Export to CSV
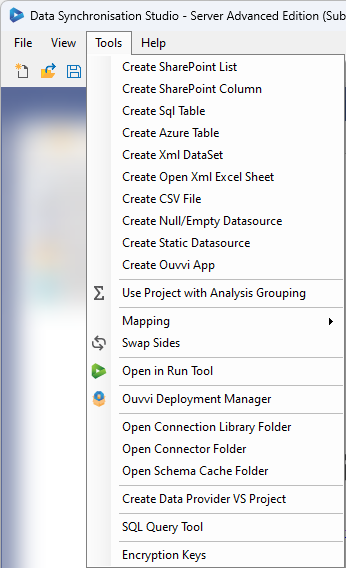
To export the data returned by the query into a CSV file, the 'Create CSV File' feature can be used which is located in the tools menu. You will need to set the new CSV files location.

Click Run Compare to preview the results, and then click Synchronise and Start. This will synchronise the extracted data from the SOQL Query into the CSV file.
The project can then be saved and scheduled to extract daily, hourly or weekly using the Run Tool and/or Ouvvi, or the project can be run Ad-Hoc.