Deleting Records from a SQL Table
If you have a list of records to delete then the following guide can be used to show you how to configure a Data Sync project to do this for you.
The below example uses a SQL table as an example however you can use any of our connectors that have support for writing back to the target.
Connect Source and Target
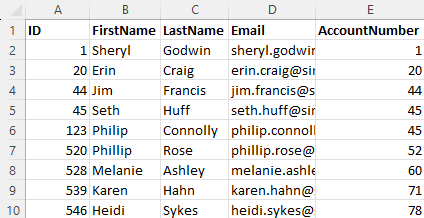
In this example we have an Excel spreadsheet that contains the record ID numbers for those that should be deleted from the SQL table.

Start by connecting your source and target to the SQL table containing the records. There will be no differences at this point.
To identify the records to be deleted we are going to lookup the ID of the records in the Excel file (deletion dataset). This is explained in the next step.
Lookup Items to Delete
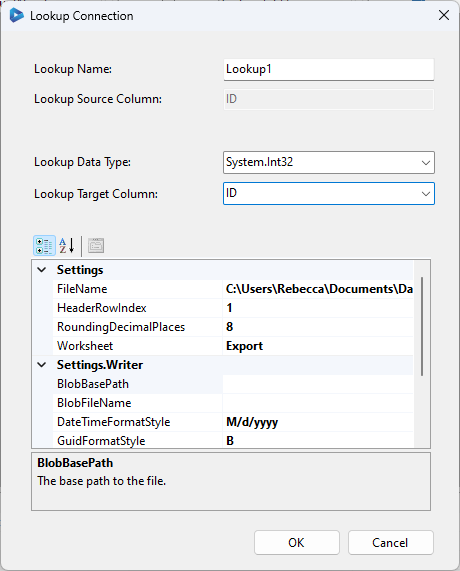
To add the lookup either drag and drop the excel file onto the ID column in the source window, or highlight the ID column and select the lookup button.
If you clicked the lookup button you will need to select the data connector applicable to your dataset (e.g. Excel) and then enter the path or connection details.
In both instances the lookup configuration window will appear where you can change the name of the lookup, check the target column is pointing to the correct linking column (i.e. ID), and check the data type is correct. Once this is done click OK and the lookup will be created.

Filter records
The next step is to filter the results to only return items that are not included in the lookup. This will exclude any items in the to be deleted file and as such will show as not being included in the source data set. This will mark these rows for deletion.
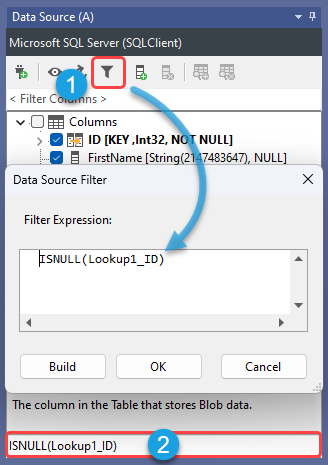
For this example the filter expression is ISNULL(Lookup1_ID).
You can either click onto the filter button in the source window or type the filter into the filter box found at the bottom of the connection window.

To preview the results after the filter click onto the Preview A button in the schema map and the records not found in the lookup (excel spreadsheet) will be visible in the results.
Enable Delete, Compare and Sync
As we want to delete records from the table we need to enable delete, as it is disabled by default.
To do this go to the target connection properties and find Enable Delete, by default the value is set to False, change this to True to allow deletions.
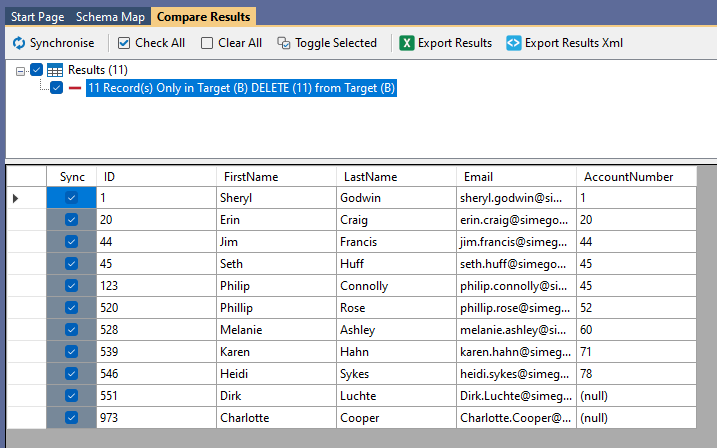
Now click Run Compare and you will be able to see the records to be deleted.

To finish click Synchronise and then Start to delete those records.
Although this example specifically covers deleting from a SQL table you can use this concept with any of the connectors that support writing, e.g. Dynamics, SharePoint, Salesforce and other Database providers to name a few.