Script a SQL Table from the Schema
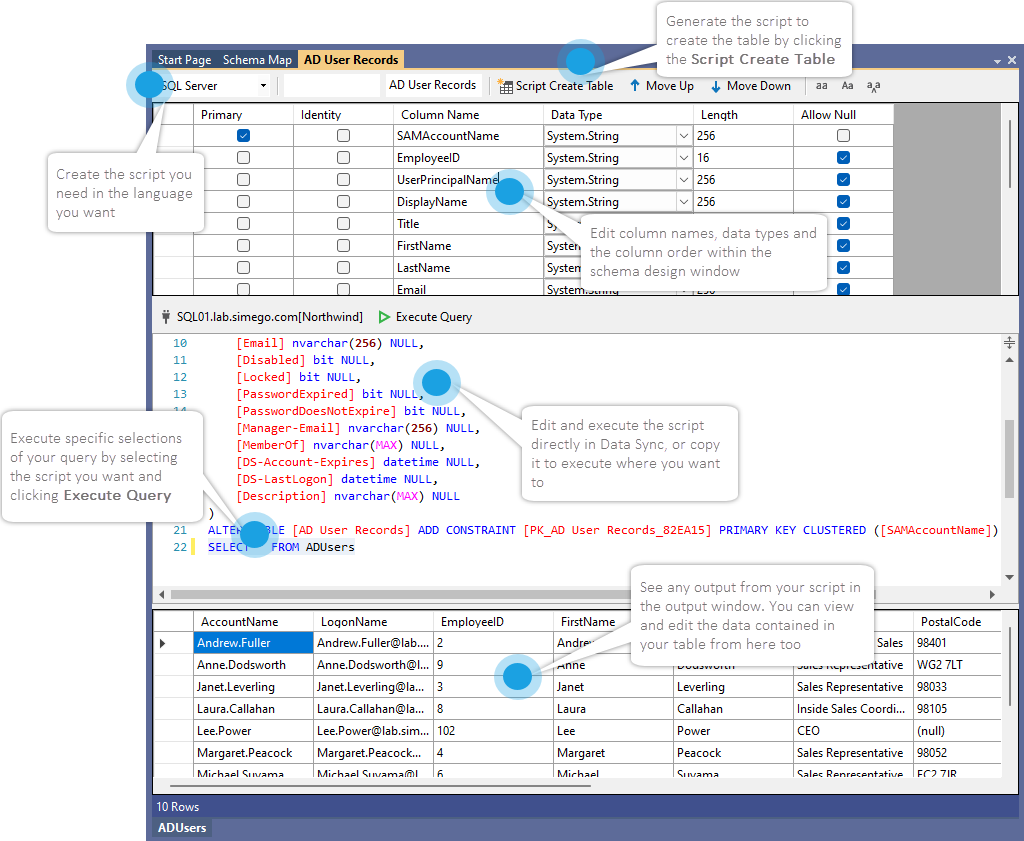
Data Sync has the ability to generate script to create new tables in your Database based upon the columns you add to the schema map window.
You can edit the configuration before generating the script; such as changing the column names, data types and data lengths. And to generate the script you simply click a button.
The tool also enables you to connect to your database and run the script from Data Sync. Before running the script if you want to add to it you can.
This works in a similar way to the SQL Query Tool.
Requirements
Before getting started you need to ensure you have the following:
- Windows 10 or Windows Server
- Downloaded & Installed Data Synchronisation Studio
- A dataset to base the script off. This example uses a CSV file but you can use any connector as the source.
- Access to a database (either SQL Server, MySQL or PostgreSQL)
If you are connecting to PostgreSQL or MySQL using ADO.net please make sure you have the relevant drivers installed.
- MySQL: https://dev.mysql.com/downloads/connector/net/
- PostgreSQL: https://github.com/npgsql/npgsql/releases/tag/v4.0.12
Alternatively if you are using the MySQL and Postgres connectors from GitHub the drivers should install alongside the connector.
Connect to your Source
You need to start by connecting to a datasource that you can base your schema off. This might be the dataset you want to ultimately import into your new table once it has been created.
In this example we have a simple CSV file with a number of columns describing contacts. You can use any of the providers built into Data Sync or you can write your own to connect to your business systems.
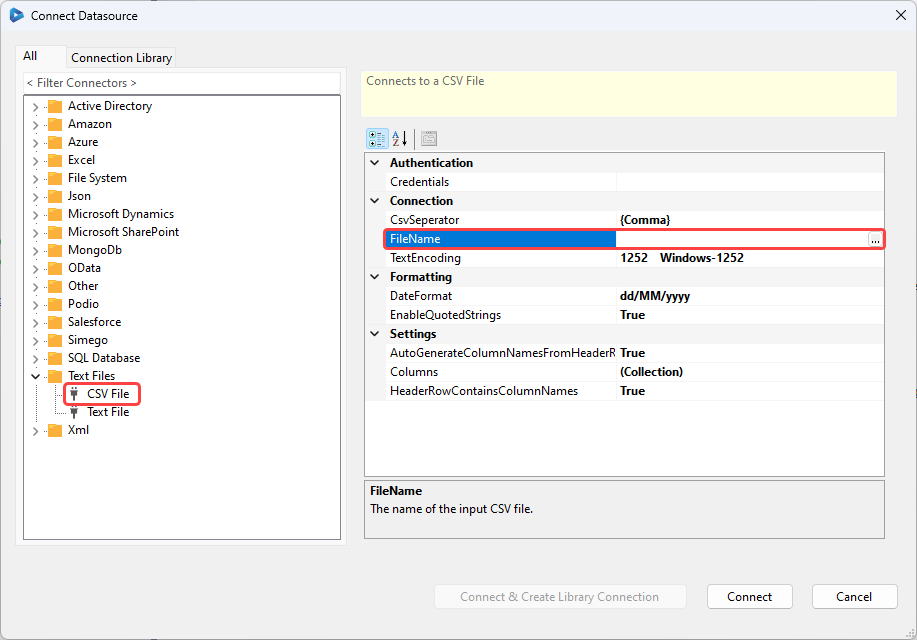
To connect to a CSV file you can either drag and drop the file from the file explorer onto the source window or you can browse for the file in the connection window. Click onto Connect Datasource to open the connection window and expand the Text Files folder. Then select CSV File and browse for your CSV by clicking onto the ellipsis in the FileName field.
Then add the columns you want to create in the new table to the schema map and move onto the next step to configure and generate the script.
Generate the Script
In the schema window toolbar you can find the Generate SQL Script button. Once you have added the columns you want to include click on this button to open the configuration window.

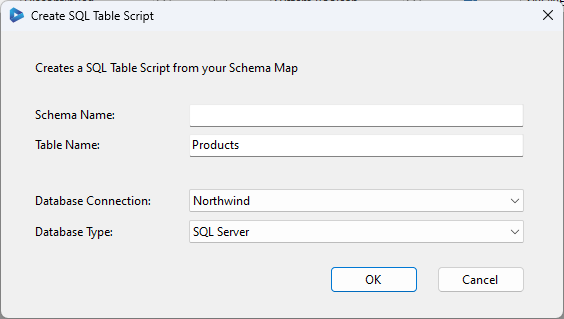
You are first presented with a window to define the table name and select a connection to the Database you want to create the table in. If you want to run the script outside of Data Sync then you can leave this blank. You can also define the type of database and script you want to generate. These settings can also be changed later on.
You can only select connections saved in your connection library. If you have not saved your connection you will need to open a new Data Sync project, create and save the database connection to the connection library before you can connect in the SQL Script Generator.
The Script window will then be opened and you can now add additional columns and change column names, data types and data lengths. If you defined a key column in the schema map this will be identified as the primary key column in the configuration. If you need to set a composite key, you can do so here.
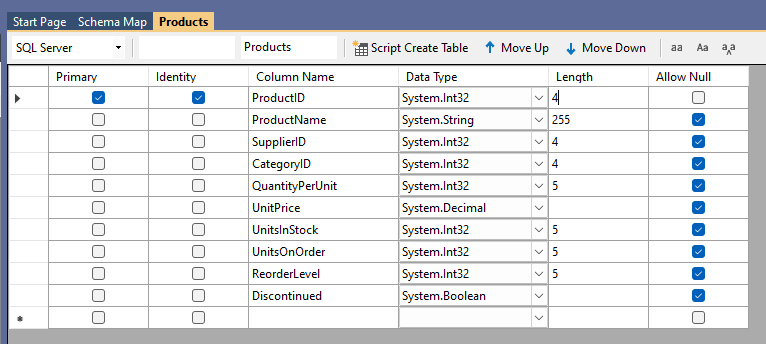
To generate the script click onto the Script Create Table in the window toolbar.
This will generate the script in a window below the columns.
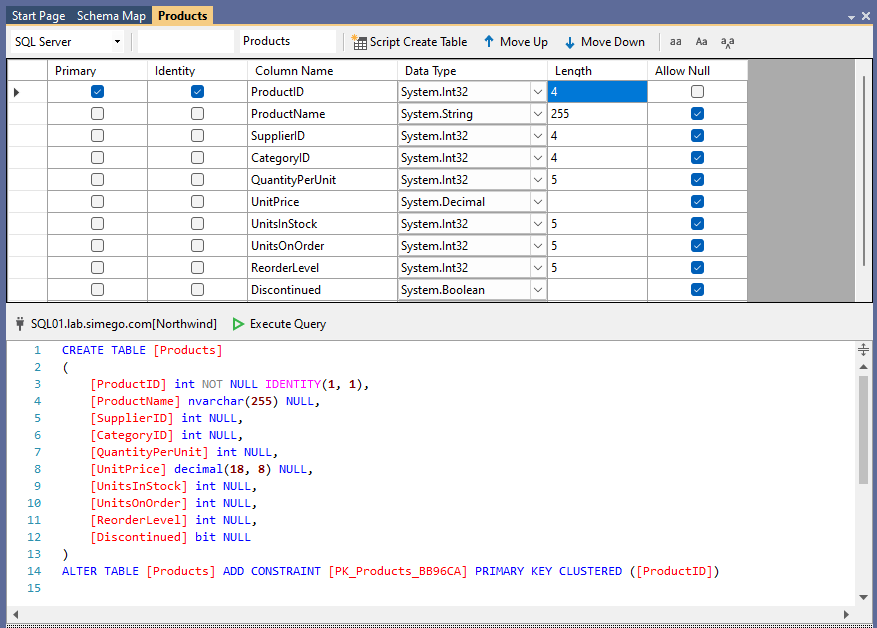
You can make edits and additions to this script, copy it or run it directly from Data Sync. To run the script on the database connection you listed at the start click onto the Execute Query button.
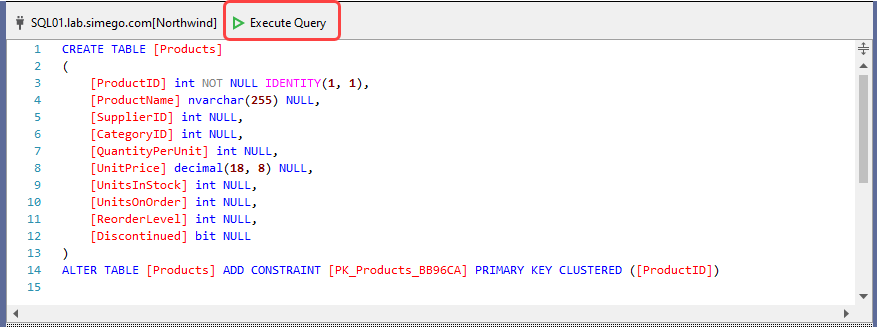
Your table will now be created in the Database specified. If you refresh your connection library and navigate to your connection. You should now be able to see your table in the list.
Use in a Project
Set the New Table as the Target
You most likely now want to synchronise data to the new table. To do this you need to start by connecting your target to the table. This example assumes you are still connected to your source data set.
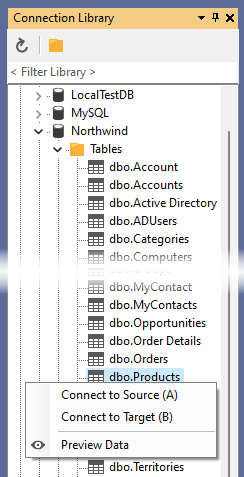
As this is stored in the connection library you can find your database connection, open the tables folder and either drag and drop or right click and select Set as Target.
Map the Source and Target Columns
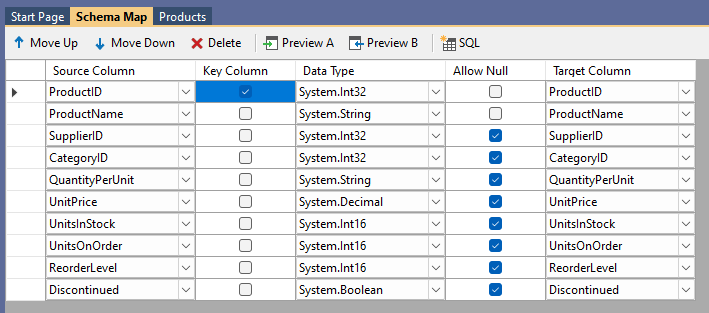
Now check that the source and target columns all match and ensure you have selected your key column to identify each record.
Compare the Results and Sync
You can then click the Run Compare button in the toolbar to preview the results. As this is a new table we will only see additions, but if you run the project again at a later date we may also see updates and deletions.
Deletes are disabled by default but will still show in the results. To enable deletes set EnableDelete to True on the target.

To synchronise the results click Synchronise and then Start to begin the sync.
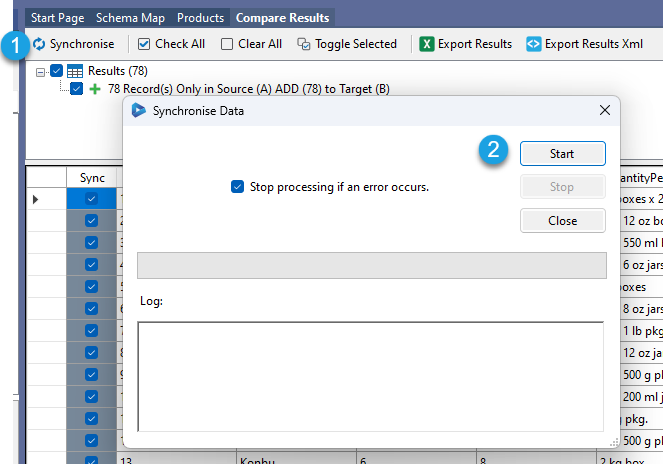
Your data will then be visible in your new table.
If you want to use this project again, make sure to save it to your file system.
Miscellaneous
Whilst using the SQL Table Script Generator you can edit the configuration you initially determined at the beginning. You can change the script language, change the name of the table to be created, and edit the database connection details.
Edit the Script Language
You can edit the language the script is generated by selecting between SQL Server, MySQL, and PostgreSQL in the drop down in the toolbar window.
Edit the Table Name
To edit the name of the table to be generated, and listed within the script, click onto the current name field in the toolbar of the window and simply make the changes you need.
Change the Database Connection Details
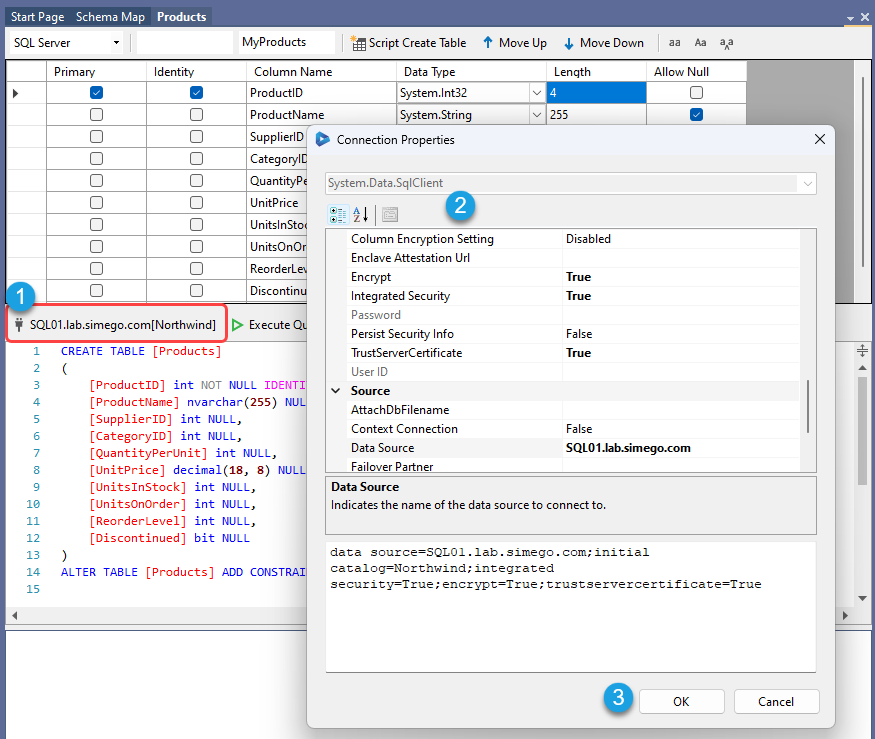
To change the database connection details you can click onto the connection in the script editor. This will open the Connection Properties for the connection you selected at the start. Make the changes you need and then click OK to save them.
Execute Selected Script
If you add additional script to the script generated by Data Sync, for example a SELECT query, then you can run just that script by highlighting it and then clicking Execute Query.
For example to run a simple select query on the Contacts table I would use the following:
SELECT * FROM Contacts
Highlighting this query and clicking the Execute Script button will then bring up the data in the preview window below the script.
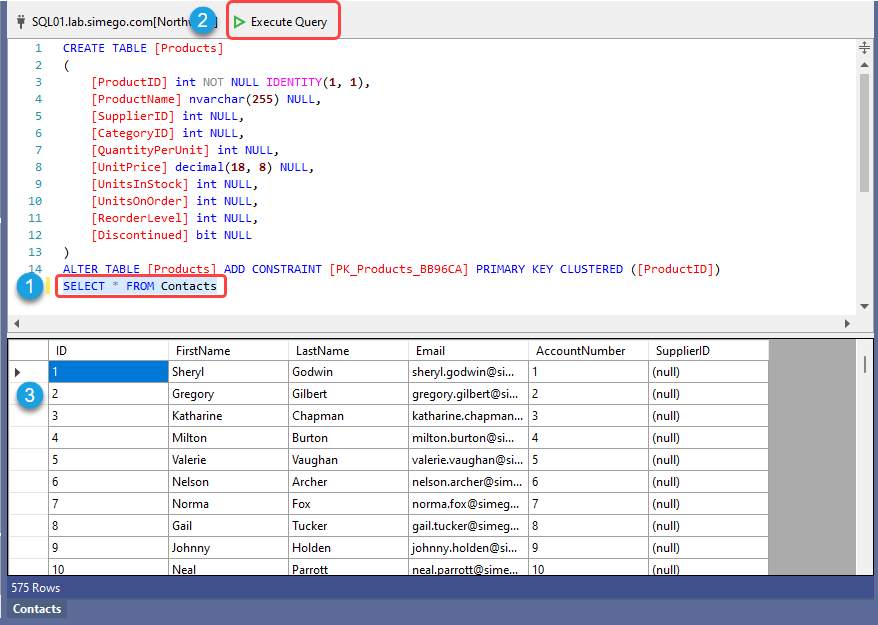
In the preview window you can also edit the records manually by double clicking onto the field you want to edit. Clicking out of that field will apply the changes.
If you are looking to run other SQL queries in Data Sync then you can do so using the SQL Query Tool. Check out our documentation for more information.