Podio Connector
To connect to Podio you need to start by installing the Podio connector from the Simego GitHub page.
Installing
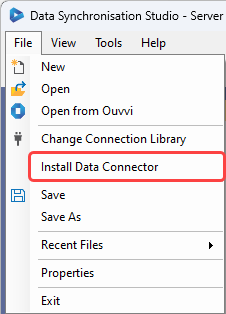
We have a connector installer inside Data Sync that will download and install the relevant files for you. To do this open the File menu and select Install Data Connector.
This will open the Connector Installer Window, where you need to select the connector you want to install from the drop down and click OK. In this case we select Podio from the dropdown.
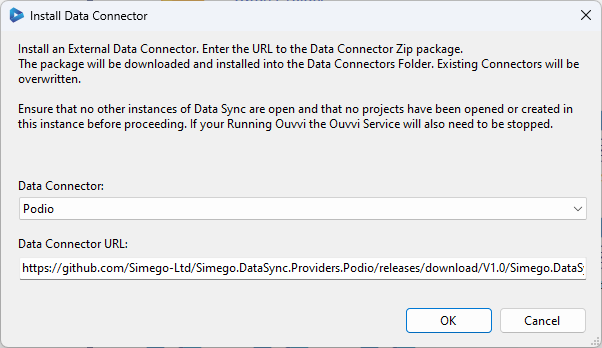
If you get an error saying it could not install the connector because it is "Unable to access folder", then this is because the folder is locked by Ouvvi. Please stop your Ouvvi services and try again.
If it was successful you should get a confirmation popup and you now need to close all instances of Data Sync and then re-start the program.
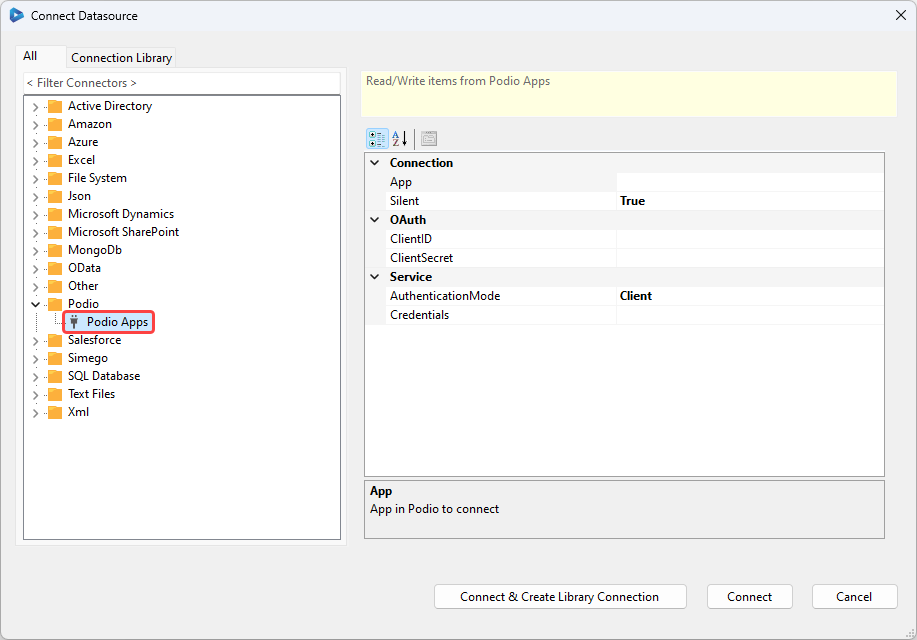
You can then access the connector by expanding the Podio folder and selecting Podio.
Connecting to Podio
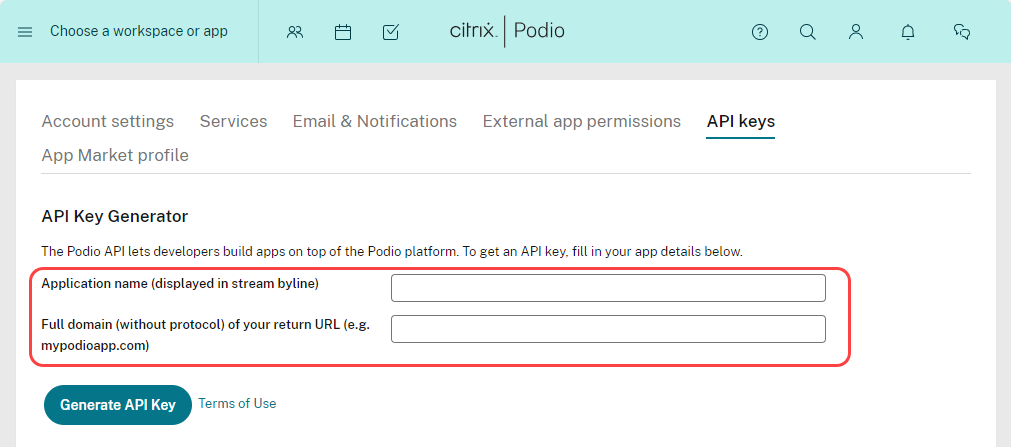
Data Sync connects to Podio via the Podio OAuth 2.0 protocol, this requires an API Key combination of Client ID and Client Secret. You will need to generate your own keys to connect from Data Sync. To do this open Podio and navigate to account settings, then under API Keys create a new application and keep note of the Client ID and Client Secret.
Contact Podio Support and mention Simego Data Sync Studio to increase your API limits on your Key.
It's recommended to use the Data Sync connection library with Podio since these keys need refreshing from time to time and it's much easier to setup this authentication once and re-use it.
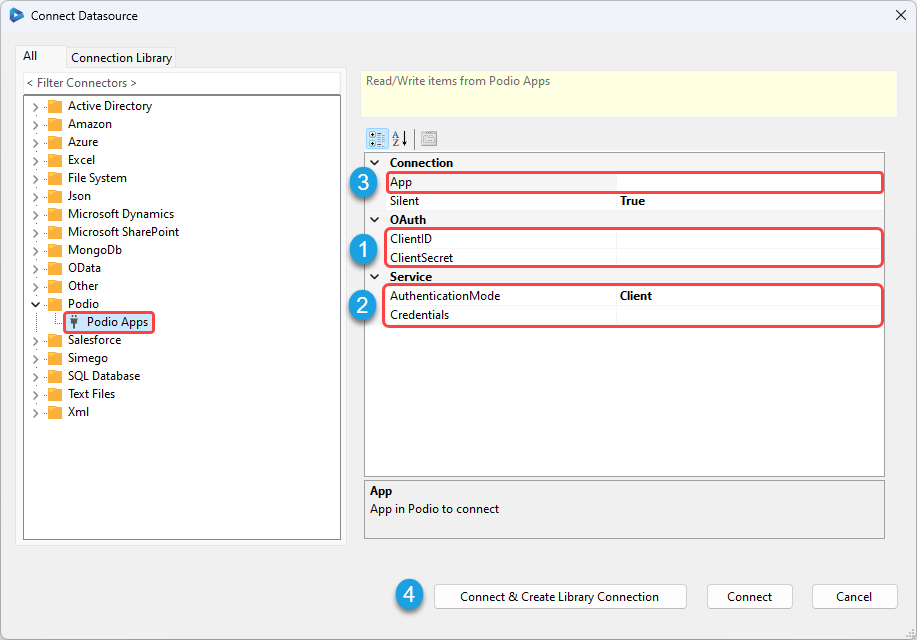
To create your initial Connection locate the Podio Items connector and enter the connection details as follows:
- Your API Client ID and Client Secret
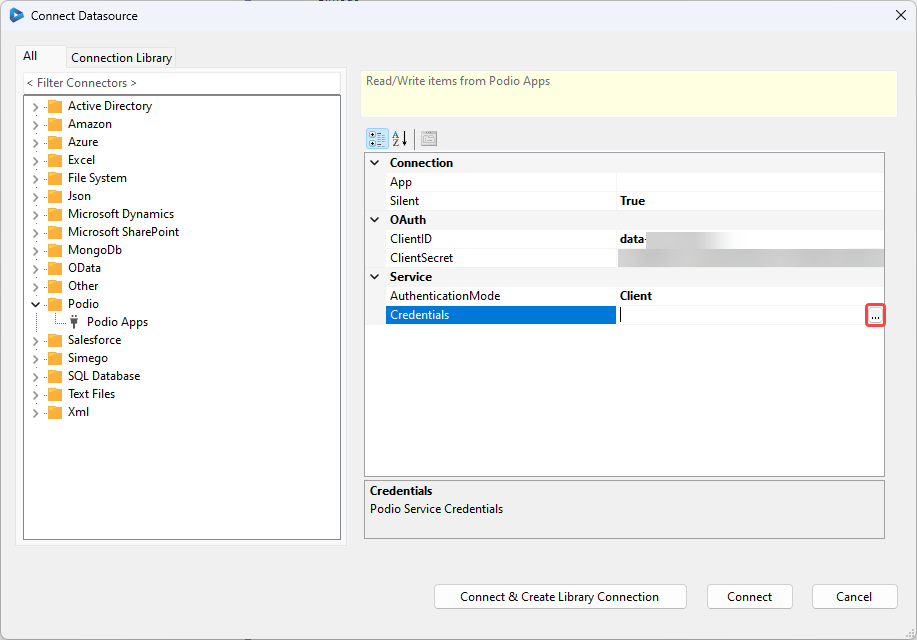
- Your credentials, click onto the ... to sign into Podio and authorise the application to connect. Set the Authentication Mode to either Client or App depending on how you are authenticating.
- Select an existing Podio application to connect to
- Press Connect & Create Library Connection to connect to this app and create a library connection you can reuse. You only need to save the connection once per site as you can access the workspaces within that site from the connection library.
Granting Access
When you click onto the ellipsis in the credentials field it will open a browser window and redirect you to login to Podio.
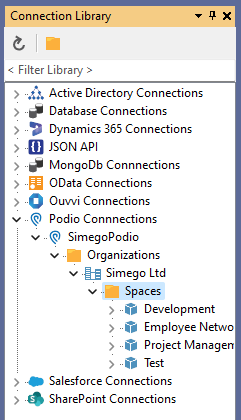
Sign in to your Podio workspace and grant access to your Application key. Once you are connected navigate back to Data Sync and then select the app you wish to connect to. Click Connect & Create Library Connection to save the connection to the connection library. You only need to do this once per site as you can access the other workspaces from the connection library window.
Exporting Data to Mongo
If you are exporting Podio data to Mongo DB you can return a reduced list of columns and have the remainder returned as a JSON Blob column by setting RawJsonMode to True. Refresh the datasource window and the column list will be reduced and a json blob column created
Make sure to refresh your connection window by clicking on the refresh button once you have changed the RawJsonMode field, otherwise the column will not be created.
Properties
| Property | Description |
|---|---|
| App | The Podio App to connect to. |
| View | A View from the App to use to return the App data, typically this will be All Items however you may want to return a filtered view in certain scenarios. |
| Silent | The Silent property indicates whether data changes should be reported to the activity stream. |
| Limit | The number of items to return from Podio in each web request, the smaller this number the more API calls are used. The larger the number the more likely you are to get errors. The default is 250. |
| DateTimeHandling | Specifies how DateTime values should be handled. If you use Local Timezone DateTime values then you should choose Local rather than UTC. Choosing local causes data sync to convert Podio UTC values into your local timezone. When updating Podio local will cause your DateTime values to be converted into UTC. |