Connecting to Dynamics 365
Please note that from Version 6.0.3341 the Dynamics connector supports PKCE for the Authorisation Code Flow and Default connection.
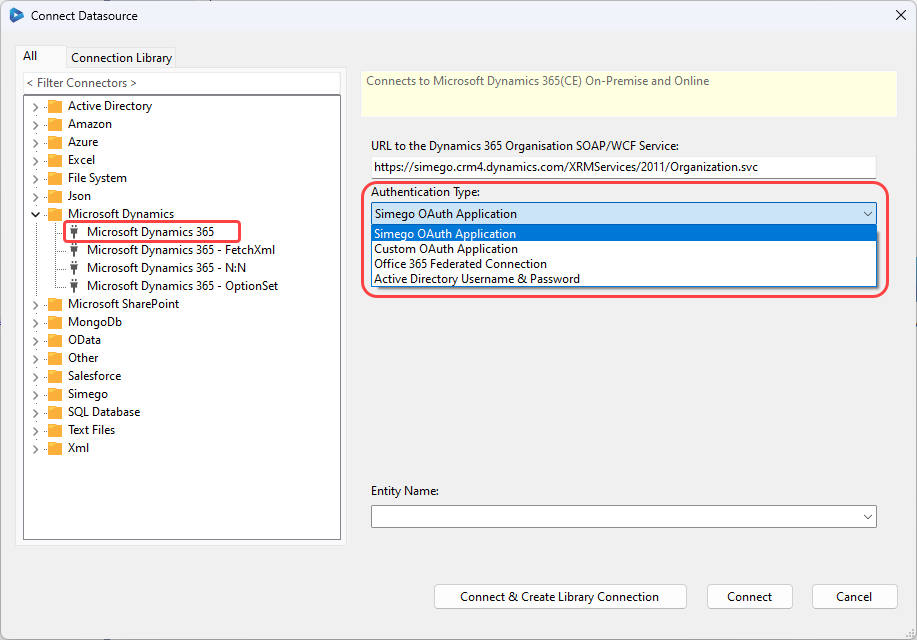
To get started you simply paste the URL to your Dynamics 365 site into the URL field and Data Sync will fill in the rest of the URL to match what is needed.
To move between the authentication types just expand the drop down list and select the type you need from the list.

For connecting to Dynamics 365 we have made a public application in our Azure AD so that Data Sync can request the required permissions from your Dynamics site. This is the default Authentication type, Simego OAuth Application, and makes for a quick authentication process.
If you want to create your own private app for connecting via OAuth then we have listed the details you need here. This uses the Custom OAuth Application authentication option.
If your site still has the legacy Username and Password authentication enabled then you can use your Office 365 credentials. The documentation for connecting with these can be seen here. This will use the Office 365 Federated Connection authentication option.
Alternatively the documentation for On-Premise Dynamics can be seen here. This will use the Active Directory Username & Password authentication option.
Save the Connection
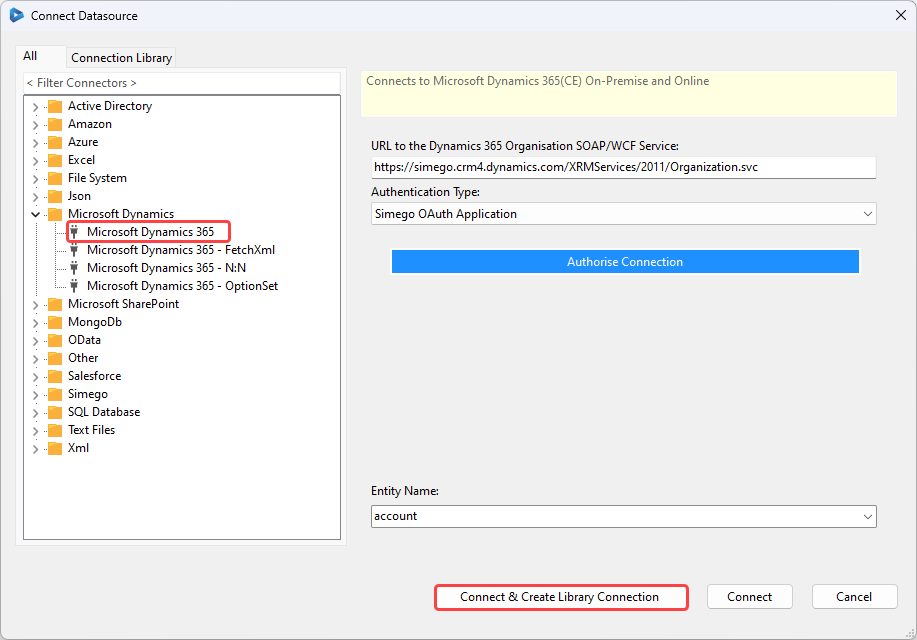
Once you have created a connection you will be offered the chance to save it in the connection library. We highly recommend doing this as it allows you to re-use entities for connections and lookups in future projects without creating a new connection each time. The connection file is stored in a file on your local system.
To save your connection click onto the Connect & Create Library Connection button.

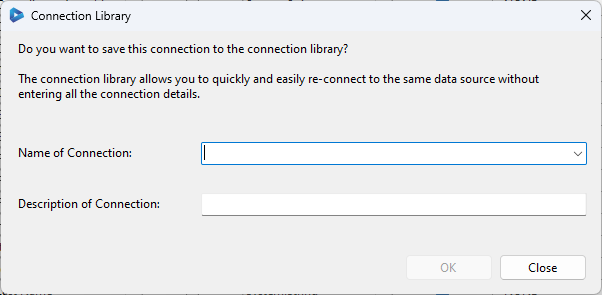
This will open the Connection Library window where you need to enter in a name for the connection and an optional description. Click OK to save it.

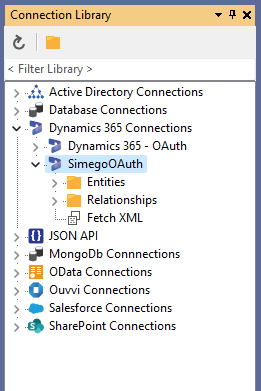
You can then access the entities found within your Dynamics site from the Connection Window Tree. You only need one connection per site as you can access all the entities within that site from the connection library window.

Authentication (Enable WIF)
To connect to Dynamics 365 using a Username & Password, Microsoft uses a feature called the WIF (Windows Identity Foundation). To enable this feature in Windows 8 and above type the following into command line:
dism/online/Enable-Feature:Windows-Identity-Foundation
When using windows 7 or windows 2008 server you will need to install WIF runtime from Microsoft.
Properties
Below is a list of the properties you can set once you have connected to Dynamics.
| Property | Description |
|---|---|
| CrmAuthenticationProvider | Dynamics 365 authentication provider scheme to use. |
| OrganisationServiceUrl | URL to your Dynamics 365 Organisation Service SOAP\WCF service. |
| DateTimeHandling | DataTime handling: Utc or local. |
| Entity | Entity name connect to. |
| EntityID | Entity id column name. |
| FetchXMLFilterExpression | Filter expression to add to the generated FetchXML to filter the records. |
| OnErrorOutputRequestDetails | Output the request data to the log. |
| PageSize | Number of records to return from CRM in each request, maximum 5000. |
| ThreadCount | Maximum parallel requests sent to CRM server. |
| Timeout | Service HTTP Request Timeout. |
| UpdateBatchSize | Number of updates to send to server in each request. |
Custom Connections (Project Automation)
Please see below for a list of functions that can be used with the Dynamics 365 Provider in Project Automation or Dynamic Columns.
ExecuteOrganisationRequest
Execute any request on the OrganizationService.
DataSourceB.ExecuteOrganizationRequest(request);
ExecuteWorkflowRequest
To call a workflow you can use the ExecuteWorkflowRequest wrapper. To have it run once the data has been changed add it to the AfterAddItem() method within Item Events.
DataSourceB.ExecuteWorkflowRequest(new Microsoft.Crm.Sdk.Messages.ExecuteWorkflowRequest() { WorkflowId = Guid.NewGuid() });
GetOptionSet
DataSourceB.GetOptionSet(string entityName, string attributeName)
GetProxy
To get an instance of the OrganizationService directly you can use:
DataSourceB.Connection.GetProxy()
Or if you are doing it from Dynamic Columns you need a cast to the connector type:
GetDataSourceB().Connection.GetProxy()
SetState
Call within Project Automation Item Events to set the state flags.
DataSourceB.SetState(item.ToDataCompareItem(), int StateCode, int StatusCode)
SetOwner
Call within Project Automation Item Events to set the owner flags.
DataSourceB.SetOwner(item.ToDataCompareItem(), Guid id, type)
type can be either systemuser or team.
GetEntityLastChanged
Get the value of when the entity was last changed.
DataSourceB.GetEntityLastChanged(string entityName, string filter)
GetFetchFilterXmlForModifiedSince
DataSourceB.GetFetchFilterXmlForModifiedSince(DateTime)
UpdateSourceRow
Use this to update your source after a synchronisation has occurred. For example; return a state flag to mark the record as sent. Or update an ID column, so that the value matches that in Dynamics.
DataSourceB.UpdateSourceRow(AttributeCollection<string,object> properties, Guid id)