Copy Address Details from the Account Entity into the Contact Entity

In this example we show how you can use Data Sync to copy the address details from the account record to the contact record in Dynamics 365 (CRM). For a full synchronisation of Account and Contact records please take a look at our Schedule Import and Export for Dynamics 365 guide.
The following guide will use a lookup on the parentcustomerid field to return the address details for the associated account record from the Account entity.
Requirements
Before getting started you need to ensure you have the following:
- Windows 10 or Windows Server
- Downloaded & Installed Data Synchronisation Studio
- Access to Dynamics 365
- Configured your connection to Dynamics 365 in Data Sync
Connect to Dynamics
Start by connecting your source and target to the contact entity in Dynamics.
The easiest way to do this if you have already configured and saved your connection to your Dynamics site is to drag and drop the account entity from the connection library onto the source and target columns. Alternatively you can right click and select Set as Source (A) and Set as Target (B).
If you have not yet configured your connection to Dynamics please take a look at our documentation to find out how.
Filter the Results
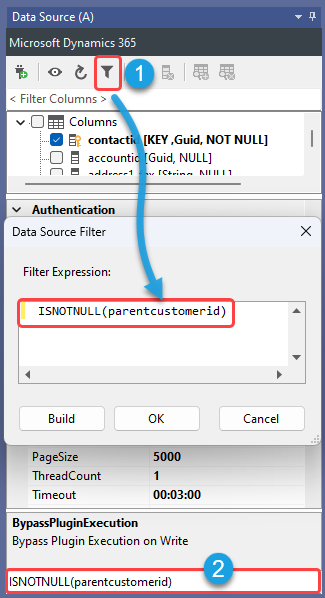
The next step is to filter the records to exclude any rows where the parentcustomerid column is null. This can be done with the source filter and the expression:
ISNOTNULL(parentcustomerid)
Enter this expression into the filter window by clicking onto the filter button in the data source toolbar, or enter it into the filter box at the bottom of the source window.
Lookup the ParentCustomerID
Within Dynamics 365 the parentcustomerid field defines the relationship to the parent Account record within the contact record.
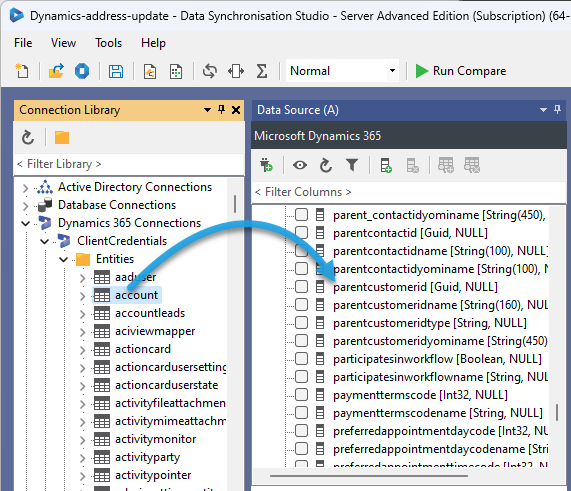
To get the address data we need to lookup the parentcustomerid in the account entity. If we use the connection library you can simply drag the account entity onto the parentcutomerid column from the connection library tree.
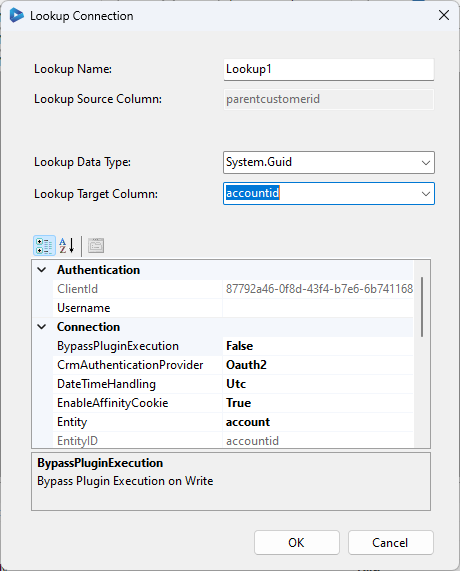
Alternatively select the parentcustomerid column in the source list and click onto the Add Lookup button.
Both options will open a lookup configuration window where you need to set the target lookup column to the accountid and make sure the data type is set to System.Guid.
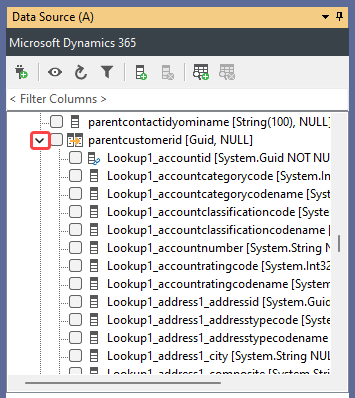
Click OK to create the lookup. You can now access the lookup columns by expanding the tree.
Configure the Schema Map
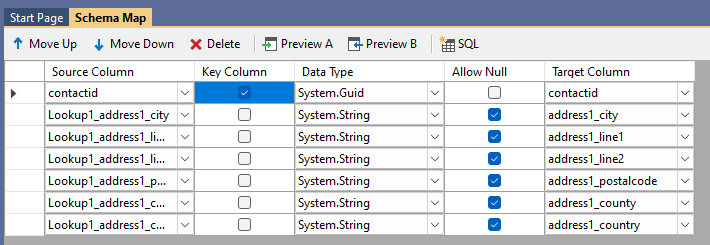
The next step is to configure the schema map and the columns being included in the sync. To do this click onto the schema map tab and remove all the default added columns from the schema map and add the contactid and relevant address columns from the lookup.
Map these to their corresponding column in the contact entity, these may be mapped automatically but it is worth checking that they are linked to the right columns.
Make sure to set the contactid as the key column.
Disable Delete and Add Actions
For this project we only want to update records and not add or delete them, so make sure to disable delete and add actions. The filter may exclude rows which could create delete actions on the target, so disabling deletes prevents these from being removed.
We can do this by going to the target connection properties and setting EnableDelete and EnableAdd to False. Make sure that EnableUpdate is set to True.
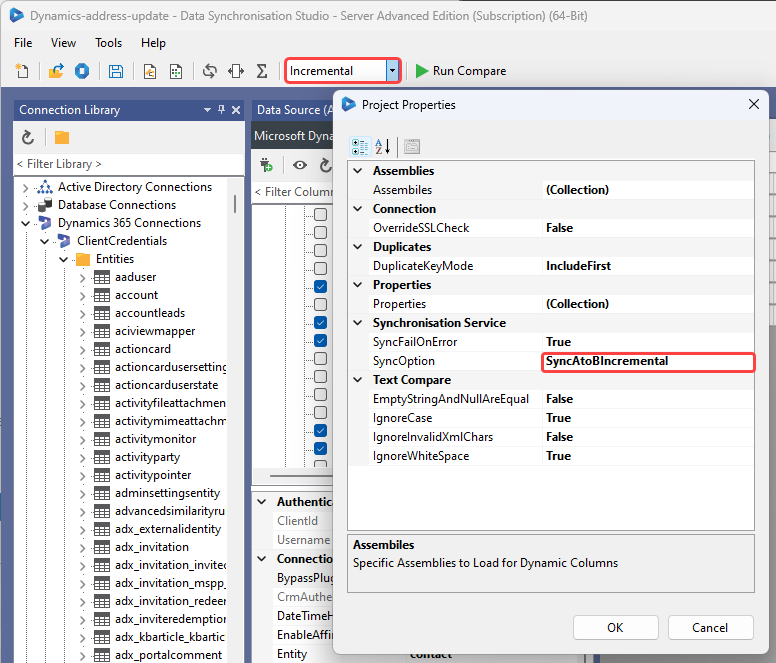
An alternative option is to use the Incremental Sync mode to synchronise one record at a time. You can set this either in the toolbar or in project properties by opening the File menu, selecting Properties, and then changing SyncOption to SyncAtoBIncremental.
Compare and Sync the Results
We can now run the compare to preview the changes that need to be made to copy the address records from the Account Entity to the Contact Entity.
Click the Run Compare button, and then click onto the update results to preview the changes to be applied. In the screen capture below you can see there are 28 records to update and the changes to be applied are highlighted in yellow.
If there are any add or deletes being picked up these will show in the results but will not be applied as we disabled them in the previous step.

When you are ready to apply the changes click Synchronise and then Start to begin the sync. The contact records will then be updated in Dynamics 365 with the new address details.