N:N Relationships
In Dynamics 365 (CRM) you sometimes need to define many to many relationships, with Data Sync we have a connector that can handle these type of integrations.
The article below demonstrates how to create N:N relationships in Dynamics 365 using the specific N:N connector. In this example we are using the opportunity and competitor entities to relate one or more competitors to opportunity records.

Requirements
Before getting started you need to ensure you have the following:
- Windows 10 or Windows Server
- Downloaded & Installed Data Synchronisation Studio
- Access to Dynamics 365
Connect to your Source Data
For this example we have a simple dataset that contains the target relationships. Here we are mapping Opportunity 1 to Competitor 1, 2 and 3, and Opportunity 2 to Competitor 1 and 2.
The data set doesn't contain any of the identifying Guids from Dynamics so we will create lookups to return these and ensure we are linking the correct opportunity to the correct competitor.
A sample of the data we are using can be seen below:
| Opportunity | Competitor |
|---|---|
| Opportunity 1 | Competitor 1 |
| Opportunity 1 | Competitor 2 |
| Opportunity 1 | Competitor 3 |
| Opportunity 2 | Competitor 1 |
| Opportunity 2 | Competitor 2 |
To get started we need to open Data Sync and connect the source to our source data. To do this click onto the source window to open the connection panel and select the relevant provider to connect to your source data.
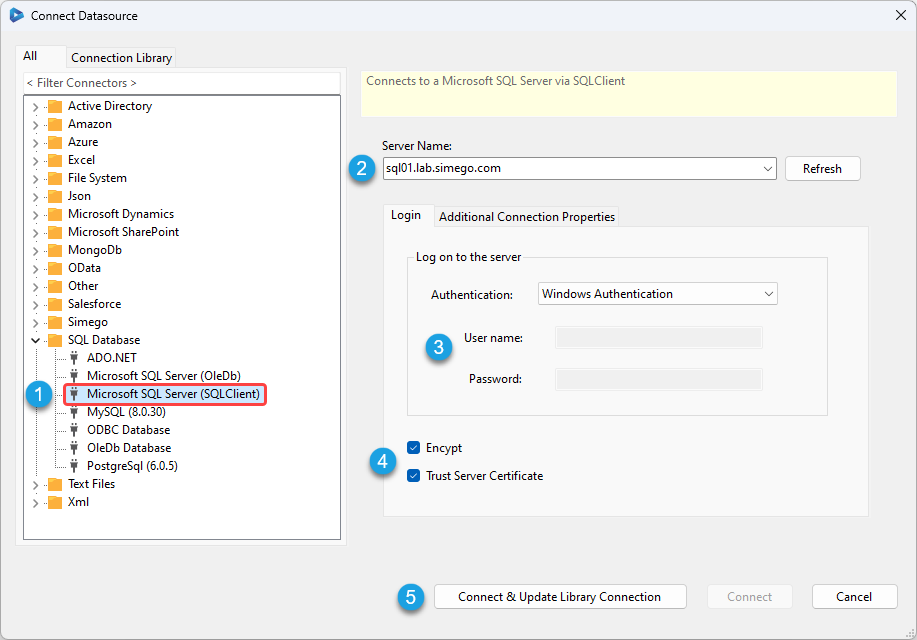
For this example we have a SQL table so we use the SQL Server (SQL Client) provider, but if you have a CSV or Excel file you can simply drag and drop this onto the connection window to quickly connect.
Enter in the details required to connect to your SQL Server and click Connect & Create Library Connection to save the connection to the connection library. You only need to do this once per database and you will be able to access all the tables within that database from the connection library.
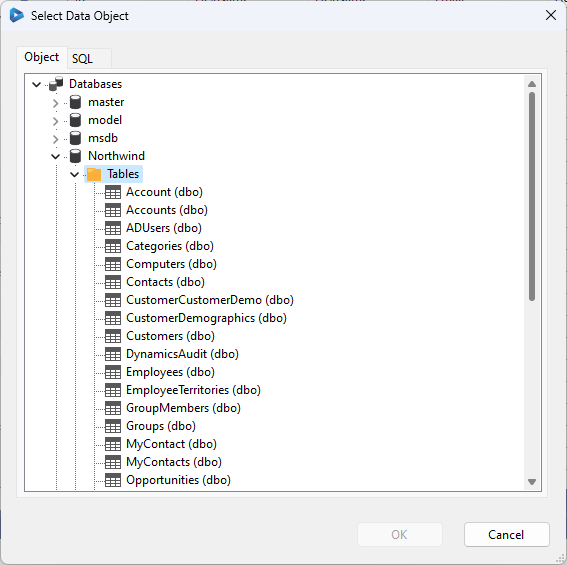
Once you have clicked connect it will open the database selector window. Expand the databases to locate the table you wish to connect to. In this case Opportunities.
Connect to Dynamics
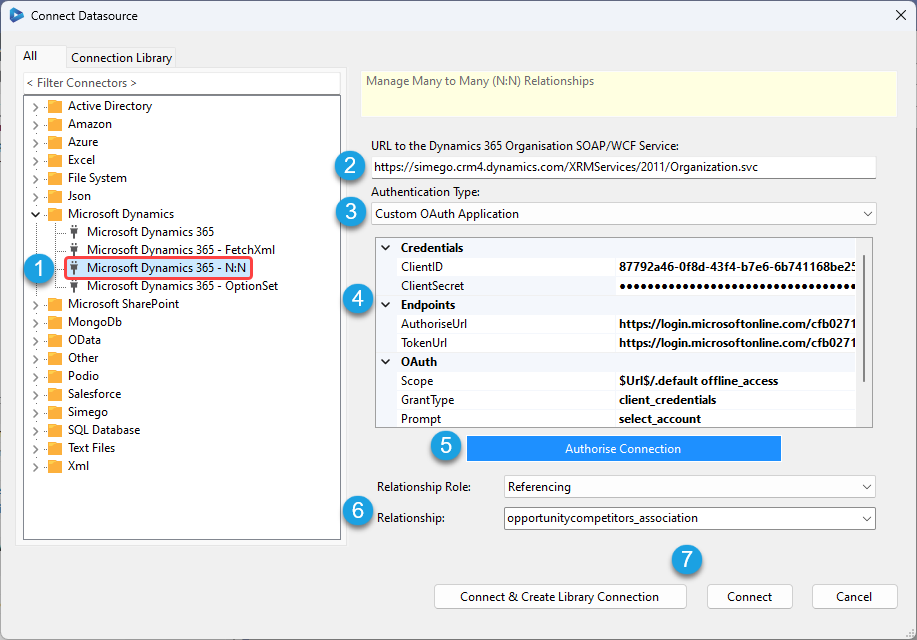
You then need to connect to Dynamics. To do this you need to have your Azure app registration details: ClientID, Client Secret, Token URL and URL to the SOAP/WCF Service. Please see our documentation for the full details on how to configure the Azure App.
Click onto the target window to open the connection panel. Then go to Microsoft Dynamics > Microsoft Dynamics 365 - N:N and enter in the required connection details.
Click Authorize to authorise the connection and then set the relationship role to Referencing and the relationship to the right one for your project. In this example we need opportunitycompetitors_association.
Once you are ready click Connect to connect.
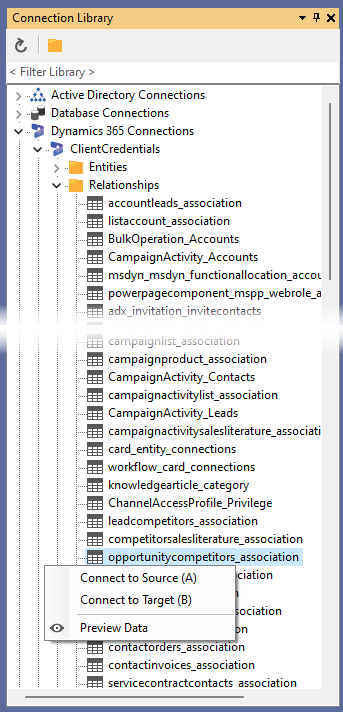
If you have already saved a connection to this Dynamics site in the connection library then you can connect to the relationship by expanding the Relationship folder in the connection tree. Either drag and drop the relationship onto the target or right click and select Set as Target (B).
Lookup ID Values
Next we need to return the guids for the opportunities and competitors, we can do this by configuring a lookup for each.
Starting with Opportunity we can go to the connection library, expand the connection for Dynamics and then the Entities folder. Find the Opportunity entity and drag this onto the opportunity column in the source to open the lookup configuration window.
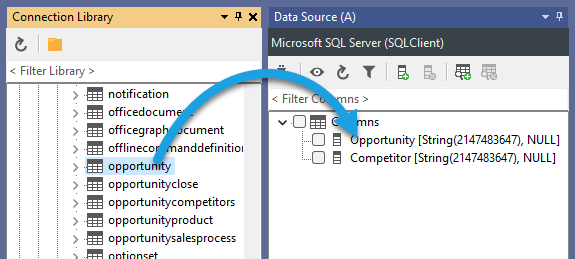
Alternatively you can select the opportunity column in the source and click onto the Add Lookup button, you will need to select the connector/connection to use and this will then open the lookup configuration window.
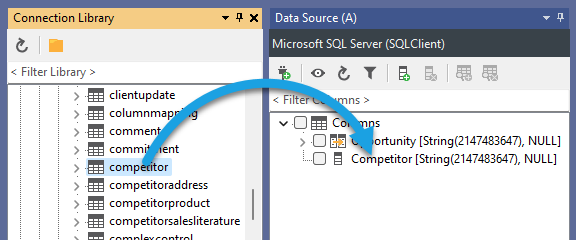
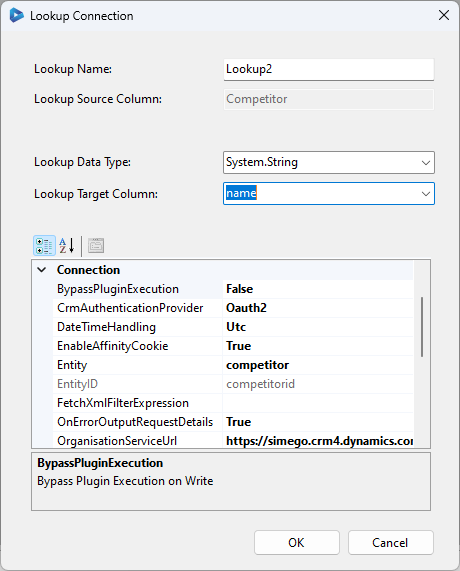
We then need to repeat the above steps for Competitor but select the Competitor entity and drag this onto the Competitor column in the source.
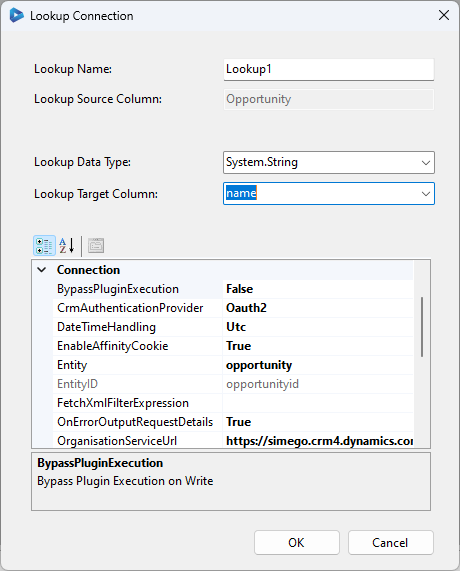
In the configuration window set the target lookup column to be the name column and click OK to create the lookup
Configure the Schema Map
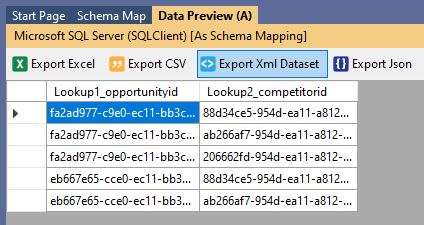
You can now add the opportunityid and competitorid from each of the lookups to the schema map. This should automatically map to the target opportunityid and competitorid of the Dynamics relationship connection but double check the schema to be sure.

You also want to ensure that both columns are selected as the key column, creating a composite key, to identify each record as unique.
We can quickly preview the data using the Preview A button in the schema to ensure the data is being returned.
Compare and Sync the Results
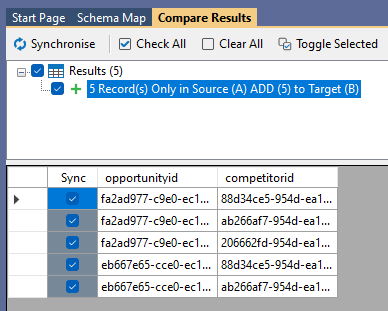
The next step is to run the comparison and preview the changes to be made. To do this click onto the Run Compare button.
This shows us that we have 5 records to add and we can preview these by clicking onto the add item.
Once you are ready click Synchronise and then Start to begin the sync. Your opportunity and competitor relationships will then be created in Dynamics.
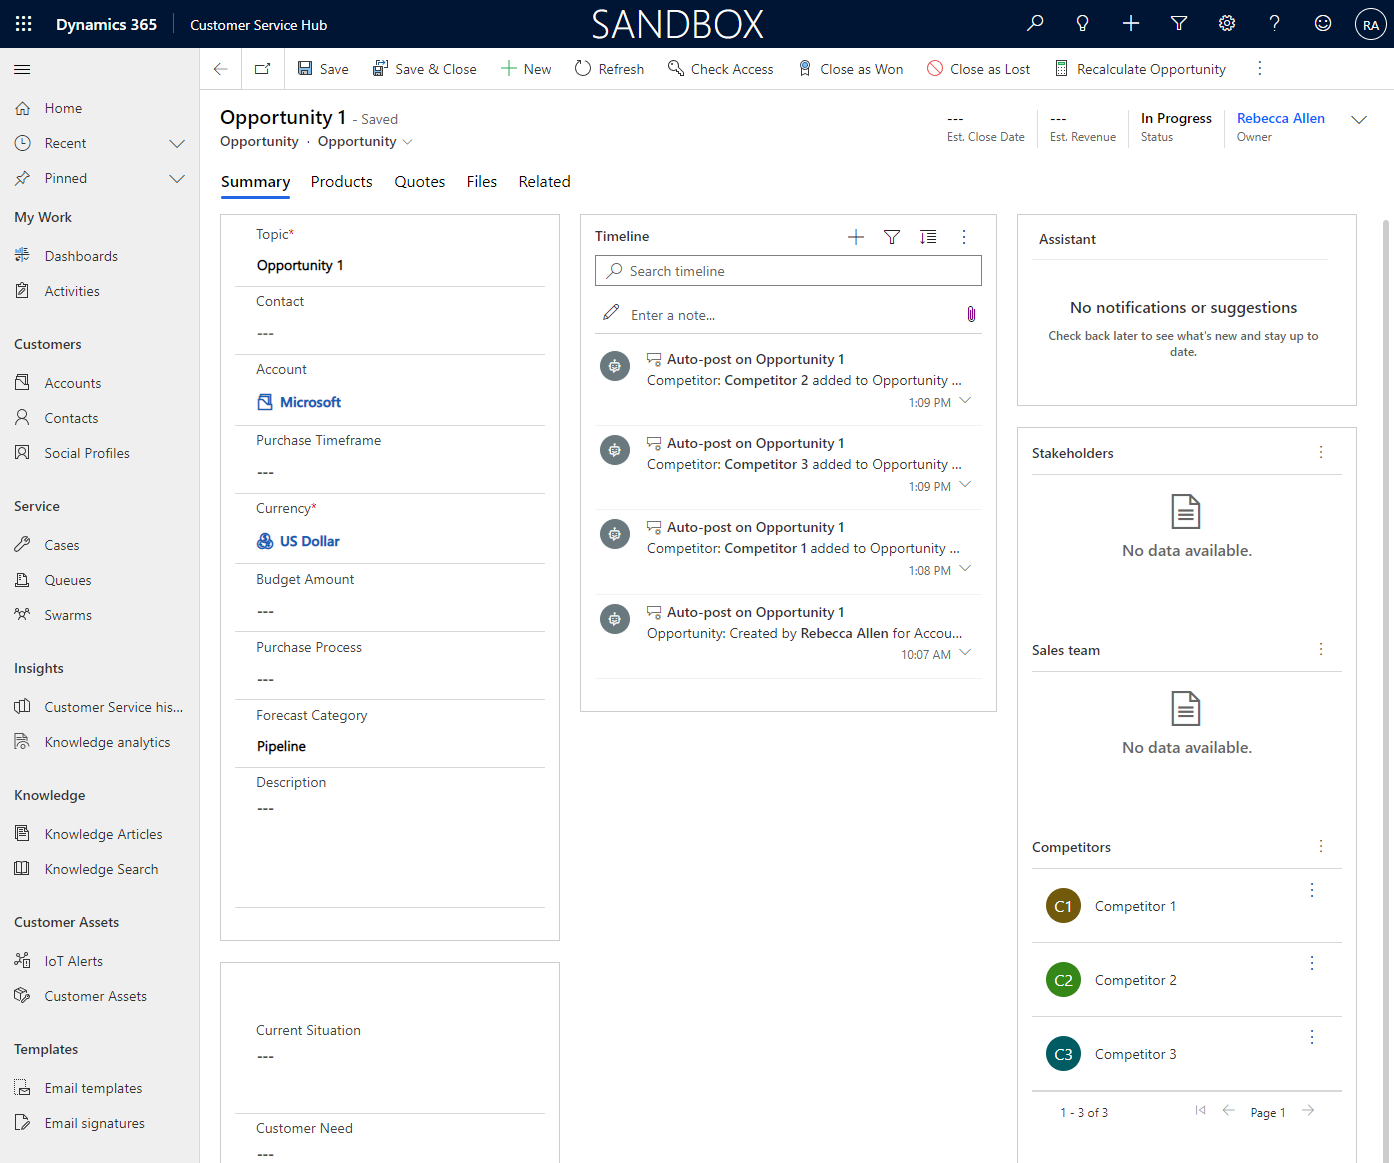
Make sure to save the project so that it can be used again in the future or scheduled to run on a regular basis.
Automate and Schedule
Now that your project is configured you can save it and then schedule it to run via the Data Sync Run Tool, Windows Task Scheduler, or Ouvvi Automation Server.
You may want to automate your project so that it runs on a regular basis, to do this you can use either the Run Tool or Ouvvi.
Ouvvi gives more options for scheduling, with both time and event based triggers. So you could configure a trigger to start your project whenever a change is detected in your SQL table or SharePoint List. Note that this requires using a modified date time stamp in your SQL table.
Alternatively you can use the Run Tool to schedule the project to run using Windows Task Scheduler.
Run via the Run Tool
The Run Tool is an additional program that comes linked to Data Sync and enables you to build out your data integration jobs.
You can use this to group Data Sync projects that need to run in order and add additional step types such as adding an status report to email you when the project has run and if there were any failures. Each step is run in the order it appears in the list and you can apply conditional rules so that the next step can run if the previous one succeeded or had data changes for example. To find out more please see our Run Tool Documentation.
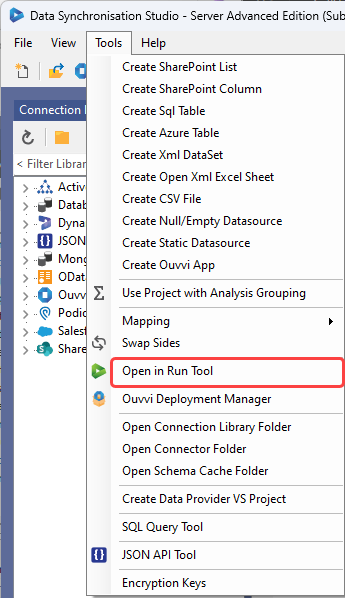
To open your project in the Run Tool, in your Data Sync project open the Tools menu and select Open in Run Tool.
You can then click onto the green Run button to check it runs as expected. If there are data changes you will be provided with a count of how many items were added updated or deleted

Run via the Command Line
Another option is to Run the Run Tool project or single Data Sync project from the command line. To do this pass the path to the project file like this:
Run Tool Project
%DATASYNCINSTALLPATH%\Simego.DataSync.Run.exe -execute "D:\DSProjects\myproject.dsrun"
Data Sync Project
%DATASYNCINSTALLPATH%\Simego.DataSync.Run.exe -execute "D:\DSProjects\myproject.dsprj"
Automate with Windows Task Scheduler
You can then schedule your Run Tool project to run when you need it to using Windows Task Scheduler. For the full details on how to do this see our Task Scheduler Documentation.
Automate with Ouvvi
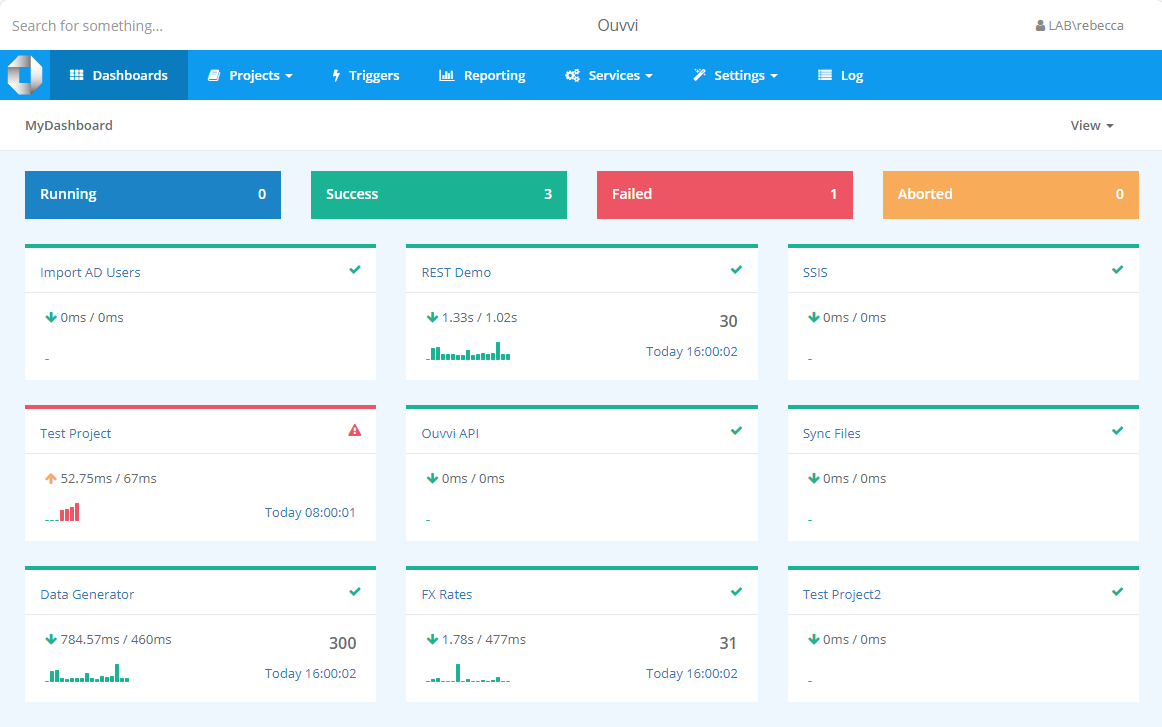
An alternative option, with more scheduling capabilities is to use Ouvvi Automation Server. Ouvvi enables you to fully schedule and manage all of your Data Integration Projects, from Data Sync projects to SQL Statements to Powershell Scripts.
It provides full logging and documentation capabilities to fully manage your integration operations.
To find out more see our Ouvvi Documentation or send us an email.
We have more ideas on how you can use Data Sync to integrate your business processes with Dynamics in our Solutions Pages.