Using the Microsoft Dynamics 365 FetchXML Connector
Data Synchronisation Studio (Data Sync) contains the Microsoft Dynamics 365 FetchXML provider which connects to an instance of Dynamics CRM 2011, 2013 and newer or Dynamics 365 Online.
There are two ways to connect to the FetchXML provider:
- Through the connection window.
- Drag and drop from the connection tree view.
Connect via the Connection Window
To start, open the connection window and expand the Microsoft Dynamics folder. Then select the Microsoft Dynamics 365 - FetchXML provider option.
You will need to enter the URL to your Dynamics site into the URL field and Data Sync will automatically format this to the Organisation Service SOAP\WCF service endpoint.
So you can just copy and paste the URL from your site into the field, e.g. https://<domain>.crm4.dynamics.com.
Select the authorisation type needed for your site, in this example we use the default Simego OAuth option, and then click Authorise Connection to sign in to Dynamics.
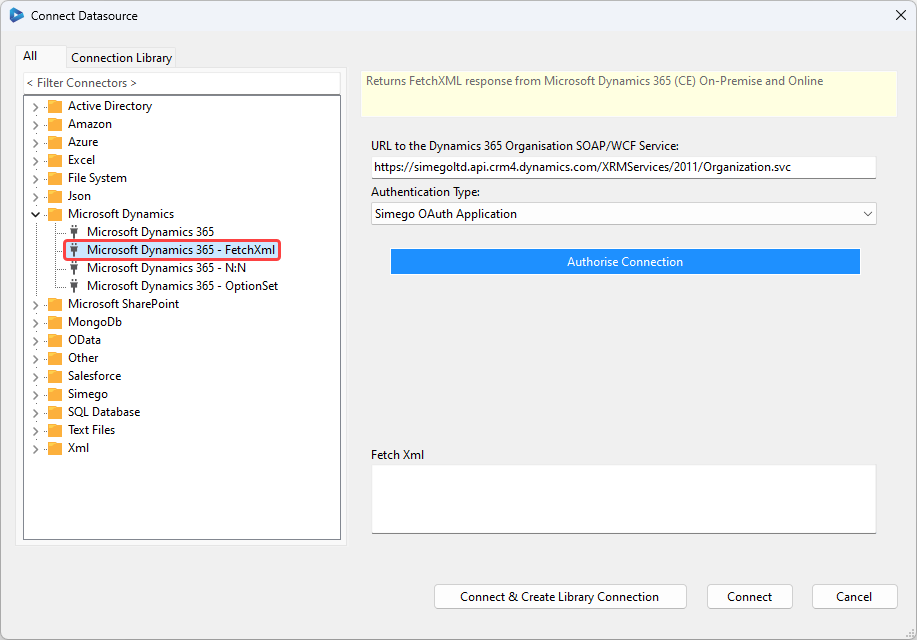
Once the connection is authorised enter in the FetchXML into the FetchXML property in the dialog box and then press Connect.
If you have not already saved the connection to this Dynamics site you can save it now by selecting Connect & Create Library Connection instead.
Connect via the Connection Tree
The preferred and easiest way to connect to Dynamics 365 is to drag and drop the FetchXML entity from the connections tree onto the data source, and enter the FetchXML into the properties field.
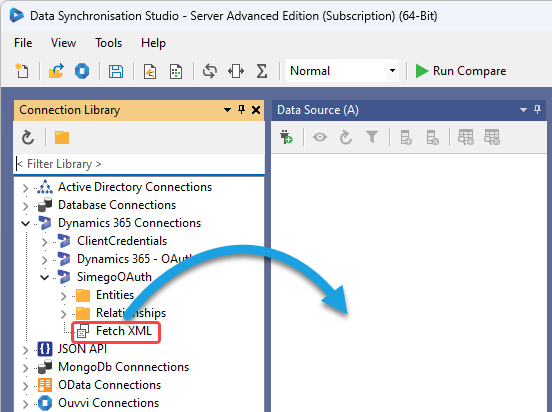
This will load the connection using the FetchXML provider and you can enter the FetchXML statement you want to use by clicking onto the ellipsis in the FetchXML field.
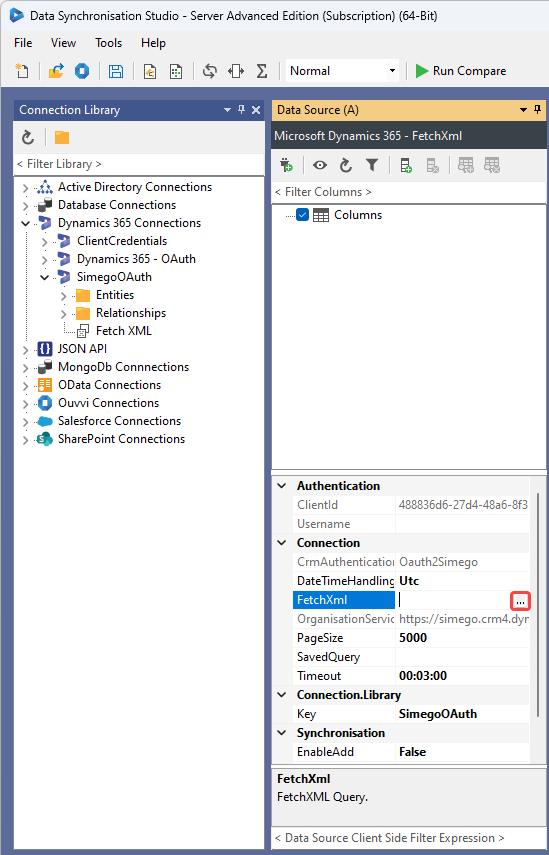
Once you have added the statement to the field click OK and refresh the datasource to load the columns.
Using FetchXML
Data Sync can be used to extract data from a CRM advanced find or view using the FetchXML provider.
Exporting the FetchXML from an Advanced Find Query
Create an advanced find query in Dynamics CRM and export the xml by selecting the 'Download Fetch XML'button.
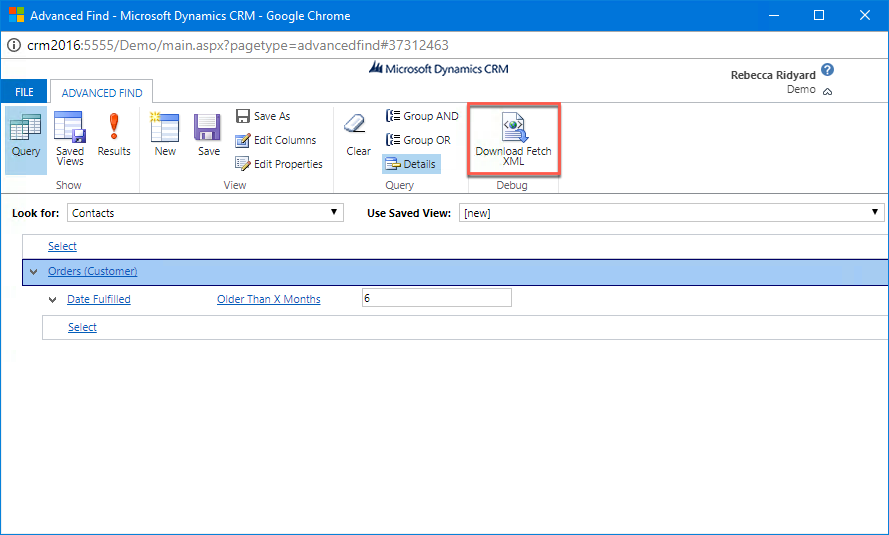
Open the downloaded file in notepad and copy the xml. This will be used by Data Sync to extract data from Dynamics CRM through the FetchXML connector.
<fetch version="1.0" output-format="xml-platform" mapping="logical" distinct="false">
  <entity name="contact">
    <attribute name="fullname" />
    <attribute name="contactid" />
    <attribute name="websiteurl" />
    <attribute name="emailaddress1" />
    <order attribute="fullname" descending="false" />
    <filter type="and">
      <condition attribute="websiteurl" operator="not-null" />
    </filter>
  </entity>
</fetch>
In the above example the filter clause has been used, for other examples of the FetchXML syntax please follow the link to the Microsoft web page.
Add the FetchXML to the Project
Connect to the FetchXML connector following the previous instructions and paste the desired xml into the FetchXML field. Refresh the datasource to load the columns into the datasource window. Then add the columns you need into the schema map
Preview the Data
To preview the data press Preview A in the schema map tab.

Export to CSV
To export the data into a CSV file you can use the Create CSV File feature found in the tools menu. Clicking onto this option will open the file explorer window where you will need to set the name and location of the new CSV file.
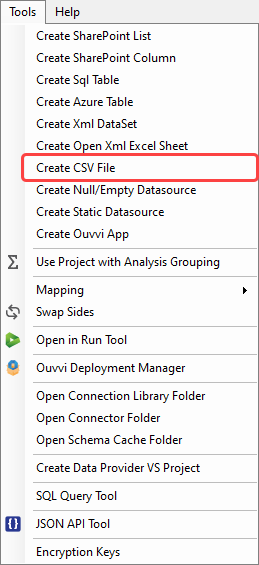
Click Run Compare and then Synchronise to sync the extracted data from the FetchXML query into the CSV file.
The project can then be saved and scheduled to extract daily, hourly or weekly using the Run Tool and/or Ouvvi, or the project can be run Ad-Hoc.
Properties
| Property | Description |
|---|---|
| CrmAuthenticationProvider | Dynamics 365 authentication provider scheme to use. |
| OrganisationServiceUrl | URL to your Dynamics 365 Organisation Service SOAP\WCF service. |
| DateTimeHandling | DataTime handling: Utc or local. |
| FetchXML | The FetchXML query. |
| PageSize | Number of records to return from CRM in each request, maximum 5000. |
| SavedQuery | Name of a saved query in CRM. Overrides the FetchXML option. |
| Timeout | Service HTTP Request Timeout. |