Exporting & Updating Active Directory Computers
Data Sync makes it possible for you to quickly and easily export computer information from your Active Directory. This can be especially useful for auditing purposes. You can also use the software to decorate your computer records with details such as an asset number or a description detailing the location.

The following page will cover how to export computer data from Active Directory to a target of your choice. We will also briefly cover updating records with additional data.
Contents
- Requirements
- Connect to Active Directory Computers
- Connect to Target Data
- Configure Schema Map
- Compare and Sync
- Quick Export Option
- Filtering the Results
- Automate and Schedule
- Update Computer Records in Active Directory
Requirements
Before getting started you will need to ensure that you have the following:
- Windows 10 or Windows Server
- Downloaded & Installed Data Synchronisation Studio
- Have access to Active Directory
- Have a source dataset containing the computer information to add to AD
Connect to Active Directory Computers
Start by opening Data Sync and connect to your Active Directory Computers. To do this click onto Connect Datasource in the target window, expand the Active Directory folder and select Active Directory V2 - Users/Contacts/Groups/Computers.
By default Users will be selected from the DefaultAttributes drop-down menu, you will need to click onto this and select Computers from the list. Then enter in the LDAP path to your Active Directory instance, and enter in any credentials you need to access AD.
You can enter in the full LDAP path (including the server name) or just the server name.
If you just use the server name your path would look similar to: LDAP://dc01.
Otherwise an example path connecting to a specific OU could be: LDAP://dc01/OU=Test,DC=demo,DC=simego,DC=com.
We have more details on finding the LDAP Path in our guide here.
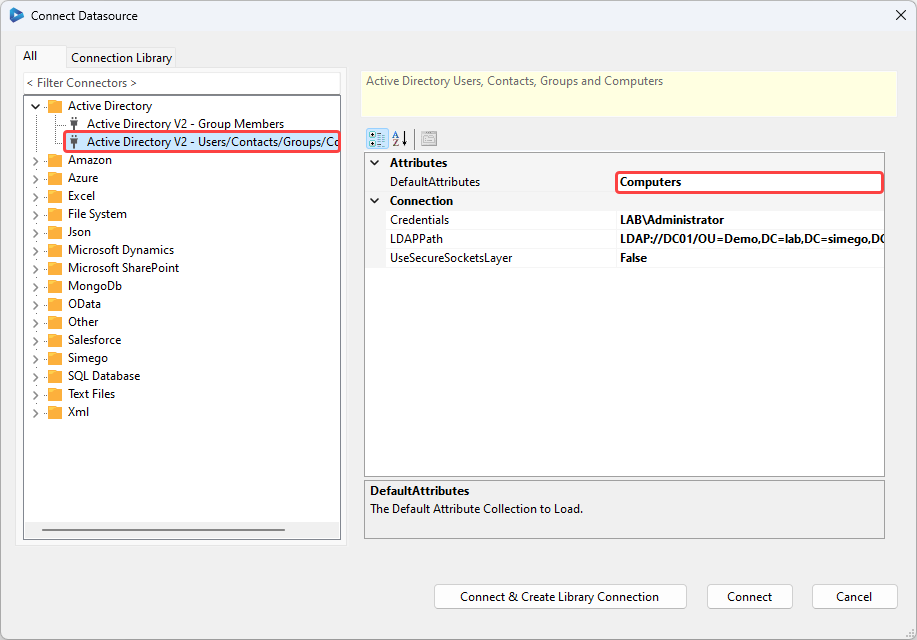
Then click Connect & Create Library Connection to save the connection to the connection library. Just enter in a name for the connection and click OK. Then refresh the connection window and your Active Directory connection will be visible in the list.
This only needs to be done once per OU as you will be able to access other objects such as Users, Groups and Contacts from the connection window.
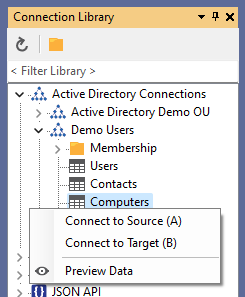
If you have already saved your connection to AD you can select the Computers object from your AD connection by right clicking and selecting Connect to Source (A).
Connect to your Target Data
You now need to connect to your target, this could be a SQL table, CSV file or another system. You can use any of the connectors to connect to your chosen file, table or system.
It is also possible to create a target table or file based off the columns added to the schema map. This can be a SQL table, SharePoint List, CSV, Excel or XML file to name a few.
To create these add the attributes you want to include from AD to the schema map. Then go to Tools and select the create option you need from the list.
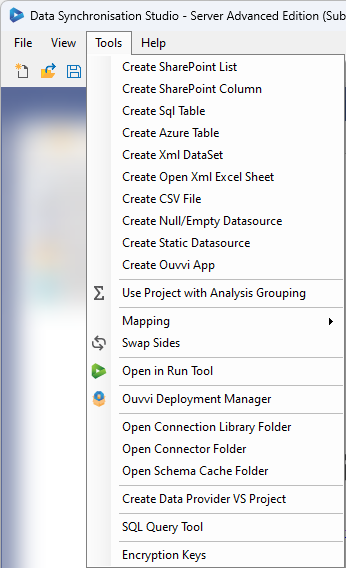
Now follow the instructions on screen to specify the connection or determine where to save the file.
Configure the Schema Map
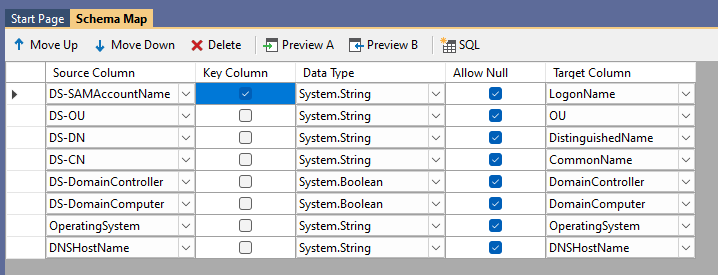
Now you need to configure the schema map. If you haven't already, add the attributes from Active Directory that you want to export and match these to their corresponding column in the target.
Make sure to select a key column that is unique and can be used to identify each record. In this example we use DS-SAMAccountName as it is unique to each record.
Compare and Sync
Once you have all the columns mapped you can run the comparison to view the differences between the source and target. Do this by clicking onto the Run Compare button in the toolbar.
This will open a tab where you can view actions that need to be made to make the target the same as the source. These may be a series of Add, Update or Delete actions, however delete is disabled by default. To enable deletes set the property EnableDelete to True on the target.
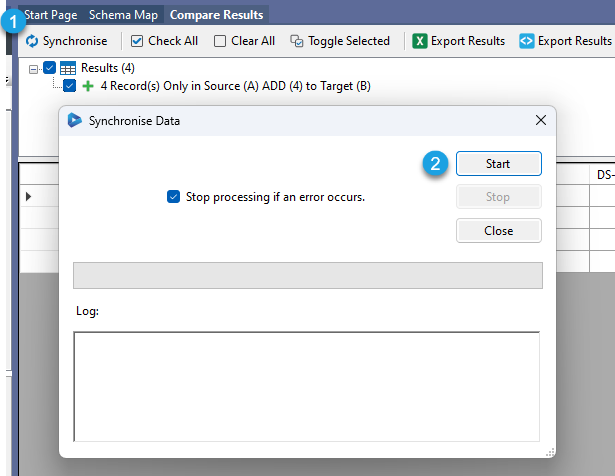
The results for this example show that there are 4 records to be added.

As the data looks as expected you can synchronise the results. To do this click Synchronise and then Start to begin the sync. The computer data will then be imported into your chosen target.
Quick Export Option
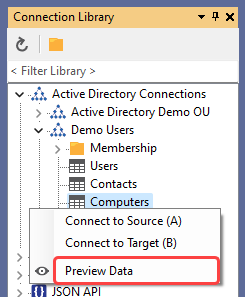
If you have saved your connection to Active Directory in the Connection Library you can quickly export your computer data to a CSV, Excel spreadsheet or XML file. Just right click onto Computers in your connection and select Preview Data, in the preview window you will then be able to access the quick export functions. Choose your preferred file type and type in a name for your export.
You can also do this by connecting to your Active Directory Computers and adding the columns you want to the schema map. Then click Preview A and you can export the results to either a CSV, XML or Excel File.
Filtering the Results Returned
You can filter the results returned either by editing the LDAPFilter or by using the filter function.
You can enter an LDAP Filter in the connection properties, this can be found below the columns in the source window. Look for the property LDAPFilter and click onto the ellipsis in the field to open the editor. Edit the default filter to return only the results you need and click OK.
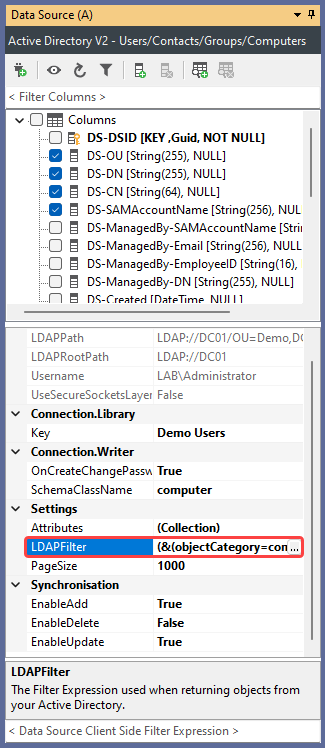
Now refresh the connection by clicking onto the refresh icon in the datasource toolbar and preview the results (Preview button in the datasource toolbar). Data Sync will now only return the data that matches your filter.
We have more details on how to construct an LDAP Filter in our guide page here.
The filter function, can be found at the bottom of the source window or by clicking onto the filter button in the datasource toolbar.
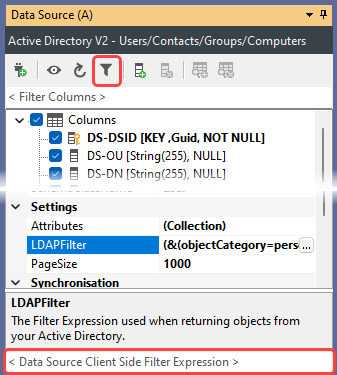
To use this simply enter in a C# function to filter your data, either into the filter box or into the text field that opens when you click onto the filter button. Using the filter button will open a code editor window that will help you build the function with intellisense.
You might filter for computers using a certain operating system, e.g. Windows Server 2019 Standard, so you could use the expression OperatingSystem == "Windows Server 2019 Standard".
Please note that column names must be in a C# friendly format i.e. not contain spaces or special character (except for underscores).
To apply the filter and check the data that is being returned click the Preview A button in the schema map toolbar. Using the example expression above either only the computers that have "Windows Server 2019 Standard" as a value in the OperatingSystem attribute will be returned.
Automate and Schedule
Now that you have configured your synchronisation from Active Directory to your target you have a couple of options available to automate the running of your projects.
Run via the Run Tool
The Run Tool is an additional program that comes linked to Data Sync and enables you to build out your data integration jobs.
You can use this to group Data Sync projects that need to run in order and add additional step types such as adding an status report to email you when the project has run and if there were any failures. Each step is run in the order it appears in the list and you can apply conditional rules so that the next step can run if the previous one succeeded or had data changes for example. To find out more please see our Run Tool Documentation.
To open your project in the Run Tool, in your Data Sync project go to Tools >Open in Run Tool.
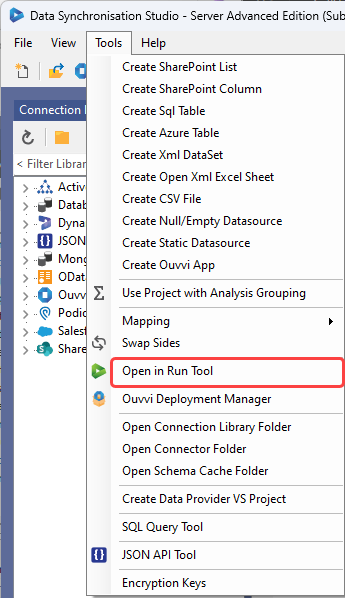
You should make sure to save the Run Tool project and then click onto the green Run button to check it runs as expected. If there are data changes you will be provided with a count of how many items were added updated or deleted.

Run via the Command Line
Another option is to Run the Run Tool project or single Data Sync project from the command line. To do this pass the path to the project file like this:
Run Tool Project
%DATASYNCINSTALLPATH%\Simego.DataSync.Run.exe -execute "D:\DSProjects\myproject.dsrun"
Data Sync Project
%DATASYNCINSTALLPATH%\Simego.DataSync.Run.exe -execute "D:\DSProjects\myproject.dsprj"
Automate with Windows Task Scheduler
You can then schedule your Run Tool project to run when you need it to using Windows Task Scheduler. For the full details on how to do this see our Task Scheduler Documentation.
Automate with Ouvvi
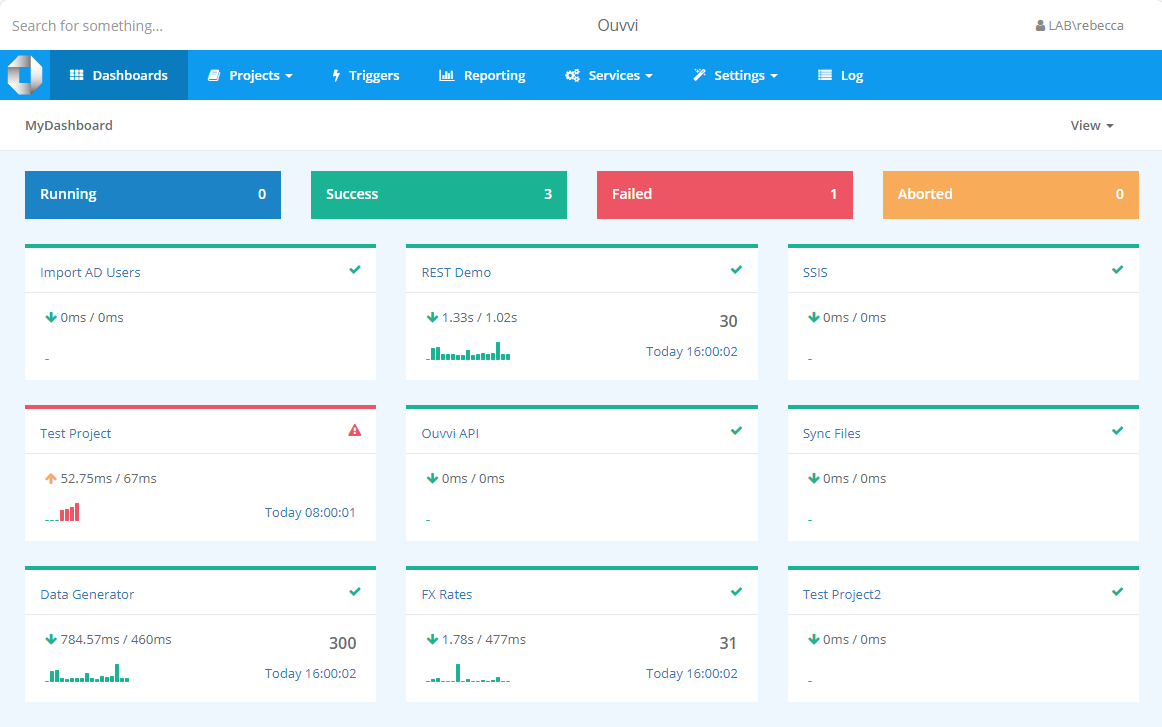
An alternative option, with more scheduling capabilities is to use Ouvvi Automation Server. Ouvvi enables you to fully schedule and manage all of your Data Integration Projects, from Data Sync projects to SQL Statements to Powershell Scripts.
It provides full logging and documentation capabilities to fully manage your integration operations.
To find out more see our Ouvvi Documentation or send us an email.
Update Computer records in Active Directory
To add details to other attributes in your computer records you can set up a simple Data Sync project to do so.
Your source data with the details to add, such as an asset number, needs to have something to identify each computer. This need to be unique, for example you could use the computer name or logon name (SAMAccountName).
Start by connecting to your source data and then connect your target (Data Source B) to your Active Directory Computers. You can find more details on how to do this in the section above or in our documentation here.
Add the columns from your source to the schema map and match them to their corresponding attribute in Active Directory. Make sure to set the key column that can be used to identify each computer. If the column does not show up by default then you can add the attribute to the list. You can read more on adding attributes here.

Click Run Compare to view the differences between the source and target, and then click Synchronise and Start to sync the results to Active Directory.