Updating & Exporting Contact Records
Data Sync makes it possible for you to quickly and easily import, export and update Contact records in Active Directory.

The following page will cover how to import contact data into Active directory and how update records in the same project, and then how to export contacts from Active Directory to a target of your choice.
Requirements
Before getting started you will need to ensure that you have the following:
- Windows 10 or Windows Server
- Downloaded & Installed Data Synchronisation Studio
- Have access to Active Directory
- Have a source dataset containing the contact data to import and update to AD
Connect to Source Data
You can use any of the inbuilt connectors to import and update your Active Directory data. In this example we will be importing contact records from a SQL Table into Active Directory.
Start by opening Data Sync and clicking onto Connect Datasource in the source window. Then expand the SQL Server folder, select SQL Server (SQL Client) and enter the details needed to connect to your SQL Server.
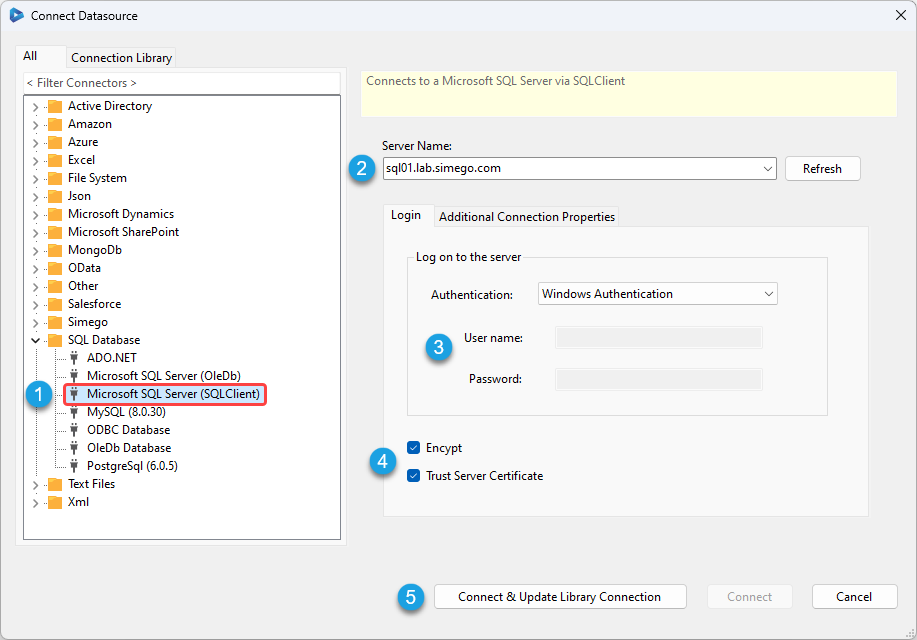
You can click onto Connect & Create Library Connection to save the connection for using again in the future. You will need to find and select your database and then enter in a name for the connection to do this.
You only need to save the connection to each database once as you will be able to access all of the tables and procedures for that database from the connection library.
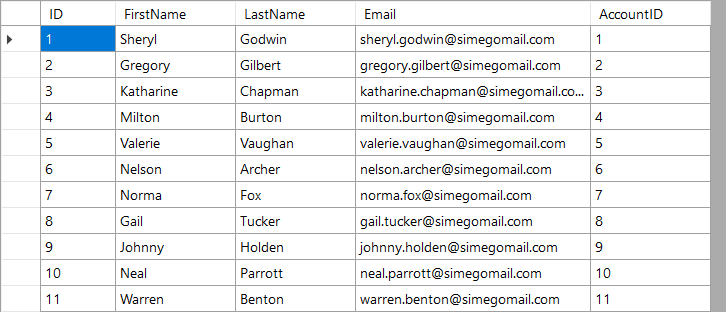
The image below shows an example of the data we will be using in this guide:
Connect Target to Active Directory
Next, connect to your Active Directory Contacts. To do this click onto Connect Datasource in the target window and go to Active Directory > Active Directory V2 - Users/Contacts/Groups/Computers.
Select Contacts from the DefaultAttributes drop-down menu, enter in the LDAP path to your Active Directory instance, and enter in any credentials you need to access AD.
You can enter in the full LDAP path (including the server name) or just the server name. If you just use the server name your path would look similar to: LDAP://dc01.
Otherwise an example path connecting to a specific OU could be: LDAP://dc01/OU=Test,DC=demo,DC=simego,DC=com.
We have more details on finding the LDAP Path on our page here.
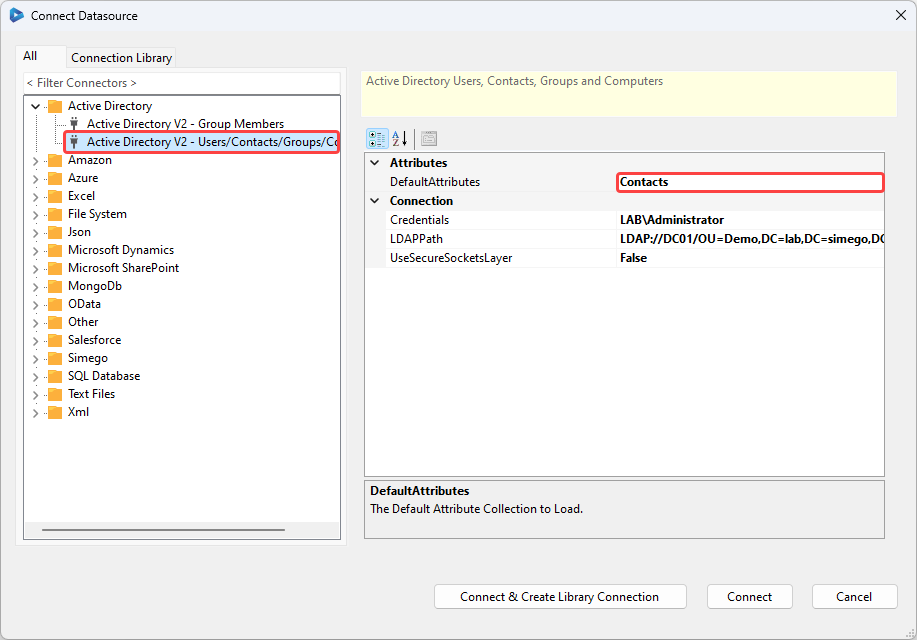
You can then click Connect & Create Library Connection to save the connection to the connection library. Just enter in a name for the connection and click OK. This only needs to be done once per OU as you will be able to access other objects such as Users and Computers from the connection window.
To view your Active Directory connection in the Connection Library, refresh the connection window and your connection will then be visible.
Configure the Schema Map
Now you need to configure the schema map, add the columns from your source that you want to import to the schema map and map them to their corresponding attribute in Active Directory.
You need to ensure that a key column that is unique and can be used to identify each record is available and selected. From this example we can use Email as this will always be unique to each contact.
Your schema map will now look something like this:

You will also need to define and include the CommonName (CN) in the schema map in order to create a contact record.
Creating the CN Column
As this example does not have the Common Name (CN) listed in the source data we can create it using calculated columns, concatenating the first name and last name with a space in between.
To create a calculated column, click onto the add column button in the data source toolbar.
To create the Common Name in this AD environment it is simply the first name, a space, and then the last name. So we can just use the CONCAT function to join the fields. You can edit this function so that it matches the requirements of your AD environment.
CONCAT(FirstName, " ", LastName)
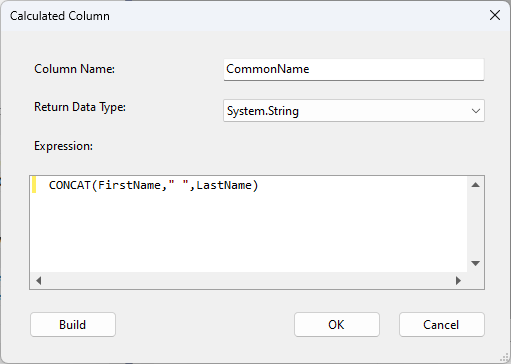
The calculated column can then be added to the schema map and mapped to DS-CN.

Adding Additional Attributes
If your source Data has columns that you want to include but the matching attribute isn't showing in the column list for AD, then you can add it using the collection editor. For example you might want to map an ID column to the EmployeeID attribute on the contact record.
This column is not in the default listing for Contacts so you can add it to the column list by going to the connection properties and finding Attributes. Open the collection editor and click ADD to add the EmployeeID attribute.
The internal attribute name for this in AD is employeeID so this needs to be entered for the AttributeName field. You can then enter in any name for the DisplayName, and you need to configure the properties for the attribute. The configuration for EmployeeID would look something like this:
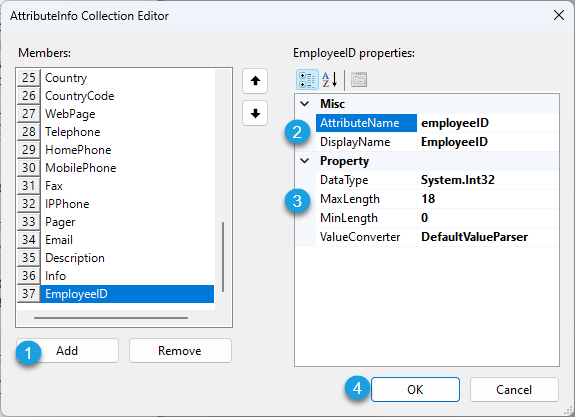
Once you have clicked OK, refresh the connection by clicking onto the refresh button in the data source toolbar. The attribute should now be visible in the column list and you can add it to the schema map.

Compare and Sync
Once all the columns have been mapped you can run the comparison to view the differences between the source and target by clicking onto the Run Compare button in the toolbar.
This will open a tab where you can view actions that need to be made to make the target the same as the source. These may be a series of Add, Update or Delete actions, however please note that delete is disabled by default. To enable deletes set the property EnableDelete to True on the target.
The results for this example shows 575 records to add to Active Directory.
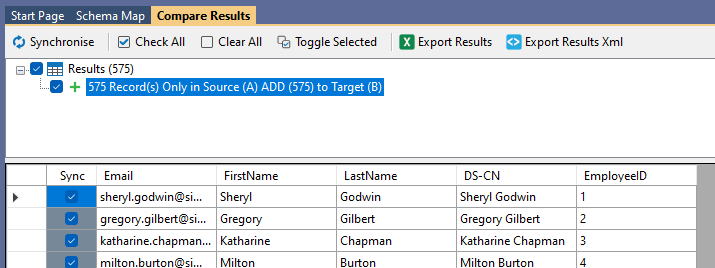
As the data looks as expected you can now synchronise the results. To do this click Synchronise and then Start to begin the sync.
The contact data is then imported into Active Directory.
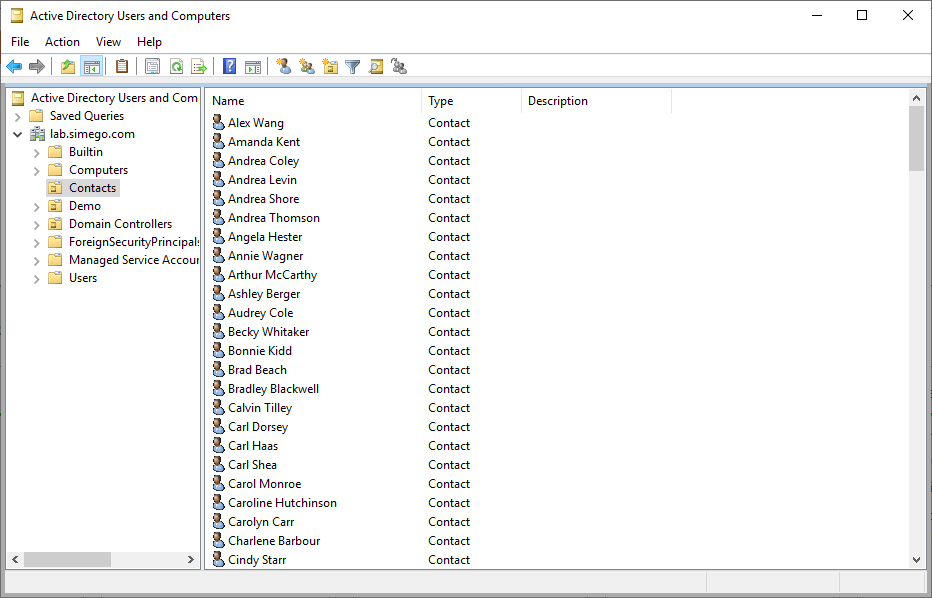
Export Contact Data from Active Directory
There are a couple of ways to export data from Active Directory with Data Sync: You can either export data from a preview, or set up and synchronisation job to export the results to a location of your choosing. Additionally you can also filter the results using either LDAP filters or C# functions.
Quick Export
If you have saved your connection to Active Directory in the Connection Library you can quickly export your Contact data to a CSV, Excel spreadsheet or XML file. Expand the Active Directory tree and find your connection. Right click onto Contacts in your connection and select Preview Data, in the preview window you will then be able to access the quick export functions. Choose your preferred file type and type in a name for your export.
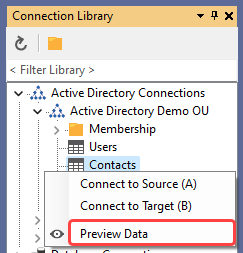
You can also do this from the schema map. Connect your source to your AD Contacts and add the columns you need to the schema map. Click onto Preview A and you can then export the results to either a CSV, Excel or XML file.
If an attribute you want to include isn't listed in the default column list you can add it by going to the connection properties and finding Attributes. Open the collection editor and add the attribute you need. Once you have clicked OK refresh the connection by clicking onto the refresh button in the datasource toolbar. The attribute should now be visible and you can add it to the schema map.
Regular Export
If you want the export to occur regularly then you can set up a quick Data Sync project to do this and schedule it to run using Windows Task Scheduler
This project would set the source to the Active Directory Contacts and the target to wherever you want the data to go. This could be a SQL table or another system. Then simply map the columns from the source to the target and set a key column.
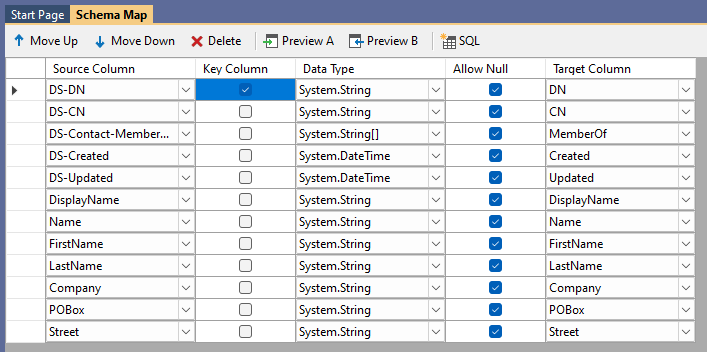
It is also possible to create a target table or file based off the columns added to the schema map. This can be a SQL table, SharePoint List, CSV, Excel or XML file to name a few. To create these add the columns you want to include to the schema map, then go to Tools and select the create option you need from the list.
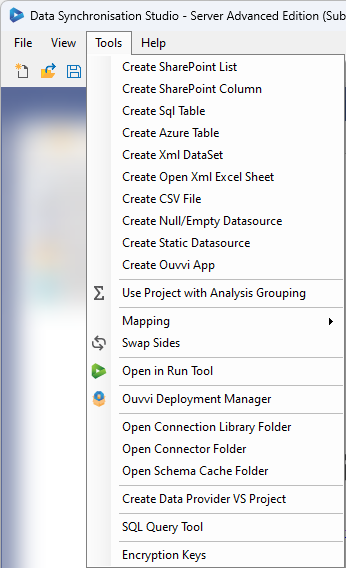
Data Sync will then walk you through what needs to be done either with a wizard or by opening the file explorer for you to determine where to save the file.
Once you have configured the schema map, making sure a key column is selected and all the columns you need are included, finish it off by comparing the datasets and synchronising the results.
Filtering the Results Returned
You can filter the results returned either by editing the LDAPFilter or by using the filter function.
You can enter an LDAP Filter in the connection properties, this can be found below the columns in the source window. Look for the property LDAPFilter and click onto the ellipsis in the field to open the editor. Edit the default filter to return only the results you need and click OK.
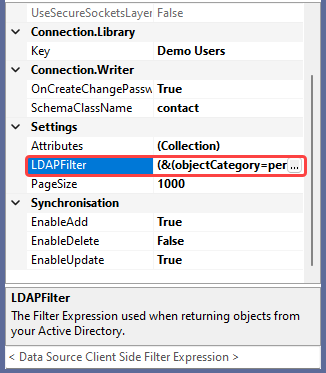
Now refresh the connection by clicking onto the refresh icon in the datasource toolbar and preview the results (Preview button in the datasource toolbar). Data Sync will now only return the data that matches your filter.
We have more details on how to construct an LDAP Filter in our guide page here.
The filter function, can be found at the bottom of the source window or by clicking onto the filter button in the datasource toolbar.
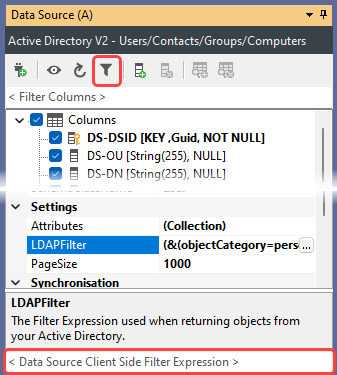
To use this simply enter in a C# function to filter your data, either into the filter box or into the text field that opens when you click onto the filter button. Using the filter button will open a code editor window that will help you build the function with intellisense.
You might filter for contacts that have a specific last name or first name. To search for users with the last name Smith, you could use the expression LastName == "Smith".
Please note that column names must be in a C# friendly format i.e. not contain spaces or special character (except for underscores).
To apply the filter and check the data that is being returned click the Preview A button in the schema map toolbar. Using the example expression above only the contacts with the surname Smith will be returned.
We have more details on filtering Active Directory records in our Filtering guide here.