SharePoint File Data Source
Available from Version 6.0.3353
Using the SharePoint File Datasource connector you can now connect to a file found within a SharePoint Document Library without needing to download and reupload the file. Once connected to Data Sync you can access and modify the data within that file as you would if the file was stored on a local machine.
This connector supports Excel, CSV and XML files. If you are after connecting to a different file type please contact us.
Connect
To connect open the data source window and locate the Microsoft SharePoint folder. Expand the node and select SharePoint File Data Source.
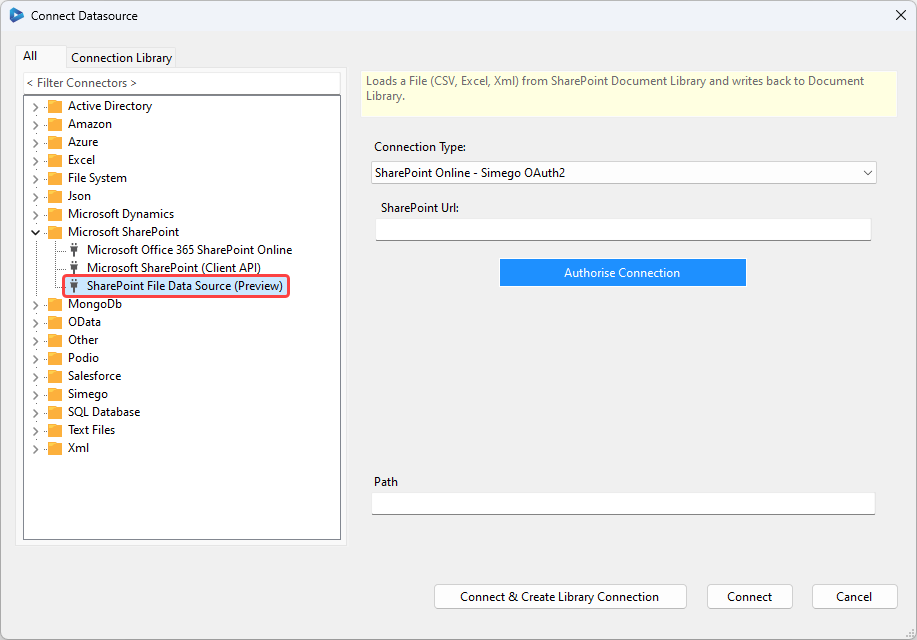
Set the Connection Type
Now select the connection type, by default this will use the Simego OAuth option but you can also choose to use a custom OAuth connection. In this example we will use the default Simego OAuth option.
If you want to connect using custom OAuth please follow the connection details here and then come back to this page to continue connecting.
Enter the SharePoint URL
Enter in the base URL to the SharePoint site. This can be either the root site or a subsite and should be in the format https://<domain>.sharepoint.com/<site1>/<site2>.
Then click Authorise Connection to enable the connection to SharePoint. You will be redirected to a browser page where you need to sign in to an account with the permissions to access the site and then come back to Data Sync.
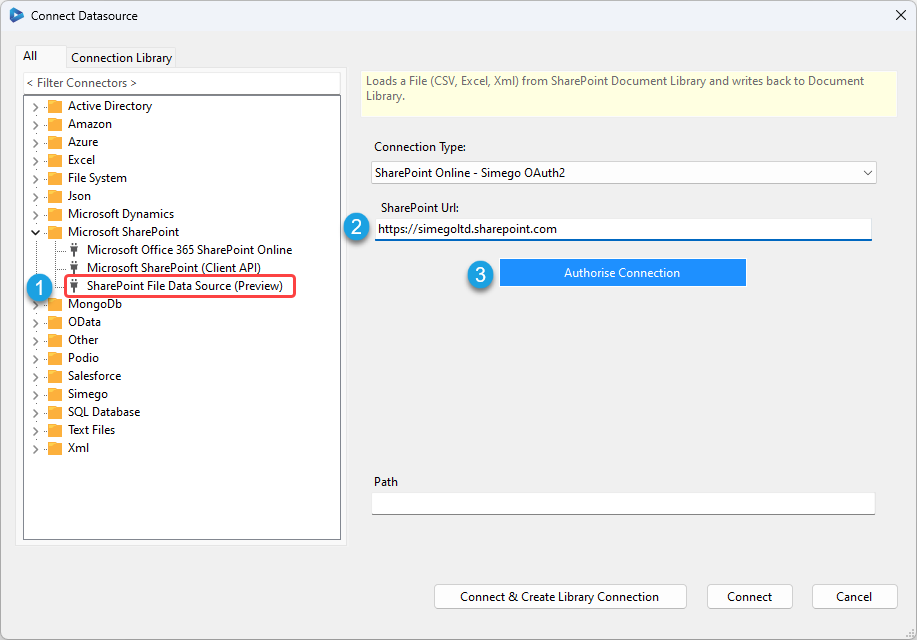
Get the Path of the File
Once the connection has been authorised you need to enter in the path to the file you want to connect to. This should include the folder paths, the file name and the file extension. For example the path could be /Documents/ContactRecords/Contacts_04-2024.csv.
You will need to build this path yourself by navigating through your SharePoint site to the file, making a note of each folder and the order you pass through.
The final connection should look similar to the image below:
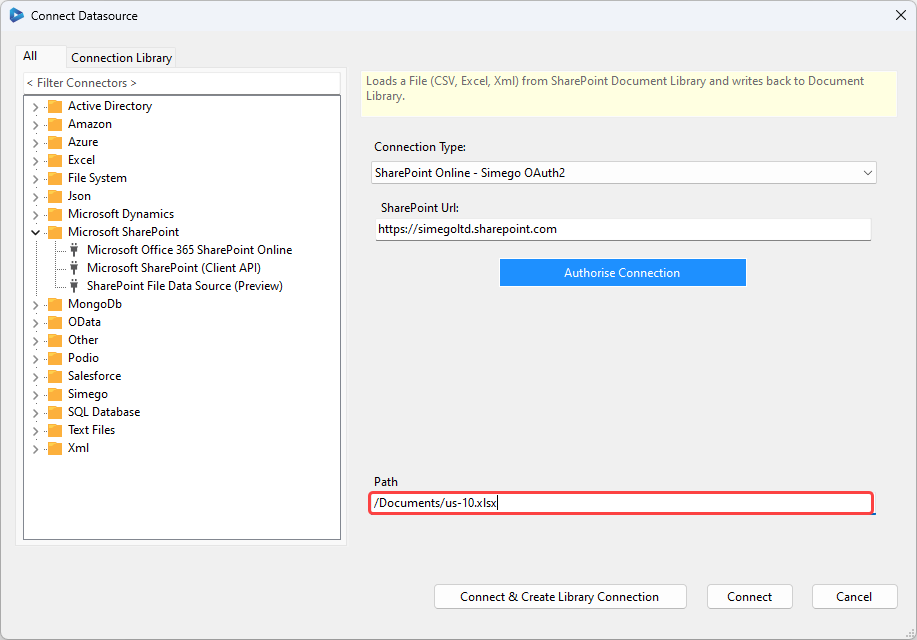
You can either save the connection to the site to the Connection Library by clicking Connect & Create Library Connection or you can simply click Connect to connect.
Connection Library
If connecting from the connection library it will show in the connection window as the URL of your SharePoint site. either drag and drop this onto the datasource window or right click and select to connect to either the source or target.
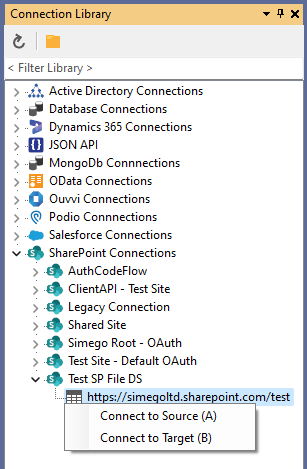
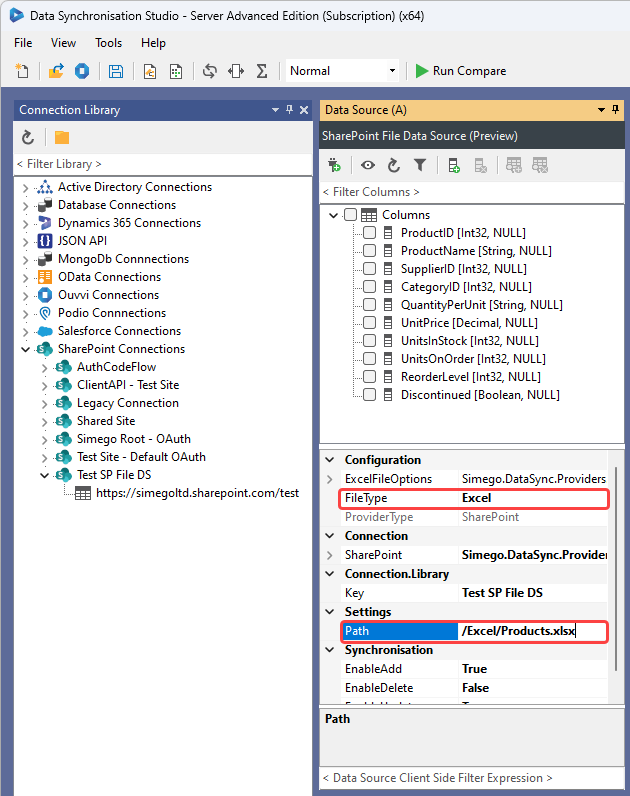
Once you are connected you will need to specify the file type and the path to the document you are connecting to. If the file extension and the file type do not match an error will be thrown.
Version Control
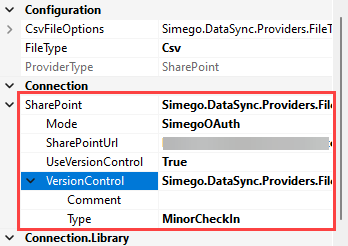
If your document library has version control enabled then you can manage the checking in and out of the file from the connection property window.
To do this expand the SharePoint property node and set the UseVersionControl property to True.
This will reveal another property called VersionControl which can be expanded and under this you can set the comment and type of check in to be performed. You can choose between MinorCheckIn, MajorCheckIn, or OverwriteCheckIn.
Excel Considerations
When connecting to an excel file you may want to consider the property options available such as which worksheet to connect to within the file, how to handle rounding, is the header row included, and what the date format should be. These can all be modified within the connection property window if your path is pointing to an excel file.
To access these properties expand the node by clicking on the arrow next to the ExcelFileOptions property in the connection property window found below the columns in the datasource window.
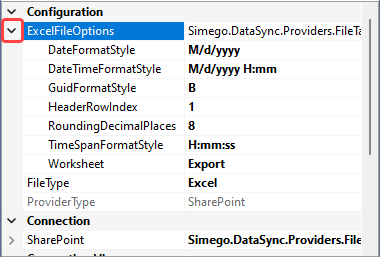
Below you will find a list of the properties available and a brefi description of what they are:
| Property | Description |
|---|---|
| DateFormatStyle | Select from the dropdown the format you want Date values to be displayed in. |
| DateTimeFormatStyle | Select from the dropdown the format you want DateTime values to be displayed in. |
| GuidFormatStyle | You can specify which .NET formatter style to use for guids. |
| HeaderRowIndex | Here you can specify which row contains the header columns. |
| RoundingDecimalPlaces | The number of decimal places to round to. |
| TimeSpanFormat | Select from the dropdown the format you want Time values to be displayed in. |
| Worksheet | The worksheet to open from the spreadsheet. |
Creating a New File that Doesn't Exist
If you want to create a new file in your document library, for example a keep a copy of the data processed on a certain date, then you can do this by making use of Project Automation.
You should start by connecting your source window (Datasource A) to your source Data.
You need to upload and connect to a file that has the same schema as the file you want to create. If you do not already have one in SharePoint you could do this by exporting the preview dataset from the Data Sync designer by using one of the export options. For example exporting as a CSV.
You then need to upload this into SharePoint, so that it can act as a template document. This is what you will initially connect to in Data Sync to get the Column names (Schema).
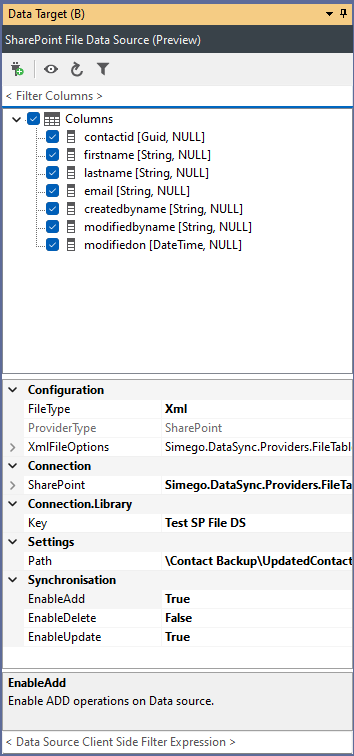
If you want the new files to exist in a new folder that doesn't yet exist you can change the path in the connection property window to specify the folder name. For example if the template file was stored under /documents/customers.xml but you wanted the new files to be stored under a year folder you could change the path to have the year folder listed i.e. /documents/2024/customers.xml.
Be careful when entering the path into Data Sync that everything is spelt correctly, and in the correct order. If you type the path incorrectly you could end up creating folders you don't need.
If you wanted to add the date to the file name, i.e for a backup or auditing purposes then you can make use of project automation to do this.
Project Automation Code - Write the FileName
Below is an example of the code you can use to change the filename of the file saved in SharePoint. This example adds the date to the filename so that a copy of the data can be kept for each daily run.
public override void Start()
{
	DataSourceB.Path = $"\\Contacts Backup\\UpdatedContactRecords-{DateTime.Today.ToString("yyyyMMdd")}.xml";
}
Make sure the path is correct, otherwise you can end up creating folders and files in places you didn't want. You should also check that the file extension matches the file type defined in the target connection i.e. the above example connects to an XML file.