Schedule your Data Sync project
Below we will cover three options of running your Data Sync project unattended and on a schedule from your machine.
If you have multiple Data Sync projects you want to run in sequence then we would recommend looking at the Run Tool to collate your projects and then use the Task Scheduler to schedule them. You can read more on the Run Tool and how to use it in our Run Tool Documentation. For a more comprehensive solution that works for larger groups of projects and allows you to manage your integrations from a web browser, please take a look at our Ouvvi Documentation.
There are three options available that are good options if you have a handful of projects you need to schedule, and don't require any additional installation. These are:
1- Running the project from the command line
2- Creating a Scheduled Task from the Run Tool
3- Manually adding the project to a scheduled task in Windows Task Scheduler
Running from the Command Line
You can run single or multiple Data Sync projects from the Command Line.
To do this open the Command Line and navigate to your directory that contains your Data Sync project. You can then use the following code, passing in the name of the project you want to run:
"%DATASYNCINSTALLPATH%\Simego.DataSync.Run.exe" -e "project.dsprj"
You can also run multiple Data Sync projects in one command and the next project will only run if the previous one succeeded. Again, navigate to the directory that contains your Data Sync projects and then use the following code, passing in the names of each of your projects:
"%DATASYNCINSTALLPATH%\Simego.DataSync.Run.exe" -e "project.dsprj" "project2.dsprj"
Create a Scheduled Task from the Run Tool
If you want a project, or group of projects to be run on a simple schedule (e.g. every hour, every 30 minutes, every 10 minutes etc) then you can use the built in option found in the Run Tool.
To do this, start by opening your Data Sync project, expand the Tools menu and select Open in Run Tool. This will add the project as a single step in the Run Tool.
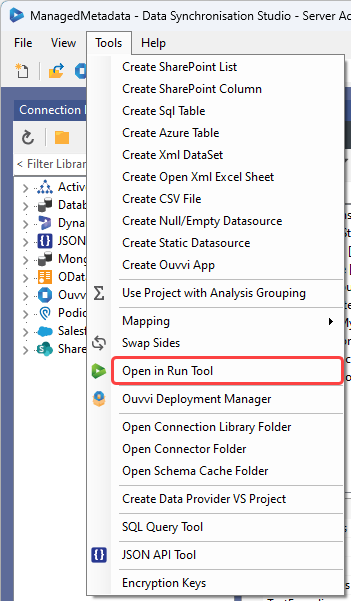
Make sure to save the Run Tool project otherwise you will not be able to create the scheduled task.
If you want multiple projects to run in a sequence on the same schedule, then add the additional steps to the project as needed. You can read more about doing this in our Run Tool documentation.
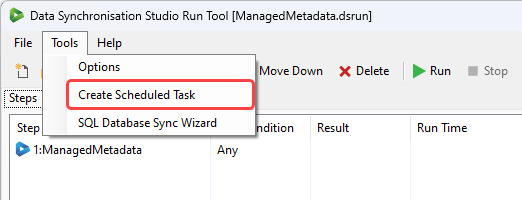
Once you have saved the Run Tool project, open the Tools menu and select Create Scheduled Task.
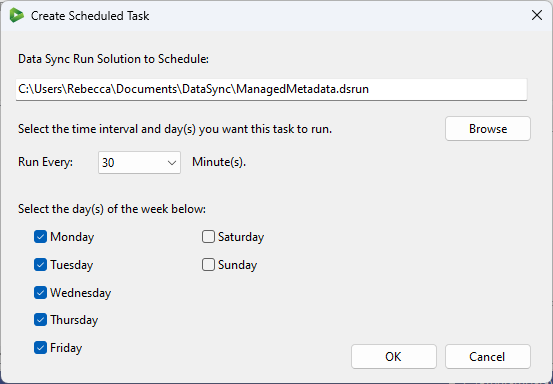
This will open a window where you can configure the schedule. Select the frequency you want the project to run at and the days of the week it should be run. Then click OK to create the schedule.
You will then need to enter in your password to authorise the creation of the scheduled task in Task Scheduler.
If you want to be able to customise the schedule further, we recommend using the next option where you manually create the schedule in Windows Task scheduler.
Manual Scheduling Via Windows Task Scheduler
An alternative option is to schedule your projects directly in Windows Task Scheduler. Here you can define the time trigger to set when the project should run.
To configure the schedule open Task Scheduler and create a folder to hold your scheduled tasks. You can do this by going to the Actions Window and selecting New Folder....
You may need to run Task Scheduler as an administrator to be able to do this.
Create the Task
To create a task either right click into the task window and select Create New Task or go to the Actions Window to the right and select Create Task...

Enter in a name and description for the task, and make sure to set the security options to the correct user account that has permission to run the task.
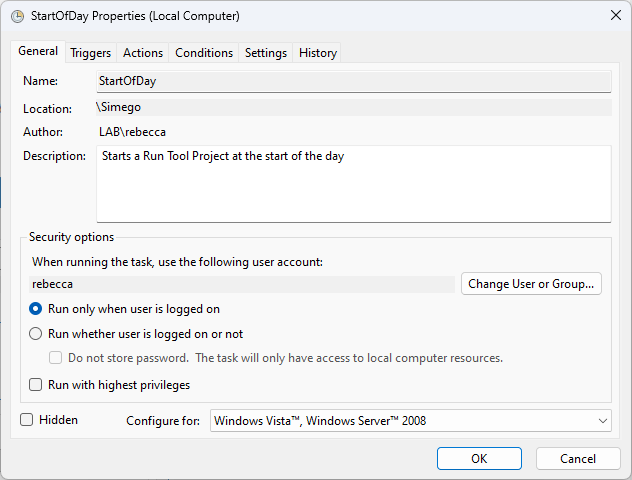
If the user account does not have permission to access the files or run the files the scheduled job will error.
Add the Data Sync Project
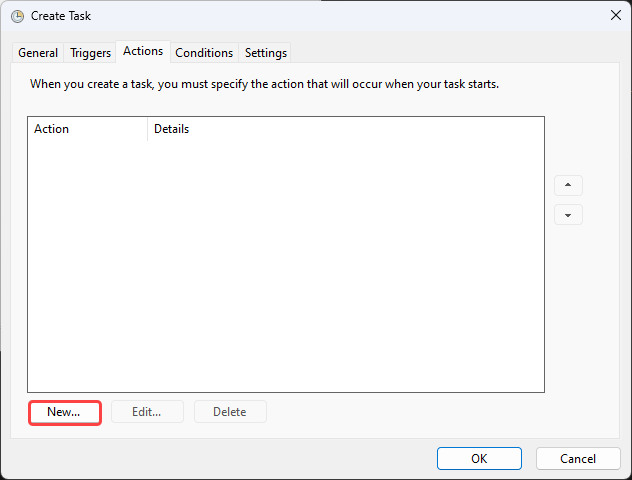
To add the Data Sync Project to the task, click onto the Actions tab and select New.
Now enter in the path to the Run Tool executable in the Program/Script field. You can use "%DATASYNCINSTALLPATH%\Simego.DataSync.Run.exe" or browse to the location of the Simego Programs folder and select Simego.DataSync.Run.exe.
For the Add arguments field enter in -e and the name of the project to run followed by .dsprj. An example of what could be entered is: -e "MyProject.dsprj"
If your project is in a different directory you can enter the path in the Start field. For example C:\Users\Rebecca\Documents\DataSync\
This should be either a local path or a UNC shared drive. It will not work with a mapped drive.
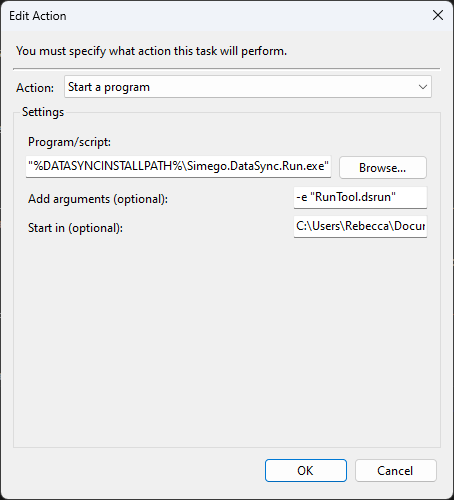
If you want to attach multiple Data Sync projects to a Scheduled Task then you can add the project to the arguments list so long as the project is in the same directory.
For example to pass three Data Sync projects in the same directory, the arguments would look like this :
-e "MyProject.dsprj" "MyProject2.dsprj" "MyProject3.dsprj"
If the projects are in different directories then you will need to add them as separate actions within the task.
Add the Schedule
Now we can create the schedule to run the project.
Go to the trigger tab and select New to define the schedule that you want the project to run on.
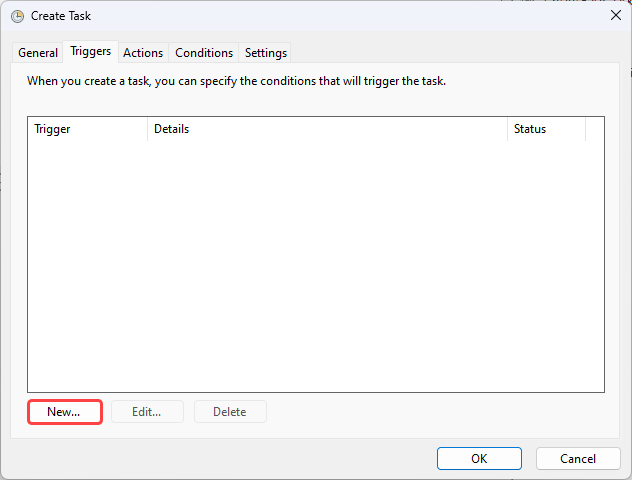
The example below shows a possible configuration for a Start of Day trigger.
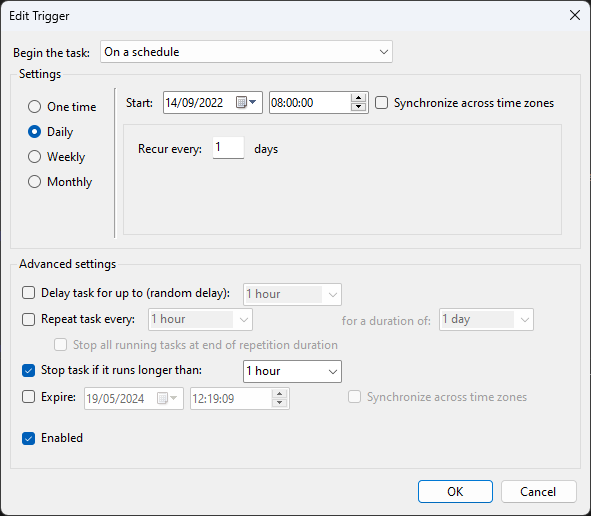
Set how frequently you want it to run (e.g. Daily), a start time, and set the recurrence frequency. We also recommend setting a stop task if it runs longer than a certain length of time, in-case there is an error.
Running
You can now check the task runs as expected by right clicking and selecting Run from the menu.
The result will be a code returned in the Last Run Result column.
- If it is successful a
0x0code will be returned. - If there is an error with Data Sync a
0x1code will be returned. Check out the log file in the .ds folder for more details. - Any other error code is thrown by Task Scheduler and you will need to look in Windows Event Viewer to see what the issue is.
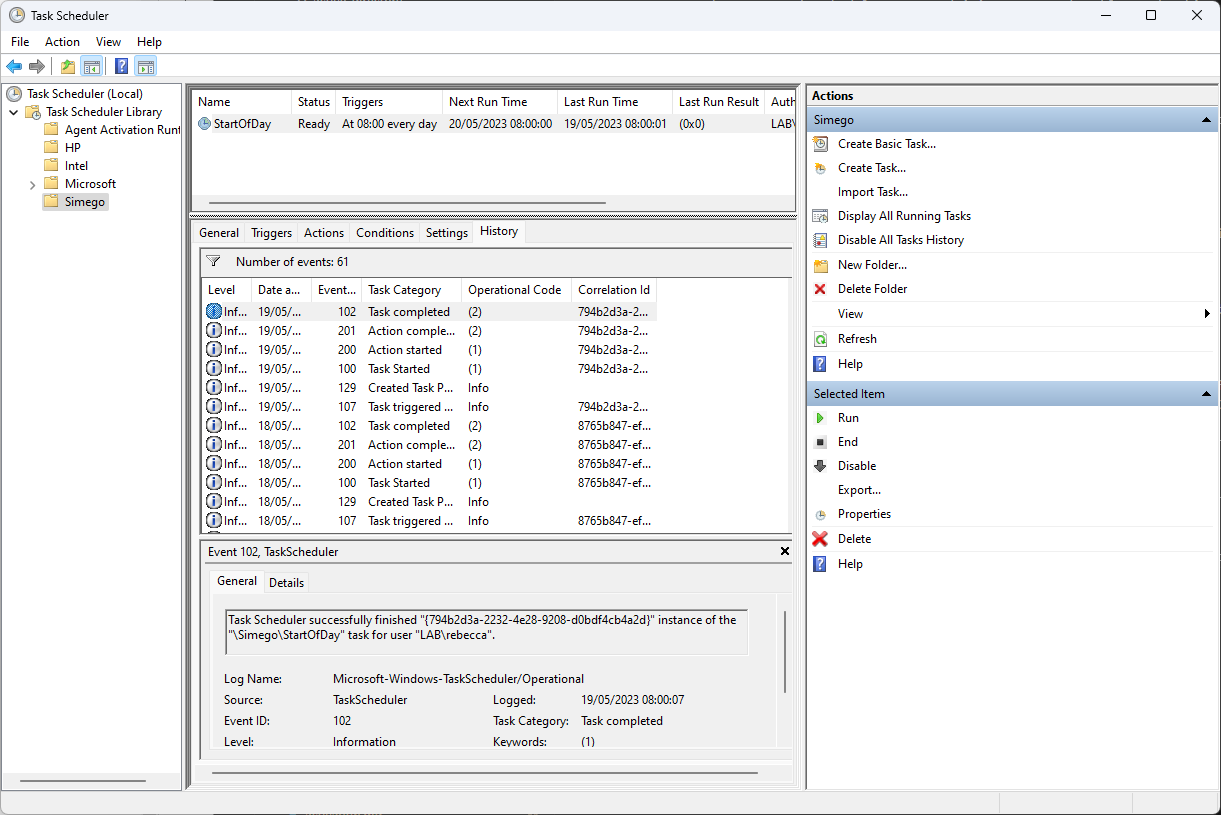
You may also want to enable task history so then you can see when the task ran. This can be done from the Actions window to the right and may already be enabled by default.

Troubleshooting
If you are getting errors or the task is not running, please check Windows Event Viewer for any error messages. This will be where you can find details about the running of the task.
If you are getting the 0x1 error code in Task Scheduler then this is being returned by Data Sync. Have a look in the log files in the .ds folder for that run to see what the error was. The .ds folder can be found in the same directory as your Data Sync project and will store all of the log files for each run of the project.
