Adding Authentication to the XML to Enable Connection
The JSON API Tool supports multiple authentication types. You only need to specify the authentication scheme to be used in the Authentication section and all subsequent requests will use the authentication details specified.
To get started adding authentication right click onto the Authentication folder and select and option for authentication.
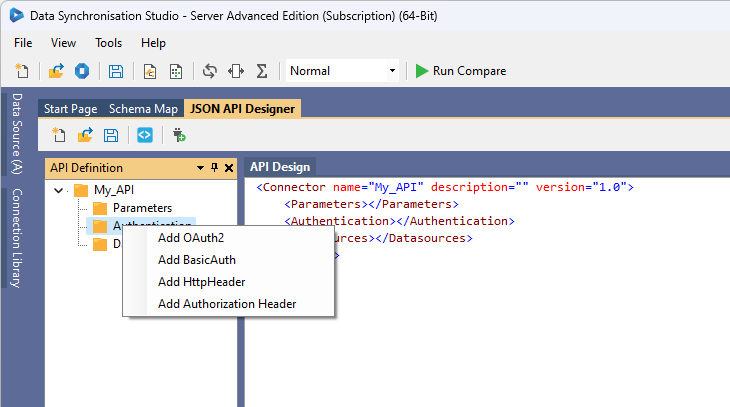
Below each authentication type is described with examples of how they should be configured.
For testing you can enter the credentials into the authentication node, as these are required to preview the data.
However for production use you should leave the parameter name as the placeholder, as shown in the examples below, as you will specify the connection details within the connector. The connector will encrypt these values and inject them at runtime.
The {} means it will be injected from a parameter, alternatively you can leave these blank e.g username=""
Adding the credentials to the connector will ensure the values are encrypted and keep your connection secure.
Basic Authentication
To specify that the connector should use Basic Authentication to connect to the API you should select Add BasicAuth from the authentication option list.
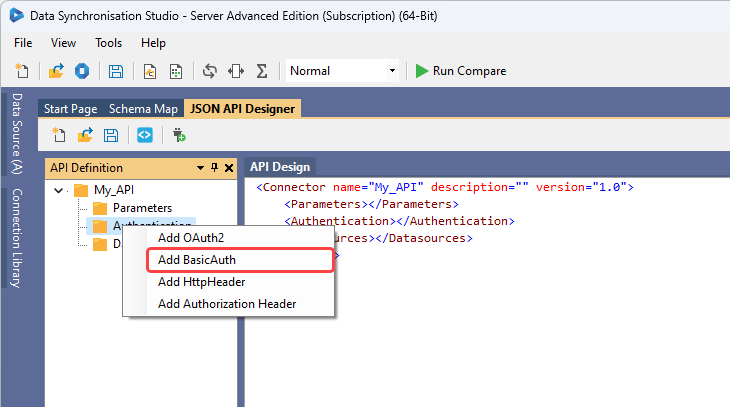
This will add the framework for Basic Authentication and you can simply supply the username and password needed to connect. An example of how this will look is:
<Authentication>
  <BasicAuth username="username" password="password" />
</Authentication>
OAuth2 Authentication
To specify that the connection should use OAuth, you should select Add OAuth2 from the authentication options list.
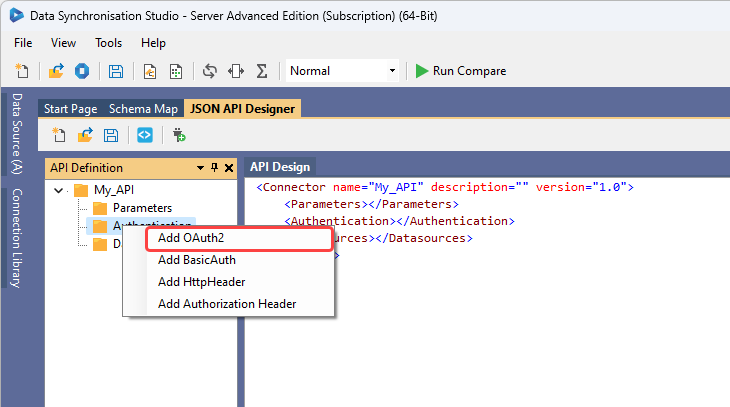
You can specify whether the connection should use the client_credentials flow or the authorization_code flow by adding the OAuth2 authentication scheme.
| Setting | Description |
|---|---|
| authorise-url | The API URL to validate the credentials |
| token-url | The API URL to return the token |
| client-id | The Client ID required to connect to the API |
| client-secret | The Client Secret required to connect to the API |
| grant-type | Whether the Client Credentials or Authorization Code flow is being used |
| scope | The scope needed to connect |
| prompt | The prompt needed (optional) |
As an example of the basic structure the below XML shows the details for using the authorization_code flow:
<Authentication>
  <OAuth2 authorise-url="{authorize-url}" token-url="{token-url}" client-id="{client-id}" client-secret="{client-secret}" grant-type="authorization_code" scope="{scope}" prompt="select_account" />
</Authentication>
Below we are connecting to the Beta Graph API endpoint. Where the parameters needed for the authentication have been added under the parameter node. In order to connect to Graph API we also need to make use of Http Headers which are discussed further down this page.
Remember that you will enter your client secret into the connector, so only enter the value into the parameters for testing the connection.
<Parameters>
	<Parameter name="url" value="https://graph.microsoft.com/beta" />
	<Parameter name="authorize-url" value="https://login.microsoftonline.com/cfb071d-x7yu-4792-4414-9f3ca405620b/oauth2/v2.0/authorize" />
	<Parameter name="token-url" value="https://login.microsoftonline.com/cfb071d-x7yu-4792-4414-9f3ca405620b/oauth2/v2.0/token" />
	<Parameter name="client-id" value="e09cfs32-af59-4e56-h69f-586017g8h93f" />
	<Parameter name="client-secret" value="" />
	<Parameter name="scope" value="https://graph.microsoft.com/.default offline_access" />
	</Parameters>
	<Authentication>
		<OAuth2 authorise-url="{authorize-url}" token-url="{token-url}" client-id="{client-id}" client-secret="{client-secret}" grant-type="authorization_code" scope="{scope}" prompt="select_account" />
		<HttpHeader name="OData-Version" value="4.0" />
		<HttpHeader name="OData-MaxVersion" value="4.0" />
</Authentication>
Http Headers
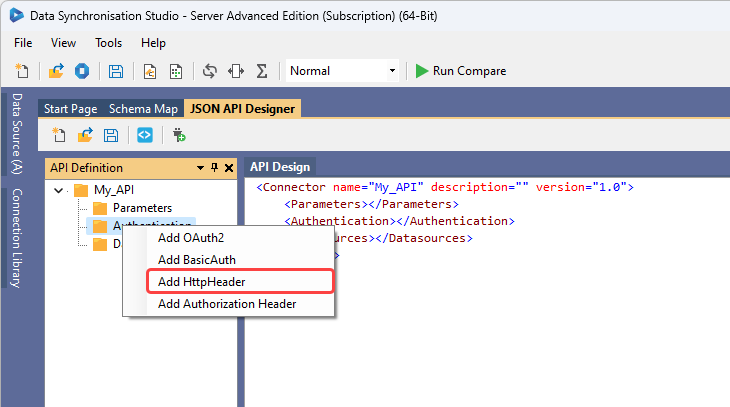
When you need to add additional data to the header you can add HTTPHeader types to the authentication scheme by right clicking onto the Authentication folder and selecting Add HttpHeader from the options list. Adding the header to the authentication node will supply it on every request.
<Authentication>
  <HttpHeader name="OData-Version" value="4.0" />
  <HttpHeader name="OData-MaxVersion" value="4.0" />
</Authentication>
Headers can also be used in combination with other authentication types, for example OAuth2:
<Parameters>
	<Parameter name="url" value="https://graph.microsoft.com/beta" />
	<Parameter name="authorize-url" value="https://login.microsoftonline.com/cfb071d-x7yu-4792-4414-9f3ca405620b/oauth2/v2.0/authorize" />
	<Parameter name="token-url" value="https://login.microsoftonline.com/cfb071d-x7yu-4792-4414-9f3ca405620g/oauth2/v2.0/token" />
	<Parameter name="client-id" value="e09cfs32-af59-4e56-h69f-586017g8h93f" />
	<Parameter name="client-secret" value="" />
	<Parameter name="scope" value="https://graph.microsoft.com/.default offline_access" />
	</Parameters>
	<Authentication>
		<OAuth2 authorise-url="{authorize-url}" token-url="{token-url}" client-id="{client-id}" client-secret="{client-secret}" grant-type="authorization_code" scope="{scope}" prompt="select_account" />
		<HttpHeader name="OData-Version" value="4.0" />
		<HttpHeader name="OData-MaxVersion" value="4.0" />
</Authentication>
You can also add headers to the body as part of the request wherever they are needed.
Authorization Header
You can add a Http Authorization Header by right clicking onto the Authentication folder and selecting Add Authorization Header from the options list.
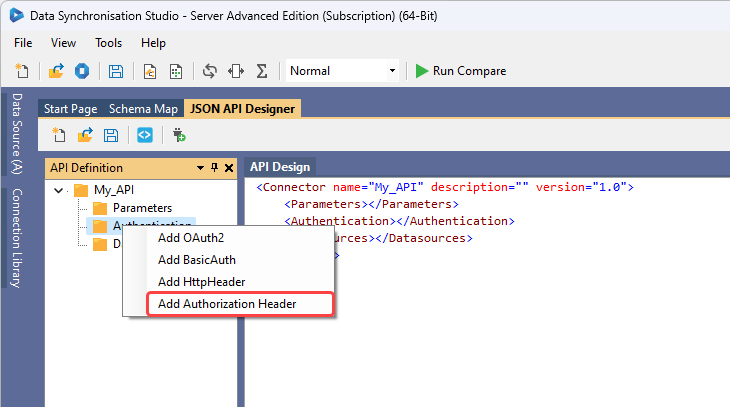
An example of how this would look can be seen below:
<Authentication>
 <AuthorizationHeader type="Bearer" token="{api-token}" />
</Authentication>
Project Automation
If you require calling an API to get an access token but the API is not OAuth2, and is instead a home grown API, then you can use Project Automation to call the API manually and setup the Authorization Header.
To do this enable Project Automation and implement the Start() method like this. This will call the Authentication API and add the access token to the API definition at runtime.
public override void Start()
{
	var helper = new  HttpWebRequestHelper();
	var response = helper.PostRequestAsJson(new { email = "username", password = "password" }, "https://localhost:2026/api/login");

	DataSourceA.AuthorizationHeader.Token = response["access_token"]?.ToObject<string>();
}