Upgrading Ouvvi from Version 4
Once you have downloaded and installed Data Sync V6 onto your machine and ensured that all of your local projects are running as expected, you can move onto upgrading your Ouvvi tenant.
If you have not yet installed Data Sync V6 and checked your local projects, please visit our Data Sync upgrade docs and these will guide you through updating your local projects.
We recommend before updating that you take a backup of your Ouvvi database, then you do not loose any of your projects.
You have two options when upgrading:
Upgrade Existing Site
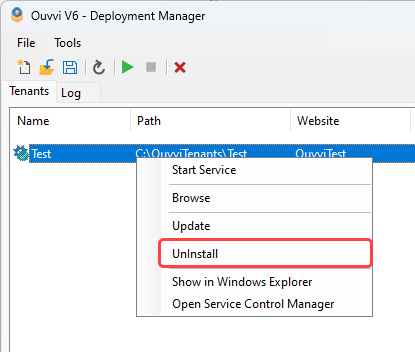
To upgrade your tenant from either V3 or V4 Ouvvi to V6 without creating a new tenant you will need to start by opening the deployment manager from Data Sync V6. To do this open Data Sync and go to Tools > Ouvvi Deployment Manager. Then right click onto your tenant and select Uninstall, this will remove the tenant files, uninstall the site from IIS but will leave the database untouched.

If you have not yet made a backup/copy of your Ouvvi database, please do so now.
Then right click onto your tenant and select Install from the list. This will update the Ouvvi tenant to V6.
You now need to browse to the site by right clicking and selecting Browse. Clicking onto any of the main pages will check for schema upgrades. If there are any schema upgrades to happen you will be redirected to the "Database Schema Error" page.

Click onto the Schema Upgrade Tool hyperlink and it will redirect you so that you can perform the schema upgrade.
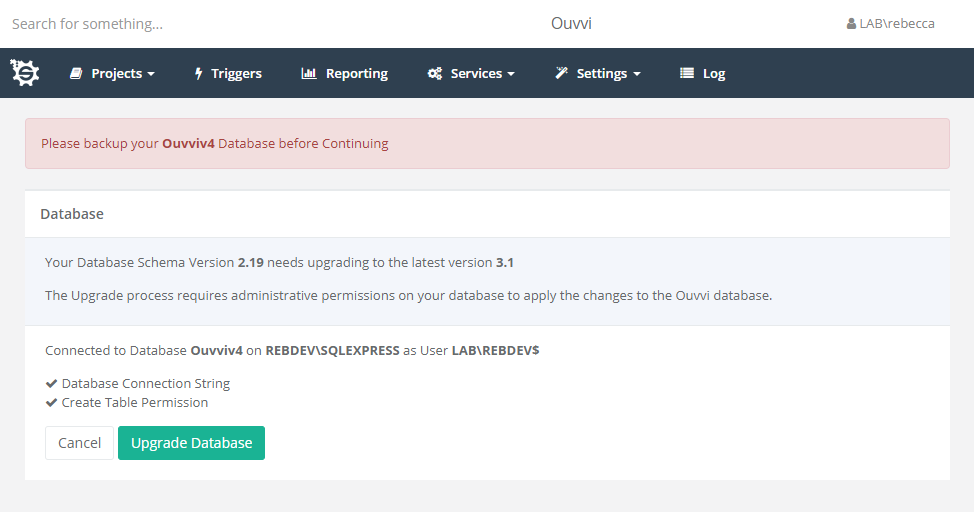
You should have already backed up your Ouvvi Database, however if you have not please do so now.
Click onto the Upgrade Database to run the upgrade.

When upgrading to V6 you may have to run through a few schema upgrades, as the changes are applied in stages depending on the version you were previously running. Keep repeating the upgrade process, you should notice the Schema version number increasing, and when it is complete you will be able to navigate to your projects overview page.
Once this is done you can proceed to start your services and check your projects are running.
Please note that as there have been some major changes in Data Sync, some of your Data Sync steps may not run without being edited. We have done our best to keep compatibility between the versions, however a few things are unavoidable.
If you have custom step handlers/connectors you will need to modify and re-compile the code to be compatible with V6. We have examples on github where you can see the code changes between the V3 branches and V6 branches in the Data Sync connectors.
You can read more details about upgrading Data Sync on the Data Sync upgrade docs.
If you find your Data Sync projects are opening from Ouvvi as V3 rather than V6, please check the windows default file association for *.dsprj files. If you choose Open with in Windows file explorer you can set the default program to be Data Sync V6.
Import Previous Tenant into New Ouvvi Tenant
If you want to upgrade Ouvvi but want to test a few things before committing then you will need to create a new tenant in the deployment manager and import your old configuration into the new tenant.
In your V4 Ouvvi you should navigate to the projects overview page and select Export from the menu. Then you need to select Solution Export and ensure that everything is selected. Click Export to save the solution file to your downloads older.
Now follow the installation guide for Ouvvi and create a new clean Ouvvi site. Make sure the services are running and you have installed and activated the license key.
You must make sure to stop the services on your Ouvvi V4 site to prevent the projects running in two locations. If you run the same project in two locations can lead to data loss and data being overwritten. Making sure that you only run the projects in one location saved you from lots of future issues.
For testing, if you are targeting the same endpoints (not dev and prod endpoints) then you can disable the projects and triggers in V6 until you are ready to test. When you come to test a project in V6, disable it in your V4 tenant and enable it in your V6 tenant.
Once the Ouvvi site is configured you can import the solution file you downloaded previously.
To do this open the All Project view page in the Ouvvi instance you are uploading into, and click Import in the sub menu.

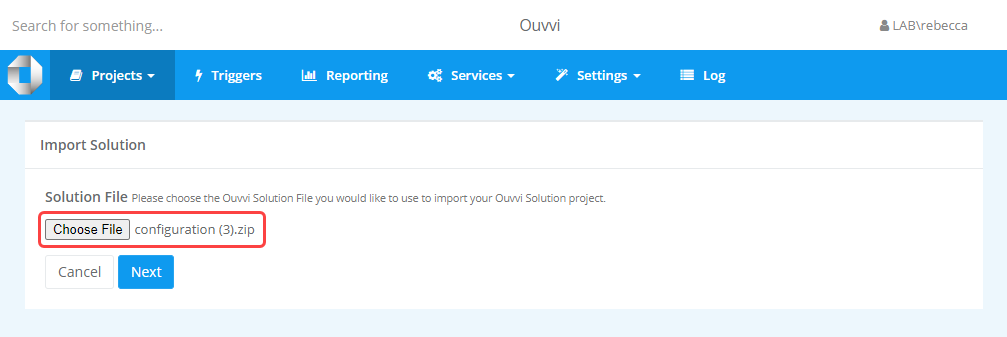
This will open the import view where you can select a file to import. Click onto the Choose File button to browse for your solution file in your the file explorer. Once you are done click Next to load the file.

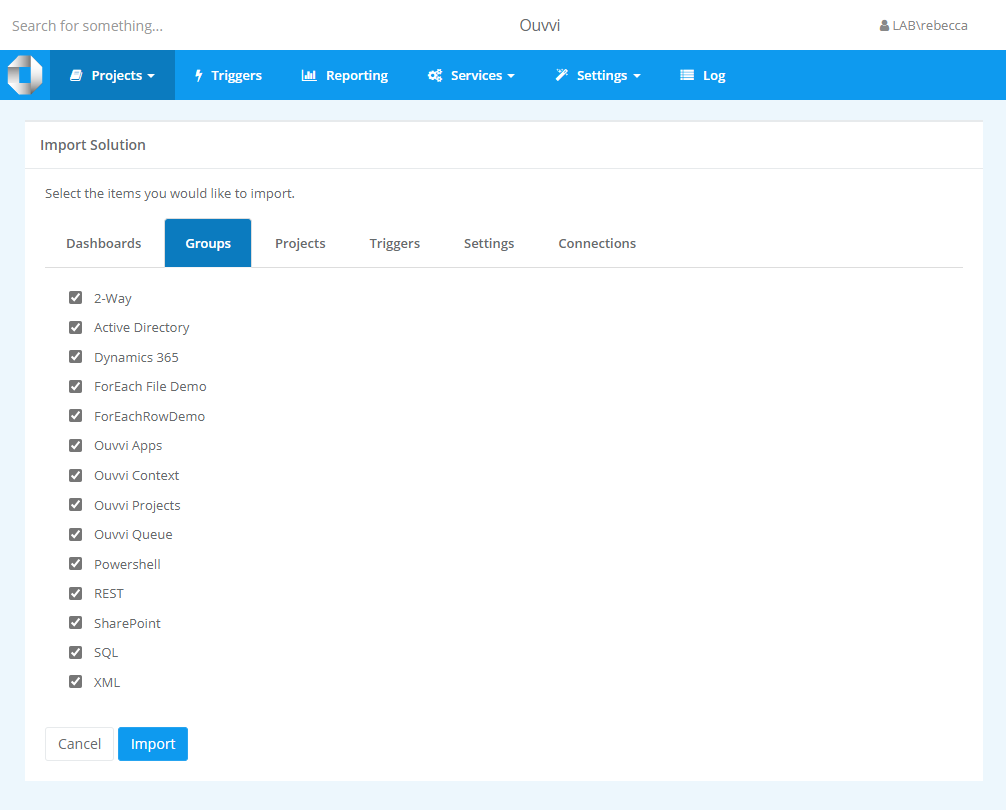
This will load the various sections within the solution file into a tabular view. Click through the tabs to check everything is included and correct. You can exclude items from the import by unchecking the checkbox.
When you are ready click Import to load the selected items.

Your files will have now been loaded and will be visible on their corresponding pages. I.E. Projects on the Projects page, Groups listed under projects and visible in the Groups Table etc.
You should now run through each step to ensure it opens in Data Sync and that there are no version errors (connectors not being installed etc). Once you are sure each project is correct and running you can start your services.