Single Machine Deployment - Default Installation
You can install Data Sync and Ouvvi onto the same machine and remote desktop into it to perform the tasks you need to.
The easiest way to do this is to use the default installation settings and keep the Web Front, Database and Agent running on the same machine.
The machine will be on your network and will be kept behind your firewalls.
Pre-requisites
The following install guide assumes that you have:
- Downloaded and Installed the latest version of Data Synchronisation Studio (V6)
- Your machine meets the system requirements:
- .NET Framework v4.7.2
- Windows 10, Windows Server 2016 or Higher
- IIS 7.5+
- Microsoft SQL Server Express, Standard, Web, Enterprise 2017 or Higher
- 2 GB RAM
- 1 CPU Core
- 50 GB Disk Space
- You have the appropriate admin permissions to configure the system.
Download Components
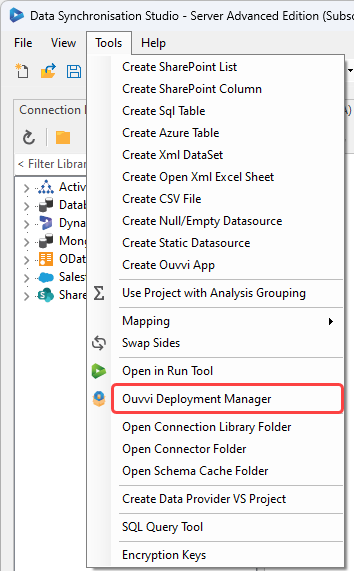
Ouvvi is installed via the Deployment Manager, which can be accessed via Data Sync. To open the Deployment Manager locate the Tools menu in Data Sync and click onto Ouvvi Deployment Manager.
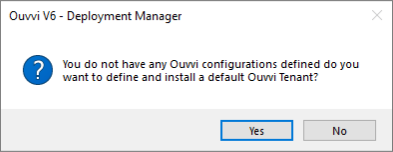
When the deployment manager has opened you will be given the option to define a default Ouvvi tenant. If you would like to use the default configuration as a starting point (this is what we would recommend) then click Yes to add it to the list.
Your tenant will now be visible in the list, and ready for you to define the configuration settings after the IIS components and SQL Express have been installed.

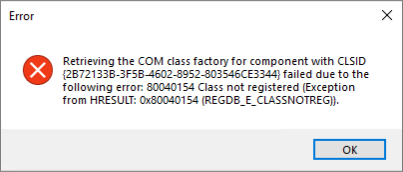
If you are installing onto a clean machine and IIS has not been installed before, you may get an error stating Retrieving the COM class factory for component with CLSID failed. You can ignore this, as it is erroring because IIS has not been installed before. Click OK to continue on to install IIS.
Install IIS Components
Before configuring your Ouvvi tenant you need to ensure that the necessary IIS components have been installed. To do this open the Tools menu and select Install IIS Components.
This will run the powershell script needed to install the components. Click enter when prompted to close the window.
Install SQL Express
If you do not have an existing SQL Server, you can install and use SQL Express to hold your Ouvvi database. If you do have SQL Server installed on your machine, you can skip this step. This guide assumes you do not have SQL Server.
To install SQL Express open the Tools menu and select Install SQL Express.
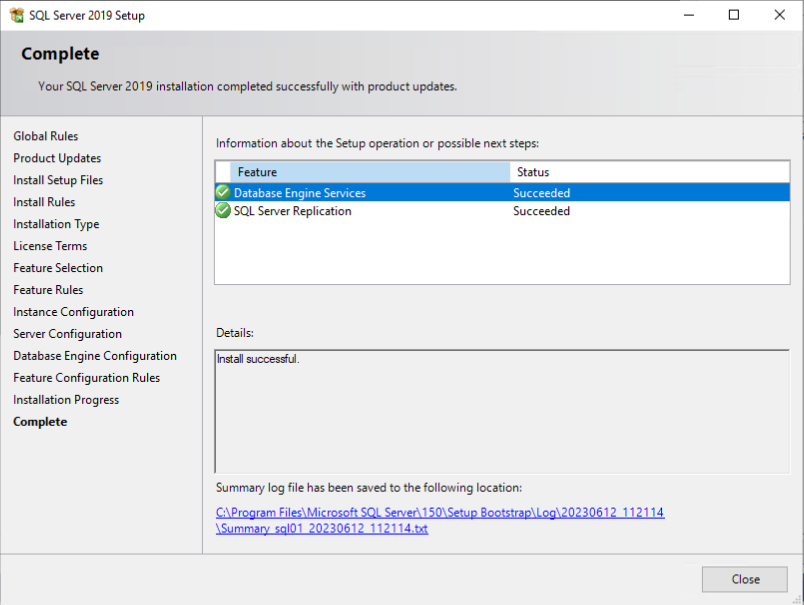
This will download SQL Express and open the installation window. Follow through the installer and change any configuration settings as required. Alternatively you can use the default settings and keep clicking Next. The default settings were used for this installation.
Configuration
The next step is to ensure the tenant configuration is correct before installing. This includes items such as the site name, database and service user credentials.
Double click onto the tenant in the deployment manager to open the Configuration Window.
At the top of the window is the details of the tenant name, the location the tenant files can be found at, and the authentication type.
The default is Windows Authentication which will use the local machine accounts. To read more on authentication types please see our page here.
Website
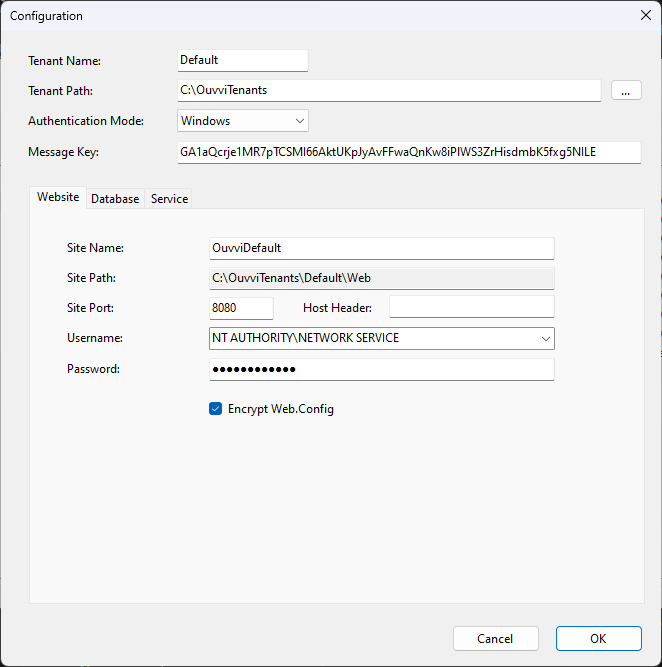
The first tab to open is the Website details. Here you can change the name of your Ouvvi site, the port it opens on and define a Windows Service account that will be the IISAppPool Identity used to authenticate with the Ouvvi database.
For this setup, where everything is on the same machine and you are using SQL Express, we recommend keeping the Windows Service Account as the default Network Service
Database
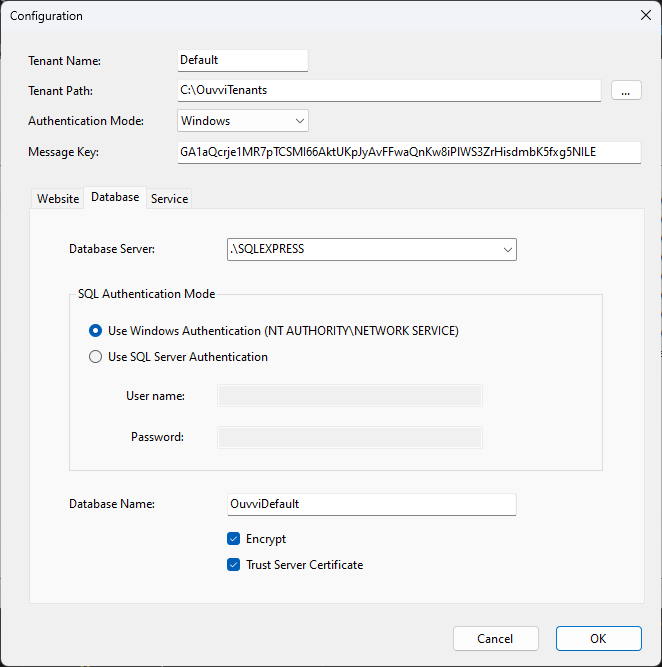
The Database tab enables you to define the connection to your SQL Express instance and the name for your Ouvvi Database.
Ouvvi uses the database to hold all of the site configuration. Such as your projects, steps, triggers and connections.
This tab should pre-populate with the details of your SQl Express Database which should look similar to .\SQLEXPRESS where the .\ means that the current machine context is used.
If you want to change the name of the Database that will be created please do so now by editing the value in the Database Name field.
You may also need to check the Encrypt and Trust Server Certificate checkboxes to be able to connect.
Service
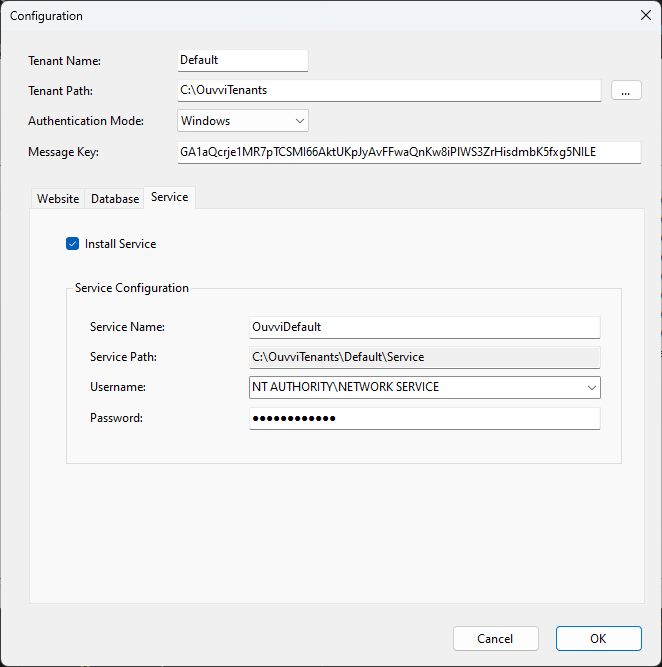
The Service tab allows you to configure the Service User account. This is the account that will be used as the security context to run the step within Ouvvi. In this example we use the default Network Service, which is a machine account and can be used the access local machine resources and internet based services with a username and password.
For local domain services, SQL Servers, SharePoint Server, File Shares etc a Domain User account must be used.
To change this from the default please read about how to edit the service user and the considerations on our page here. We will also cover setting a different service user in a different installation guide (Cloud Typical Deployment).
You can change the name of the service, this is the name that will show in the Windows Services manager. However for this example and for a single machine setup you can keep the default settings.
Install
Now that the configuration is complete, right click onto the tenant and select install. This will install the site and allow you to browse to it.
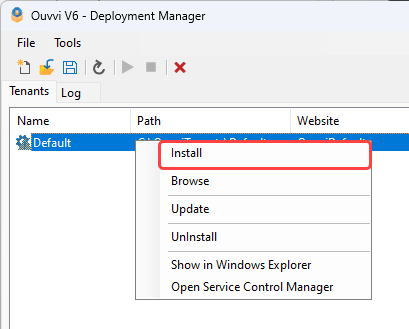
You can check that the instance installed by looking at the icon to the left, if the install was successful there will be a green tick next to the cog rather than the warning triangle.
Browse
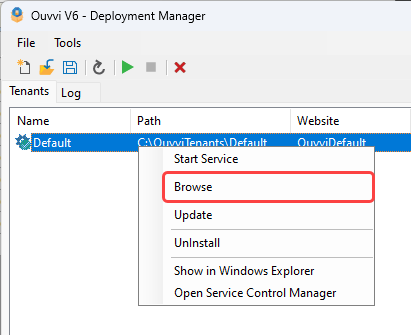
To complete the setup you need to browse to the site. Do this by right clicking onto the tenant and selecting Browse, which will open the setup page in your default browser.
Setup Page
On the setup page you can check that the final settings are correct before setting up your Ouvvi site.
As we selected Windows Authentication in the configuration the only Authentication Mode available is Windows Integrated.
You can also change the regional settings such as the Locale and the Timezone.
You should also check that there are no errors in the Database section. If there are it is usually that the user does not have read-write permissions to create the tables within the Ouvvi database. However as this is using a new SQL Express install this shouldn't be an issue.
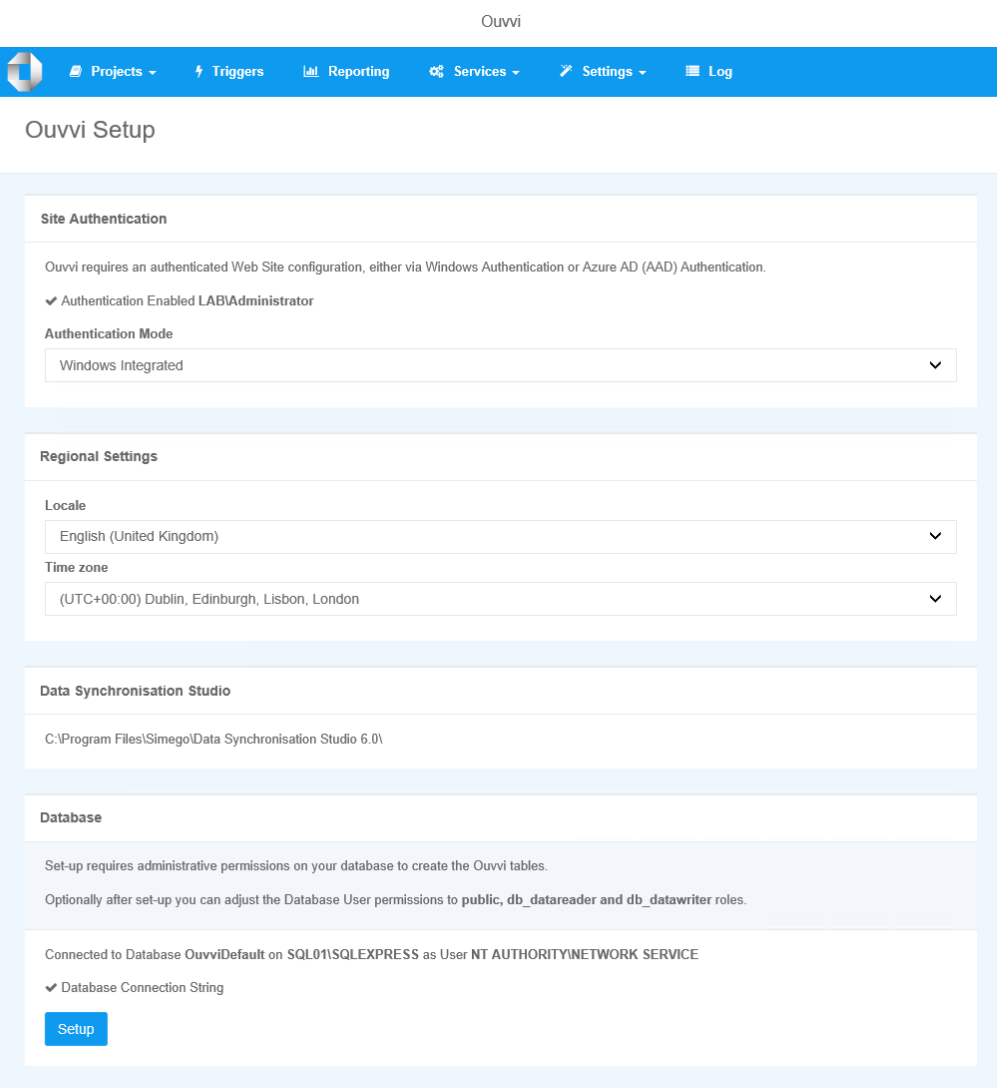
Once you are certain everything is correct click Setup to create the tables and you will then be redirected to the Ouvvi homepage.
License Key
You now need to enter your license key to activate Ouvvi to allow you to run and schedule your projects.
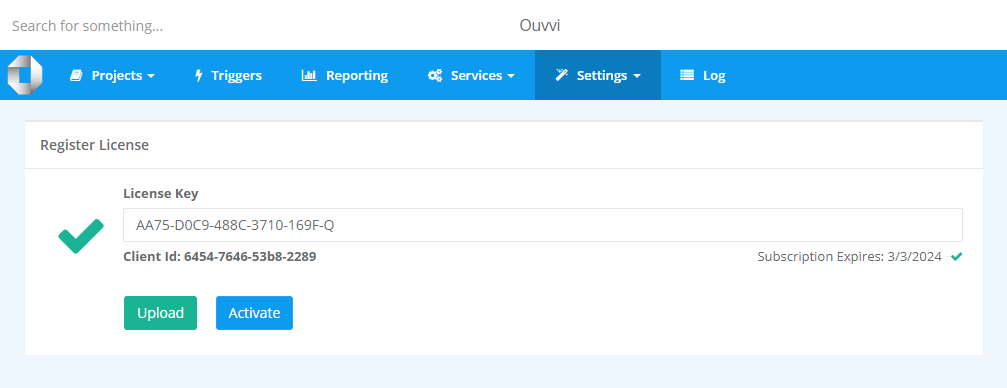
Either click onto the Activate link in the banner at the top or open the Settings Menu and select Register License.
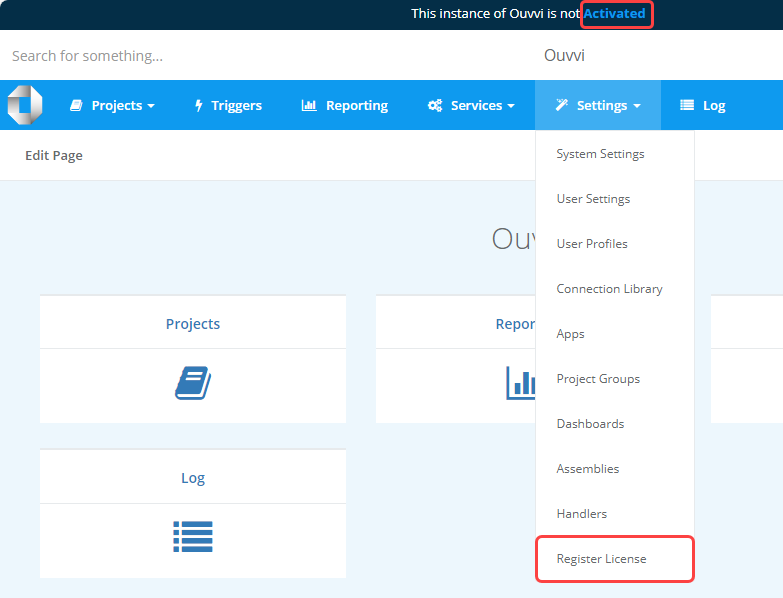
These links will open the license registration page where you can enter your license key into the field. Make sure to click Activate to apply the license.
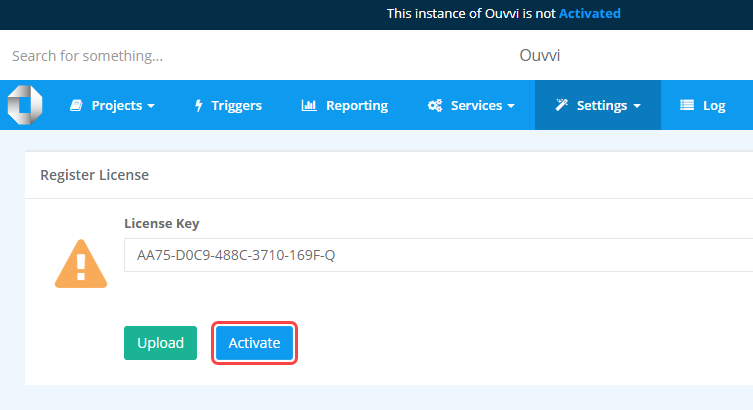
The page will show a green tick to the left and the expiry date to the right if it activated without errors.
Service
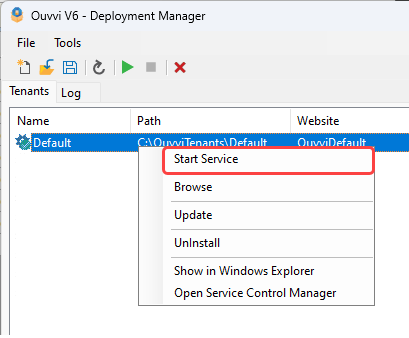
You can now go back to the Deployment Manager and start the services. For the first time you start them it is best to right click onto the tenant and select Start Service.
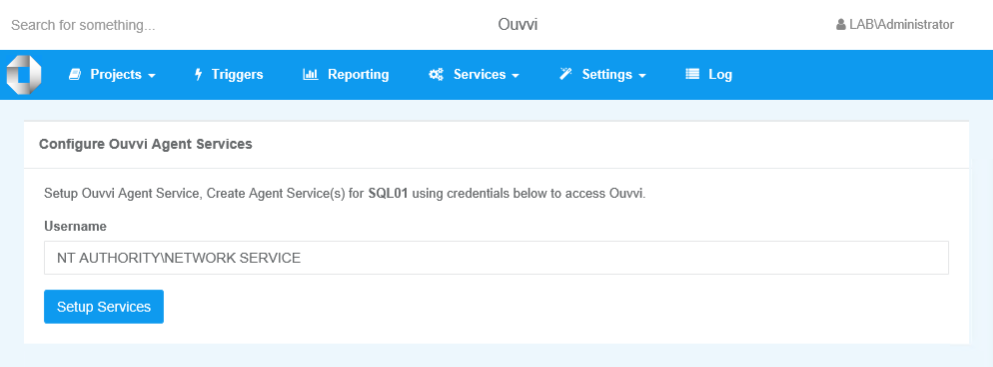
This will open the browser to the Agent Service configuration page to allow you to setup the services. Click onto Setup Services to setup and start the service.
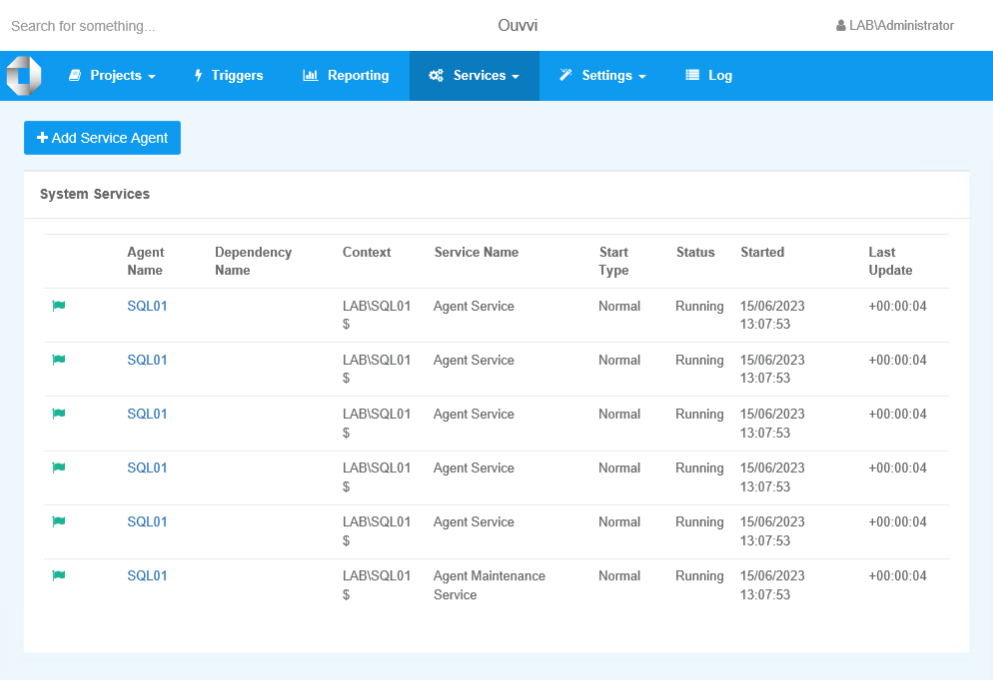
The page will redirect to the services table where you can see green flags which means the services are running.
You can now go on to create your projects and steps as needed. Take a look at our getting started for a guide on how to configure your first project and add the steps.
Save the Configuration
To make sure you can access the tenant you have just created go back to the deployment manager and click Save to keep the tenant in the list. You can either use the Save icon in the toolbar or you can open the File menu and select Save.
If you have closed the deployment manager before saving then you can follow the Import Tenant instructions to import the tenant you have created back into the deployment manager.