Mongo DB
To connect to Mongo DB you need to start by installing the Mongo connector from the Simego GitHub page.
This connector has two Mongo connectors that will be installed side by side:
The first enables you to connect to a collection inside Mongo DB by providing the connection string, selecting the database and then selecting the collection to connect to.
The second, the Podio Data connector, enables you to read Podio App Items data stored within your Mongo collection.
Installing
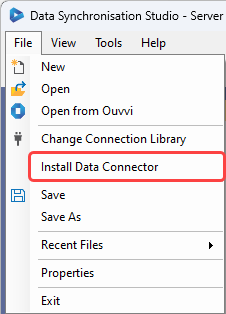
We have a connector installer inside Data Sync that will download and install the relevant files for you to make this easier. To do this open the File menu and select Install Data Connector.
This will open the Connector Installer Window, where you need to select the connector you want to install from the drop down and click OK. In this case we select MongoDb from the dropdown.
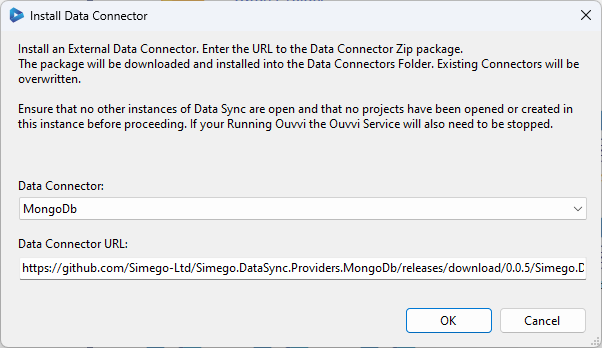
If you get an error saying it could not install the connector because it is "Unable to access folder", then this is because the folder is locked by Ouvvi. Please stop your Ouvvi services and try again.
If it was successful you should get a confirmation popup and you now need to close all instances of Data Sync and then re-start the program.
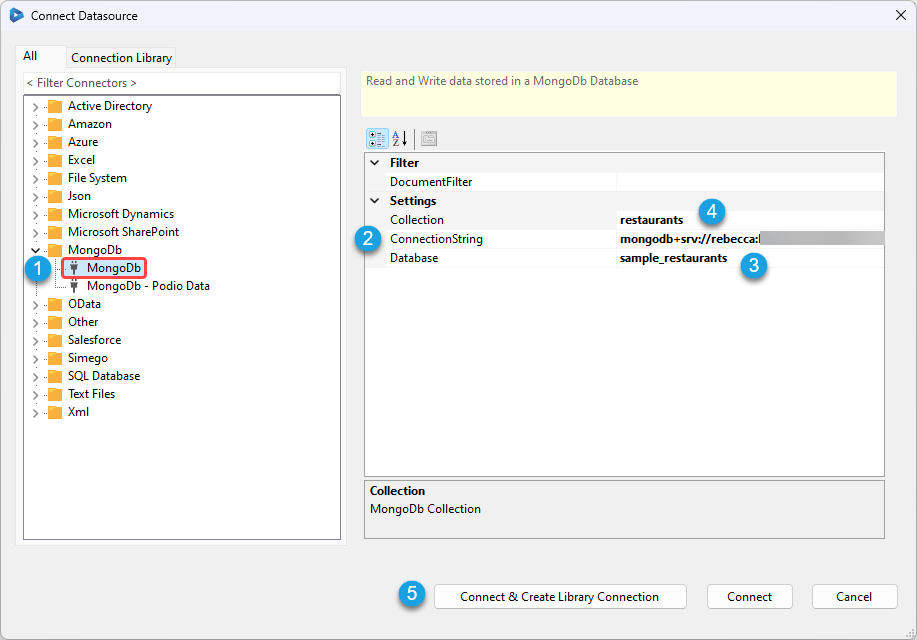
You can then access the connectors by expanding the Mongo folder and selecting Mongo.
Using the Connector (Mongo DB)
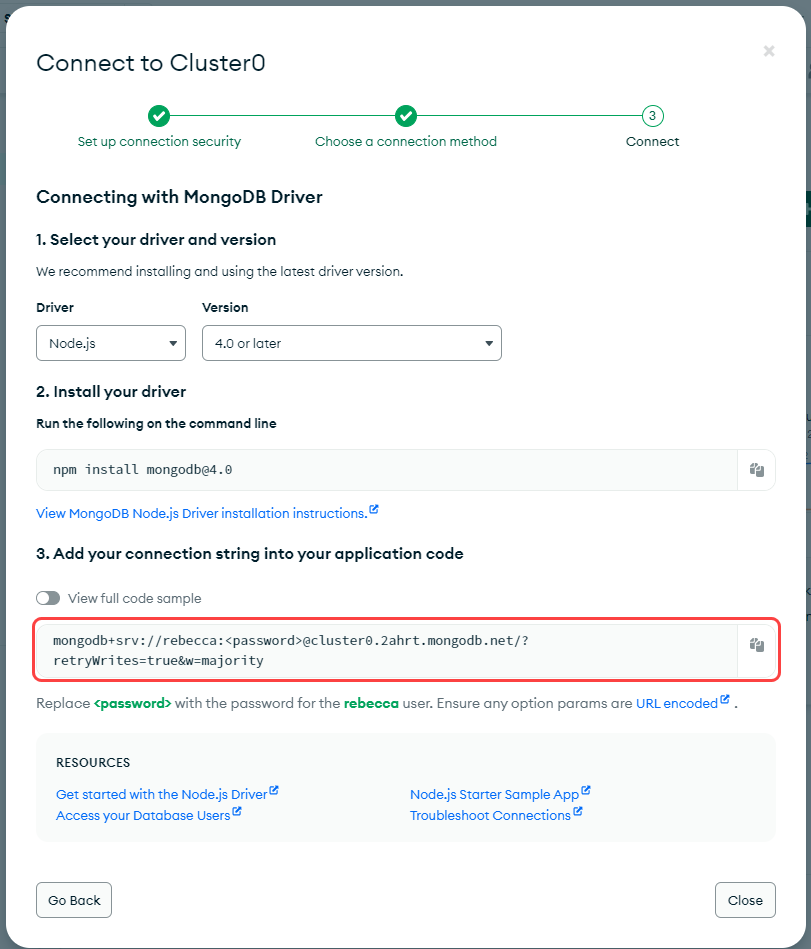
To connect to your Mongo databases you will need your connection string. You can find this in Mongo by going to Databases > Connect > Drivers.
Copy the connection string and make sure to edit it so that you change <password> to use your actual password.
Enter this connection string into the ConnectionString field. If the connection string is valid you should now be able to view a list of your Databases in the Database drop down. Select the database to connect to and then select the Collection you want to connect to.
Once you are done click Connect & Create Library Connection to save the connection to your Mongo DB in the connection library. This means you can use it again in another project and access all of your collections from the connection library.
Getting Data into a Clean Database
If you have a clean collection in your database with no data in it, you will need to ensure that one document is added to Mongo so then Data Sync can discover a schema (the columns). One record needs to be uploaded as a JSON file into your collection.
To get a JSON file filter the source data to return one record e.g. productid == 1.
Then go to the schema map and click onto Preview A, and then click onto the Export JSON button in the preview tab.

Open this file and copy the data from within the array, then go to Mongo to import it.
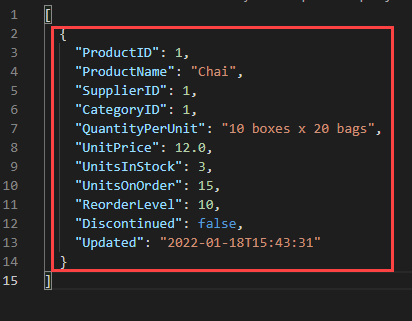
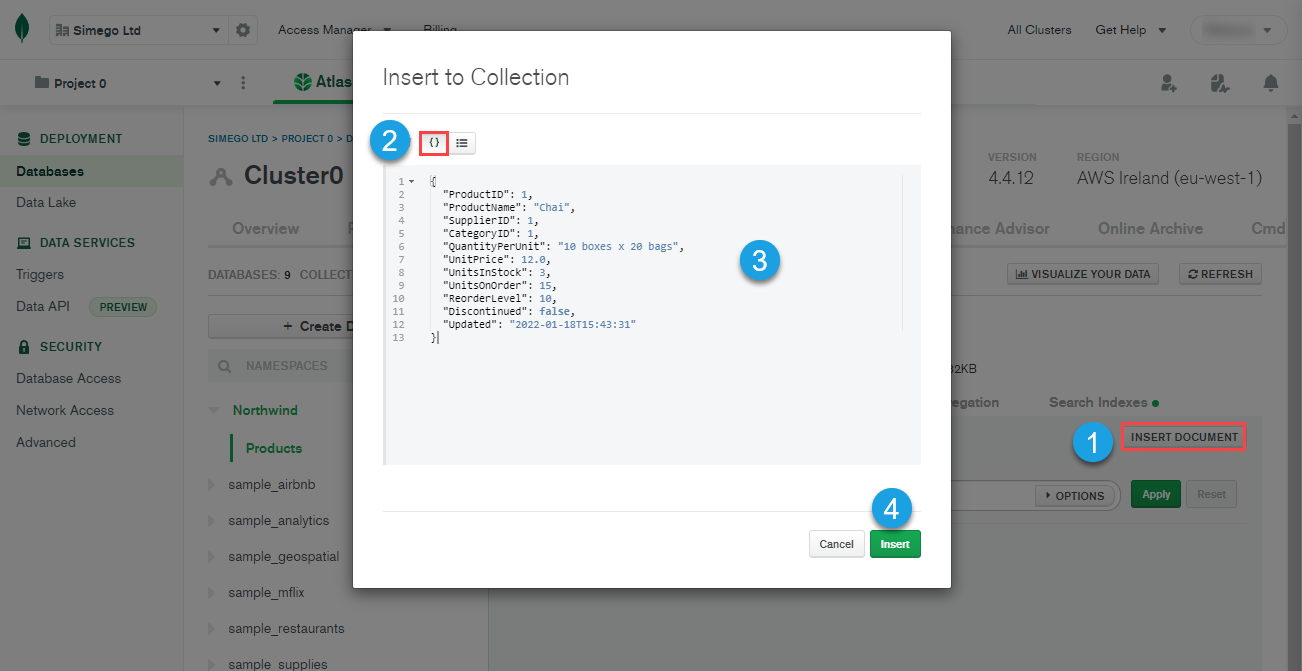
In Mongo, click onto your collection and then select INSERT DOCUMENT. Click onto the curly braces to switch to the JSON view, remove the text already there and paste the JSON we copied a moment ago into the window. Click Insert to insert it.
Now in Data Sync, refresh your connection by clicking onto the refresh button in the data source toolbar. You should now have columns available and ready to map.
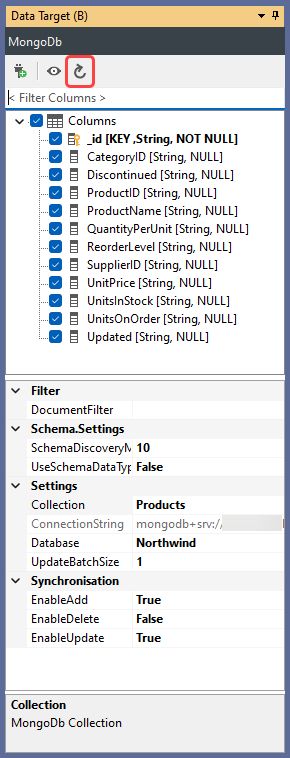
If you already have data in the collection, with all the columns you need, then you can simply connect and map the source columns to the columns in Mongo.
To get data out of Mongo simply switch the sides. Make the source your Mongo connection and your target the datasource you want the data in.
Using the Connector (Mongo - Podio Data)
To connect to Mongo to extract Podio Data you would follow the same process as above except using the Mongo DB - Podio Data connector.
This will add an additional connection property PodioDataElement where it defines that the Podio data is contained within a JSON element in Mongo DB.