Connection details for MySQL Database
To connect to MySQL you need to start by installing the MySQL connector from the Simego GitHub page.
Install the Connector
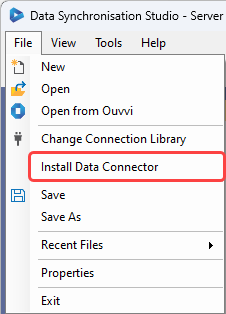
We have a connector installer inside Data Sync that will download and install the relevant files for you to make this easier. To do this open the File menu and select Install Data Connector.
This will open the Connector Installer Window, where you need to select the connector you want to install from the drop down and click OK. In this case we select MySQL from the dropdown.
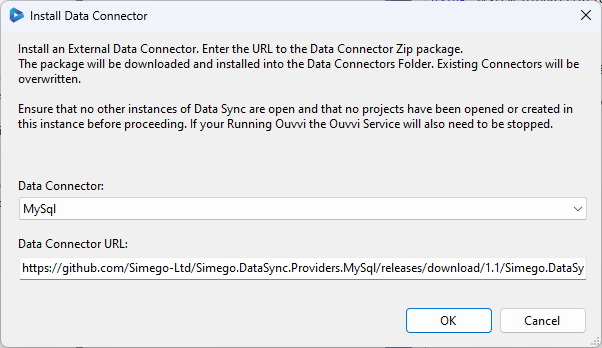
If you get an error saying it could not install the connector because it is "Unable to access folder", then this is because the folder is locked by Ouvvi. Please stop your Ouvvi services and try again.
If it was successful you should get a confirmation popup and you now need to close all instances of Data Sync and then re-start the program.
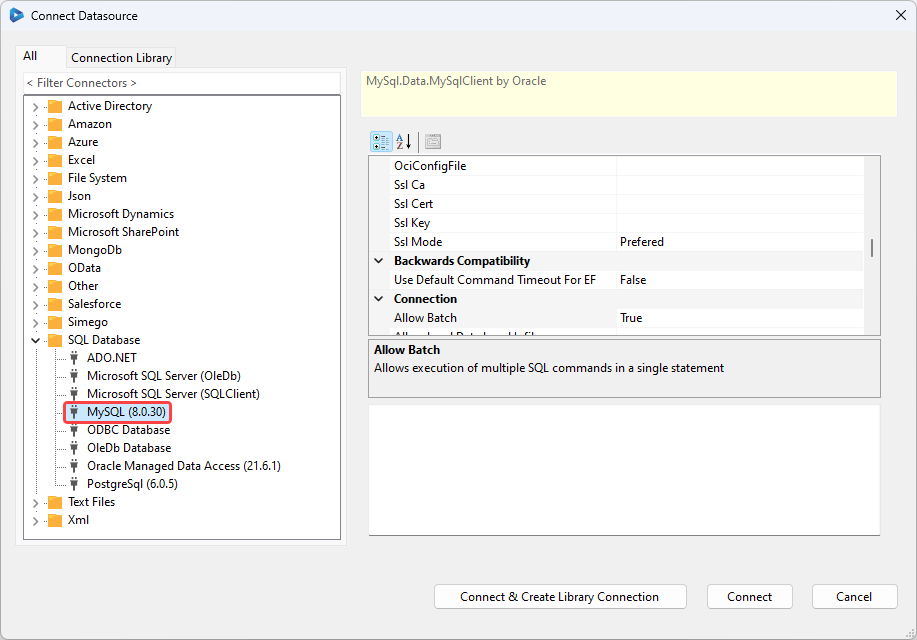
You can then access the connector by expanding the SQL Database folder and selecting MySQL. The numbers contained in the brackets are the driver version the connector is targeting. If you are after targeting a newer driver please contact us via support@simego.com.
Using the Connector
Once the connector is installed you can connect to your MySQL database by opening the connection window and going to SQL Database > MySQL.
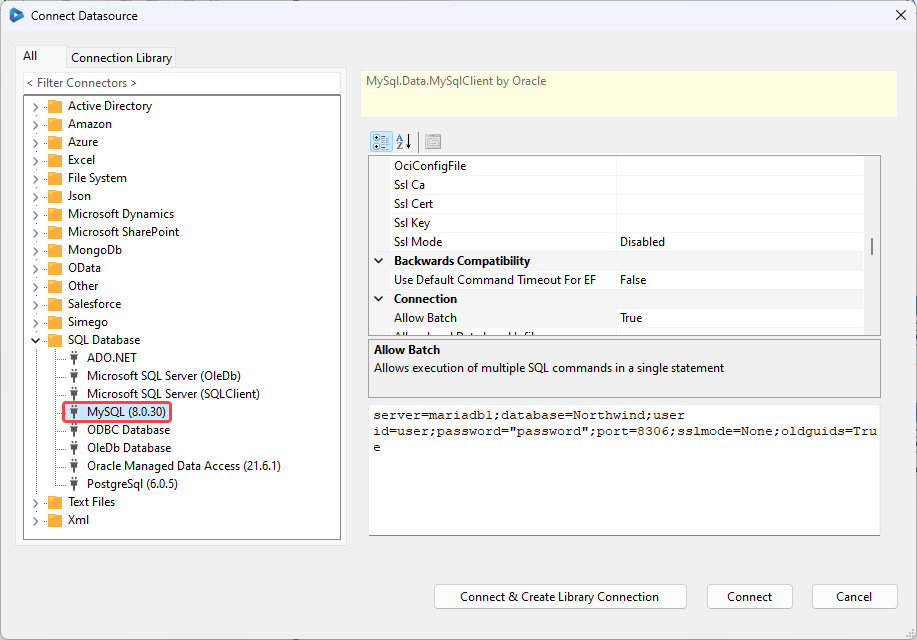
You can then either enter in your connection string into the text box or you can build it out using the connection properties.
An example of the connection string you might use is:
Server=myServerAddress;Database=myDataBase;Uid=myUsername;Pwd=myPassword;
For our connection we use the connection string:
server=mariadb1;database=Northwind;user id=user;password="password";port=8306;sslmode=None;oldguids=True
For more ideas on generating your connection string we recommend visiting ConnectionStrings.com.
You can then click Connect & Create Library Connection to save this to the connection library so that you can use it again in other projects.
It will first open a new window where you need to expand the tree to select a table to connect to, click OK once you have selected the table.
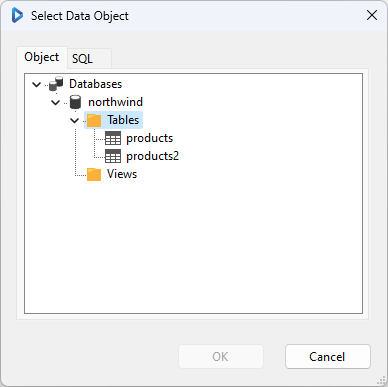
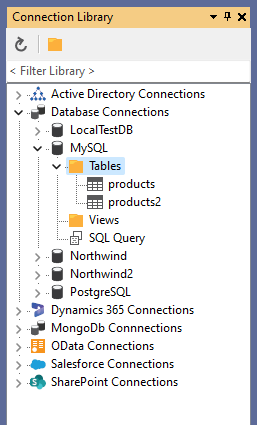
Then enter in a name for your connection and an optional description. Once it has been saved, you can refresh the connection library and under Databases you will now be able to see your MySQL database connection and expand it to select a table to connect to.
For more details on how to connect please take a look at the ADO.net connector page as this is what the connector is based upon.