User Settings
User settings in Ouvvi provide a convenient and efficient way to configure projects, steps, and specific settings within the platform. They offer a streamlined approach to defining properties that can be easily utilised throughout your Ouvvi site, eliminating the need to repeatedly specify the complete property details.
Imagine a scenario where you have a specific file location that needs to be referenced in multiple locations. If this file location ever changes, you would typically need to update it in every individual project or step. However, with user settings, you can define the file location once and then reference it as needed within each project or step. Any modifications made to the user setting will automatically propagate to all instances where it is used.
This powerful feature simplifies the management of shared configurations and ensures that changes to critical settings are effortlessly applied across your Ouvvi site. By leveraging user settings, you can maintain consistency, enhance efficiency, and easily adapt to evolving requirements without the hassle of manually updating multiple references.
User settings can have different visibility settings:
- Visible : Users can see the value in the user settings table.
- Hidden : The value is hidden with asterisks (
*). - Connection String: Use this if the value is a connection string so that it is handled correctly by Ouvvi when used.
- Encrypted: Encrypts the value, so when the setting is opened the value shown is in its encrypted form and not understandable.
Below you will find how to create a new user setting, edit a user setting, delete a user setting and how to use user settings within Ouvvi.
Adding a New User Setting
To add a new user setting start by opening the Settings menu and selecting User Settings.
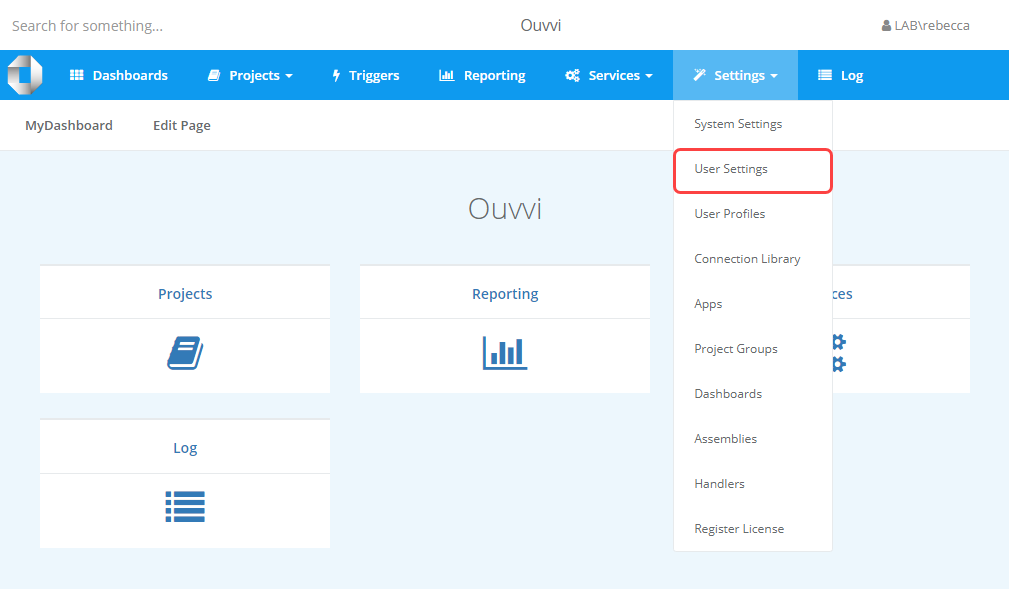
Then click onto the Add Settings button which is found below the navigation toolbar.
This will open a popup window where you can define the setting you want to add. In the example shown below we are adding a file location to be used in a few project such as a for each file project.
Simply enter in a name, an optional description and value for the setting and choose if you want this setting to be visible, hidden, connection string or encrypted.
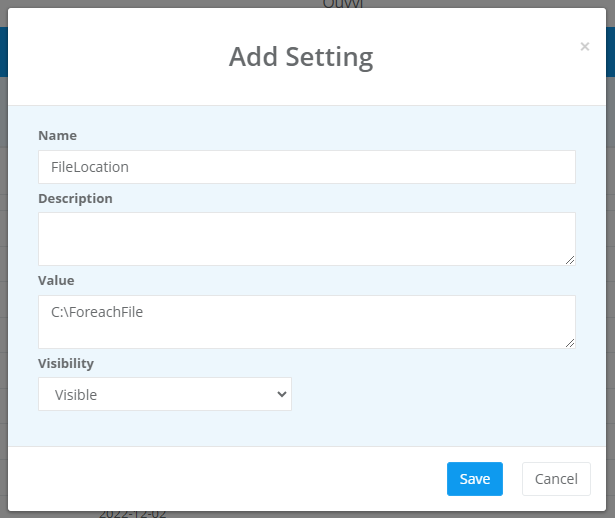
Once you are done press Save to create the user setting.
Editing a User Setting
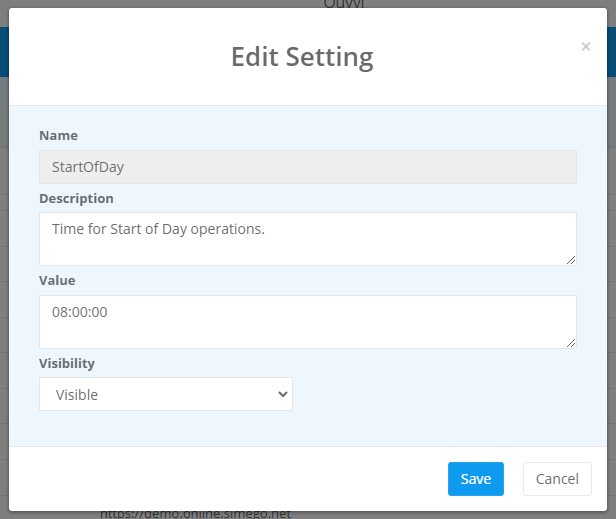
To edit a user setting, navigate to the User Settings page under the Settings menu and click on the name of the setting you wish to edit. This will open a popup window where you can edit the settings. Make the desired changes and click Save to apply the changes.
Deleting a User Setting
To delete a user setting, navigate to the User Settings page under the Settings menu and find the setting to be deleted.
Now click onto the X next to the setting to be deleted.
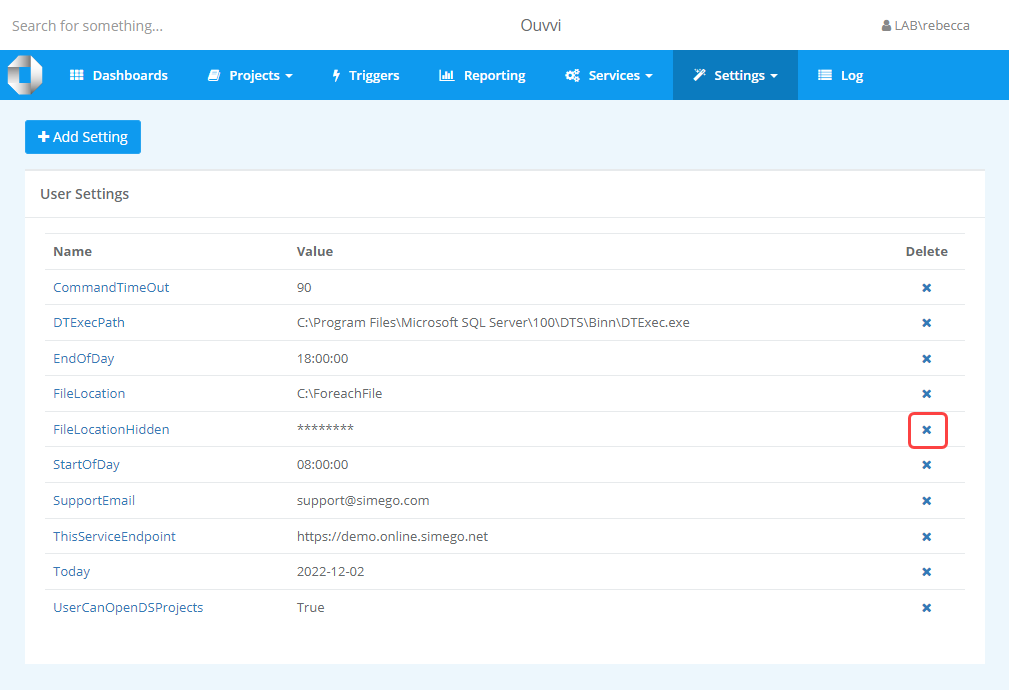
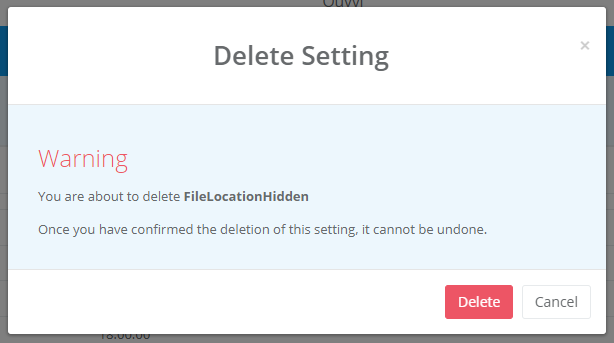
This will open a confirmation popup, where if you are sure you wish to delete the setting, click Delete to confirm.
Using a User Setting
User settings can be used within step and trigger configurations, as well as in some connection configurations. They can be used within certain property fields throughout Ouvvi by entering the user setting name contained within double curly brackets. For example : The user setting MyConnectionString would be used as {{MyConnectionString}}.
Wherever it is possible to apply a user setting within a step, project or trigger a cog will be present at the end of the configuration setting text box.
You can click on this cog to open a string builder, where you can select your user setting from the list. Note that you can use multiple settings from the string builder.
Alternatively you can type the user setting in manually, just make sure to include the double braces at either side and that there are no typos.
Below we have two examples of using user settings, the first is within a SQL Trigger and the second is within a project step. They each assume that you have created the user settings using the steps described previously.
Configuring a SQL Trigger:
On the triggers page click onto the Add Trigger button to create a new trigger.
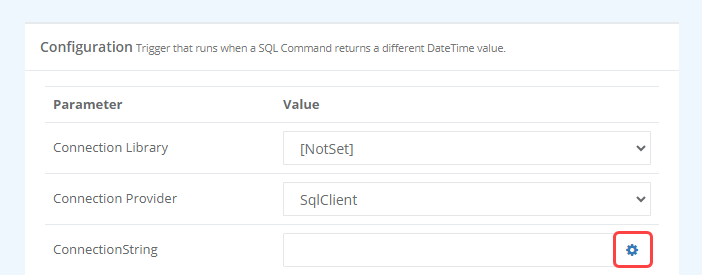
Now select the SQL Trigger from the list and enter in a name and optional description. Click on the cog to open the string builder.
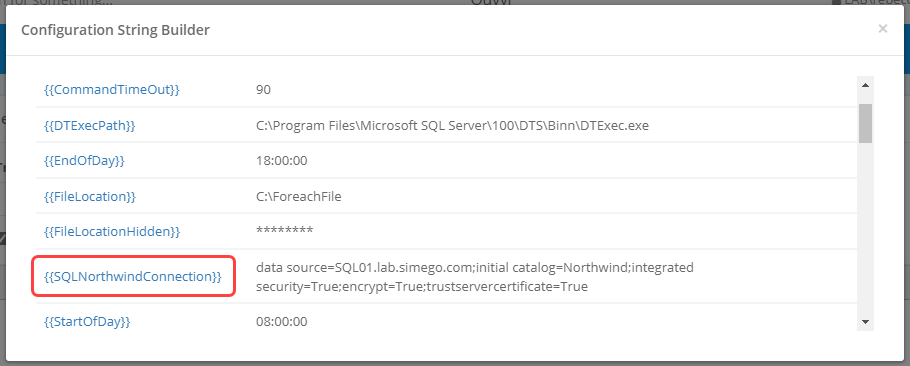
And then choose the user setting from the list, in this case we are using the setting SQLNorthwindConnection.
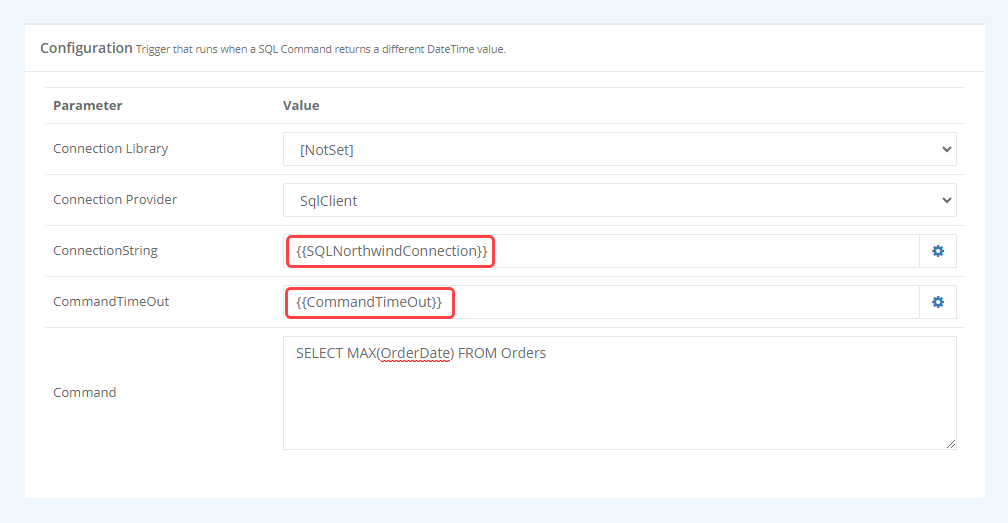
Below you can see that the configuration uses the {{SQLNorthwindConnection}} user setting to set the connection string (rather than using the connection library) and the {{CommandTimeOut}} user setting to set the command time out to 90 seconds.
Click Save to create the trigger.
Configuring a For Each File Step:
In your project add a ForEachFile step. Once the edit step page has opened complete the details for the step name and a description (if you want one).
Then click onto the cog next to the Path field to open the string builder.
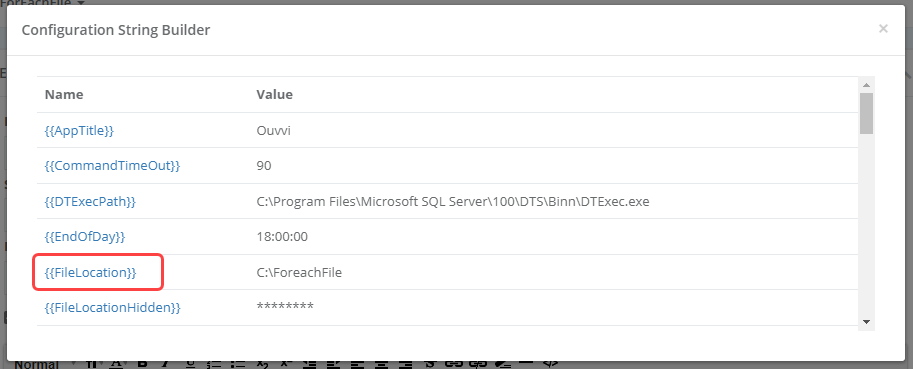
Once the string builder popup has opened you can select the name of user setting needed, in this case it is the FileLocation. Once you are done click the X in the top right of the window to close it.
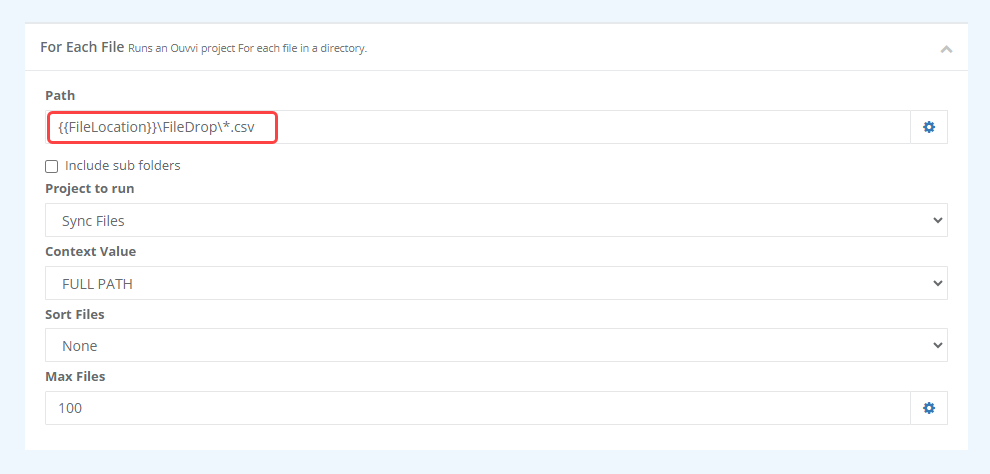
If needed you can append additional data onto the user setting. In this example we have extended the path past the user setting to look for CSV files within that location.
Make sure to click Save to create and save the step.