Schedule your Run Tool Projects with Ouvvi
To use Ouvvi to schedule your Run Tool projects you will need to have first installed Ouvvi. If you haven't already done this you can find the details on installing Ouvvi here.
By default this will use the Connection Library where the Ouvvi Processing Service is running from, not the Ouvvi Connection Library. You will need to add any required connections to the Ouvvi Connection Library or define the connection library path in the project.
Create the Project
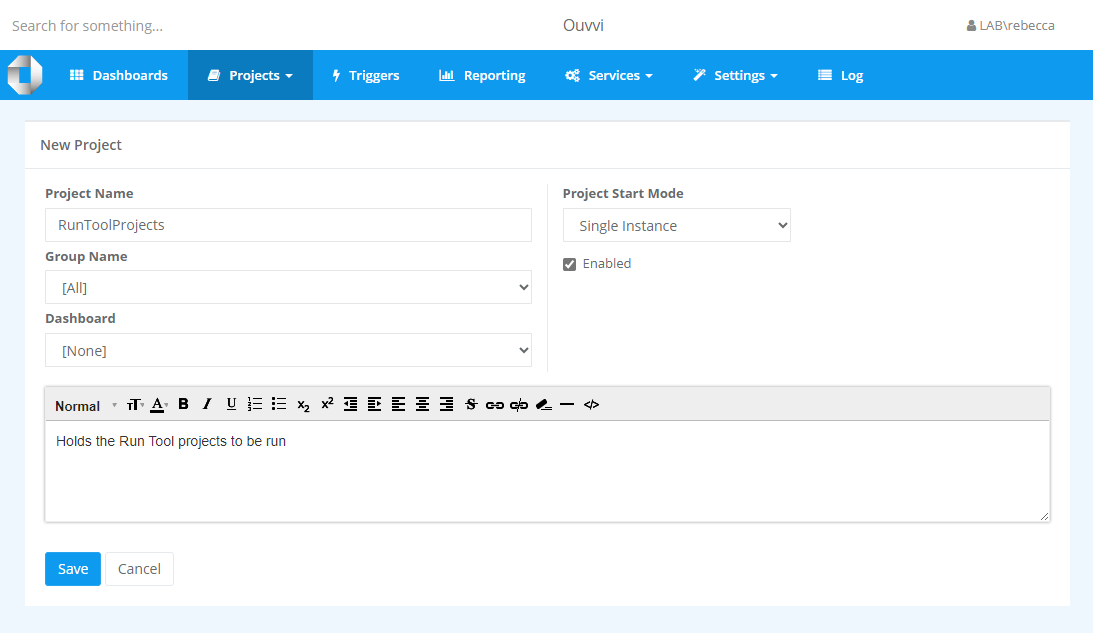
To get started you need to browse to your Ouvvi sire and create an Ouvvi project to hold your Run Tool project. You can do this by navigating to the Projects page and selecting New from the submenu.

Enter a name for your project and an optional description, then click Save to create the project.
Add the Run Tool Project
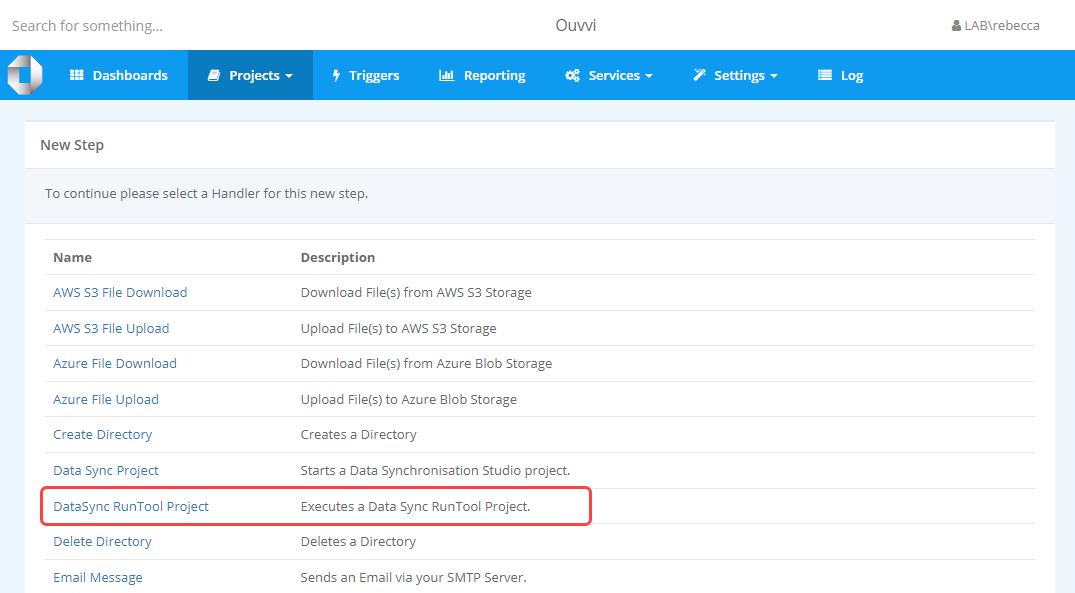
Now you need to add the Run Tool project as a step. Within the project you just created click onto Add Step in the toolbar, then More... to open the step type list.

Then select Data Sync RunTool Project from the list.
At a minimum you need to enter a name for the step and the full path to the Run Tool project to be scheduled in the Project Filename field.
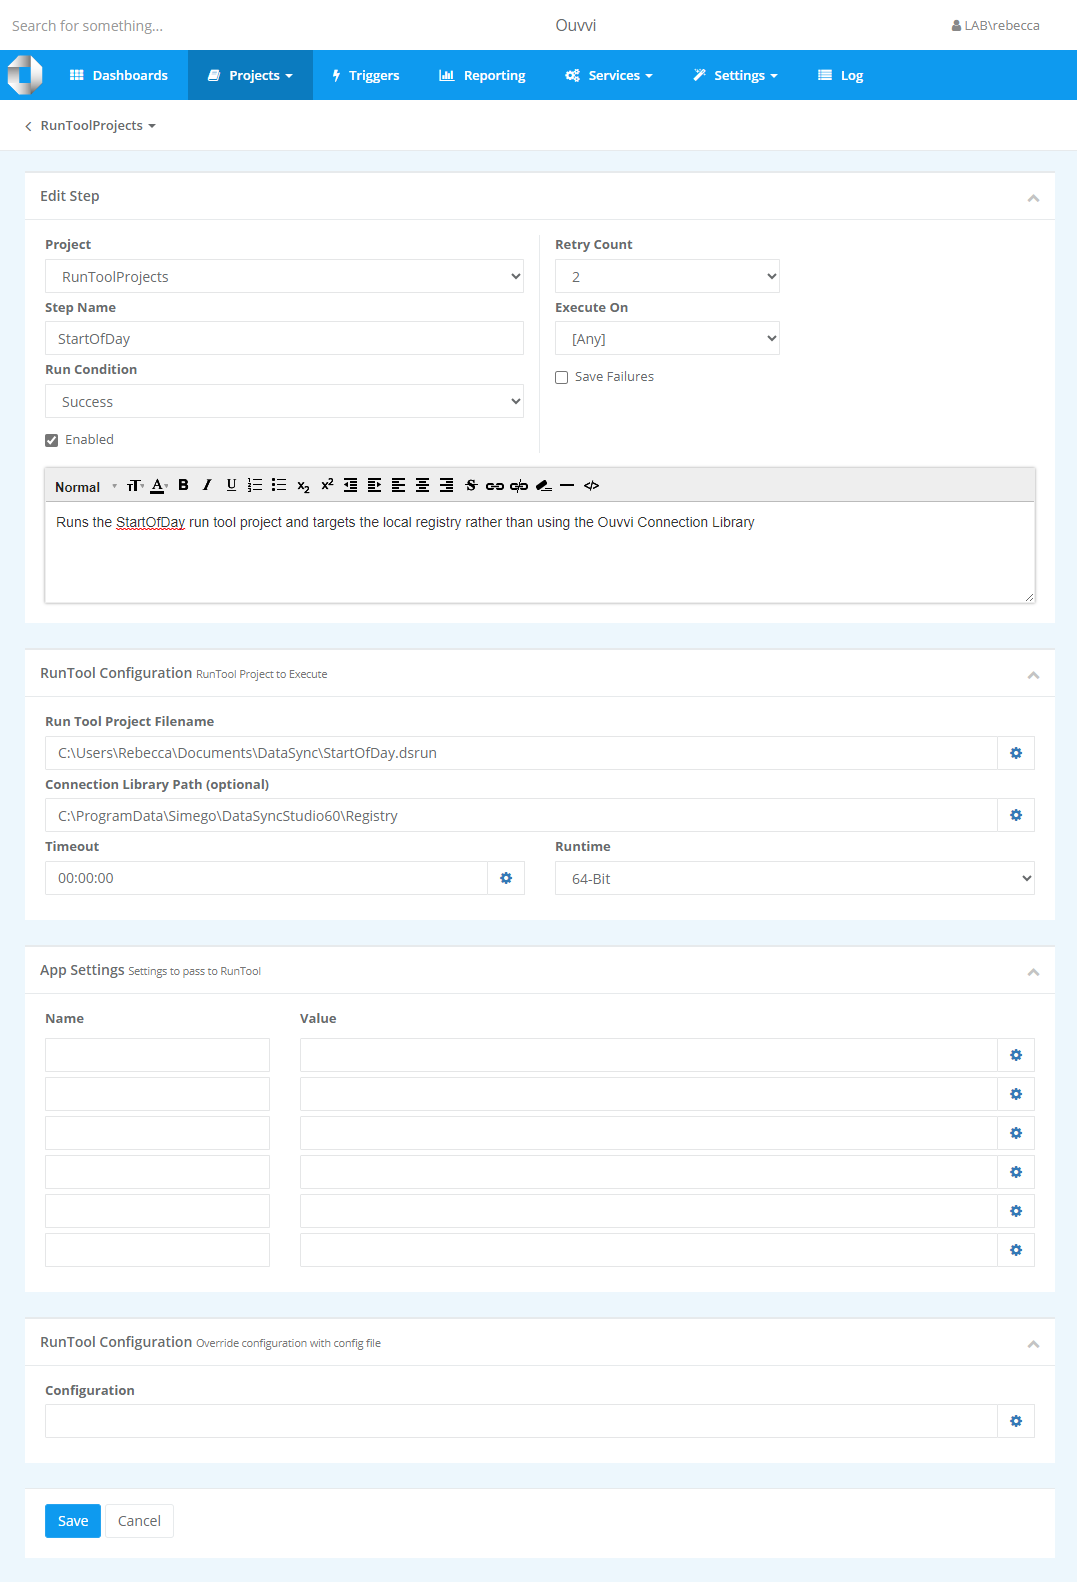
Details on the other configuration options can be found in the table below.
| Setting | Description |
|---|---|
| Connection Library Path | You can specify the path to the connection library that should be used if the connections are not stored in the Ouvvi connection library and you do not want to re-map the Ouvvi Connection Library to use the local registry. |
| Timeout | The time it takes for the project to timeout. |
| Runtime | Specify whether the 64 bit or 32 bit Run Tool should be targeted when this step is run. By default the 64 bit is targeted. |
| App Settings | To add any Ouvvi App Settings to the Run Tool project add each of them as a new line. |
| Configuration | Add any details you want to override the config file with. |
Once you are done click Save to save and create the step.
Test the Project Runs
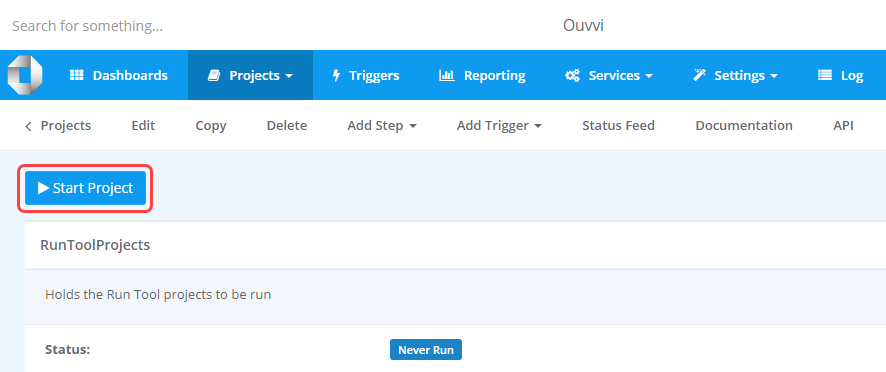
It is good practice to try running the project to make sure it runs as expected. To do this click the Start button on the project overview page.
If you get any errors make sure to check the log to see the specific error thrown. It might be that the Ouvvi agent does not have permission to access the file location.
Add the Schedule
Once the project is configured and running without any issues, we need to add a trigger to schedule it to run.
You can make use of the full Ouvvi trigger library to schedule this either by event based or time based triggers.
To add a trigger go to Add Trigger and either select the trigger from the list or click on more... to configure a new trigger. Select and configure the trigger you need and then add this to your project.
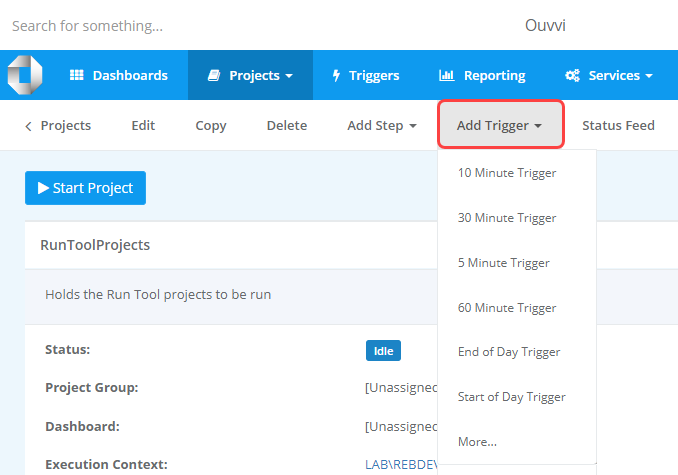
For more details on Triggers, please see our documentation here.
Troubleshooting
If you are finding the project errors with the error RunTool Project file not found then it is most likely that the agent cannot access the location where the Run Tool project is stored.

The first thing to do is check that the service user identity has access to the path of where the Run Tool project is stored. You may find that it is either a different user or the agent is running as Network Service.
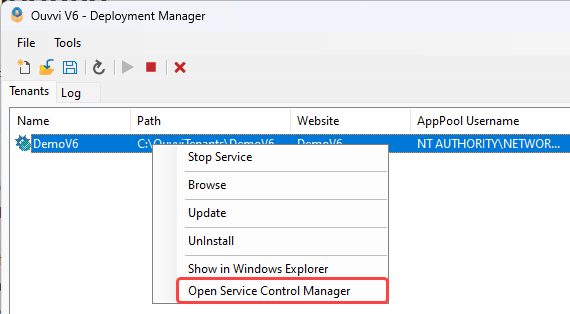
To change the user from Network Service to a specific user open the deployment manager and right click onto your Ouvvi instance. Select Open Service Control Manager from the list and then locate your Ouvvi Service.
Double click onto the service and go to the Log On tab. Here you can change the account to a user that can access the file location.
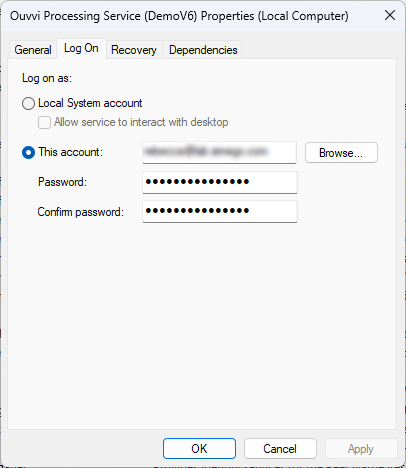
If the user is not already added as a user in Ouvvi you will need to do this now, and give them agent & admin permissions.