Authentication Options in Ouvvi
Within Ouvvi you have three options for authentication:
Which you use will depend on your own internal requirements and preferences. By default Windows authentication is selected but you can change this during the configuration setup of your Ouvvi tenant.
If you have already configured your authentication and want to change this then you will need to configure a new tenant and import your Ouvvi projects, triggers etc.
Windows Authentication
Windows Authentication is the default auth option for Ouvvi.
It uses machine/network accounts with integrated security to sign into Ouvvi, for example DOMAIN\MyUser.
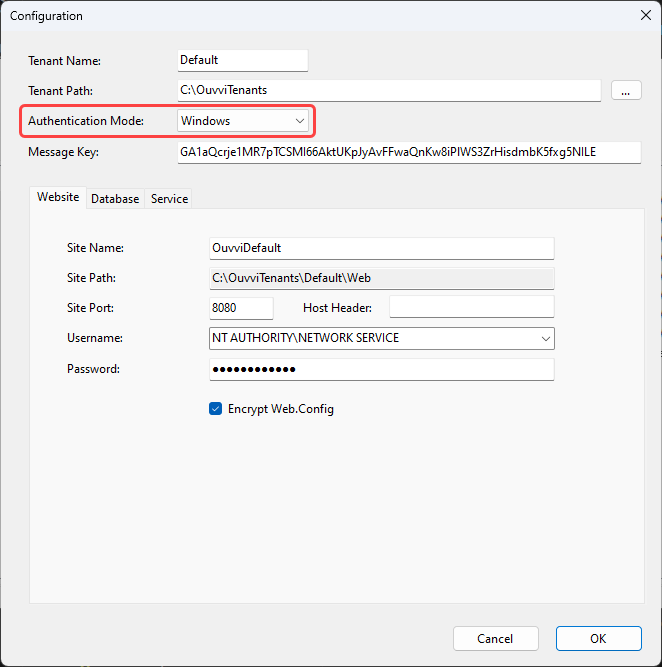
When initially configuring your Ouvvi site you can ensure that windows authentication is chosen within the configuration window by selecting Windows from the Authentication Mode dropdown.
Forms Authentication
Forms Authentication is used to either configure Azure AD authentication or to define your own logins that are held in the Ouvvi database.
Below the custom login configuration is described and Azure AD Authentication setup is covered in the section below.
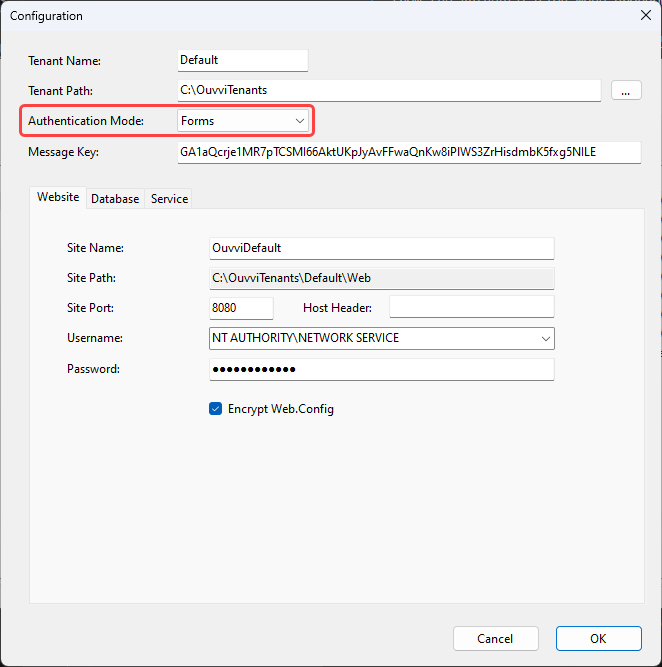
To use forms authentication you need to select Forms from the Authentication Mode dropdown in the Ouvvi tenant configuration window when you are first configuring your tenant.
Please note that basic forms authentication has no password recovery for users. Administrators can reset passwords, however if the admin password is lost then you will be locked out of your Ouvvi tenant.
You will configure the System Admin account to be used when you finish setting up your Ouvvi site in the browser.
Ouvvi Setup
Once you have installed the tenant you can browse to your Ouvvi site by right clicking on your tenant and selecting Browse.
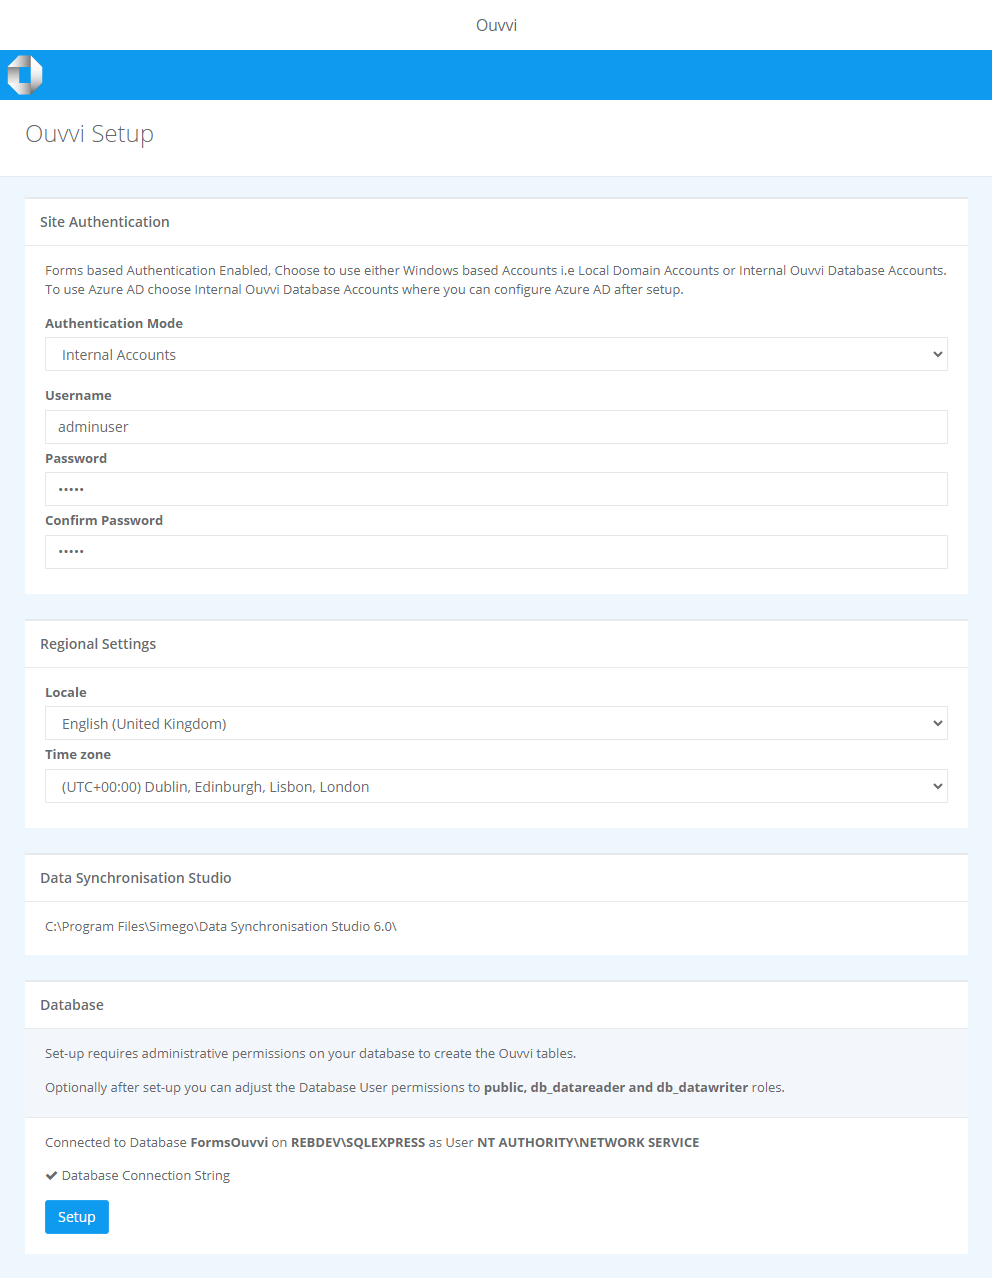
This will display the setup page where you need to specify that the authentication mode is Internal Accounts, we will specify that you want to use Azure AD authentication after the setup has completed.
Enter in a username and password for an account to login temporarily, and select your regional settings. Then click Setup to finish creating your Ouvvi site.
This will then redirect to the sign in page. Enter in the account details you entered a moment ago to login.
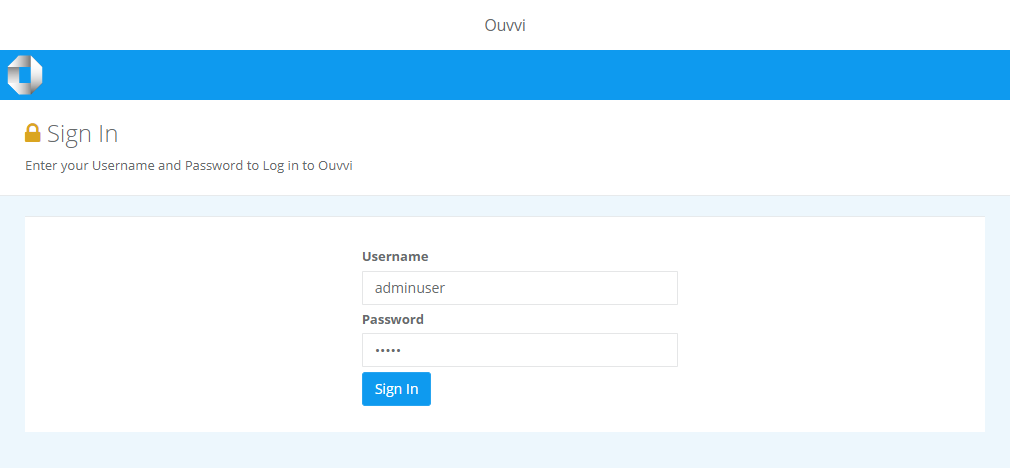
You can now add additional users as needed. For more details on adding users please see our Users documentation.
Azure AD Authentication
The below details will guide you on how to configure the Azure AD App and what you need to do to configure Ouvvi but it will not describe in detail how to install and get started with your Ouvvi tenant. If you are looking for installation instructions please select the installation type you are after on the installation page.
To start you need to create and install the Ouvvi tenant in the Deployment Manager. Follow the steps described in the Forms Authentication section as you will configure the Admin Azure AD account to be used when you finish setting up your Ouvvi site in the browser.
Azure AD Configuration Ouvvi
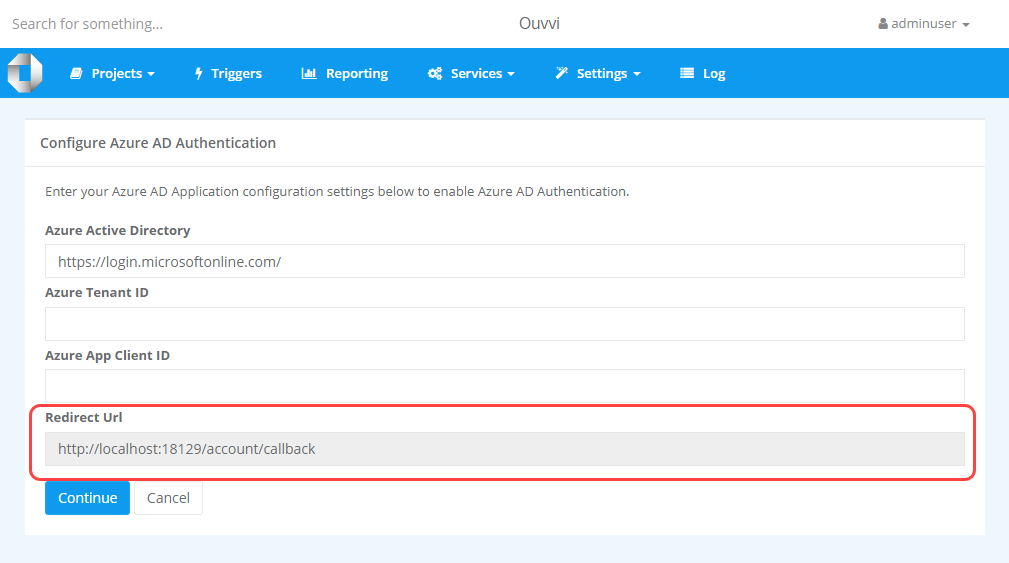
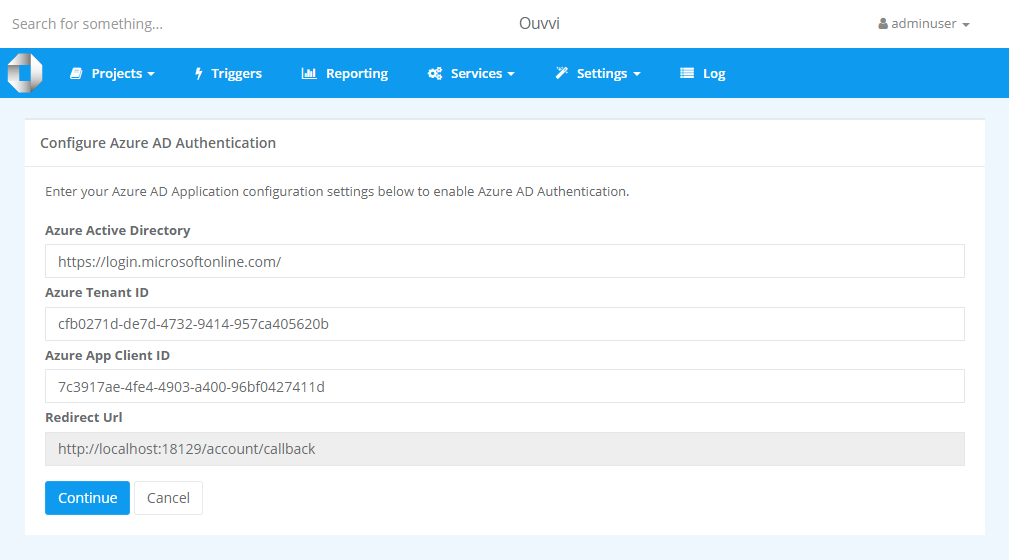
Once you have installed and setup your Ouvvi site you need to open the settings menu, select Systems Settings, and click onto Azure AD in the sub menu to open the AD configuration page.

This page will give you the redirect url you need to configure the Azure App registration. Copy this and move on to creating the App in Azure AD.
Azure AD App Registration
The next step is to create an app in Azure to enable the connection between Ouvvi and your Azure AD to be able to authenticate the user details.
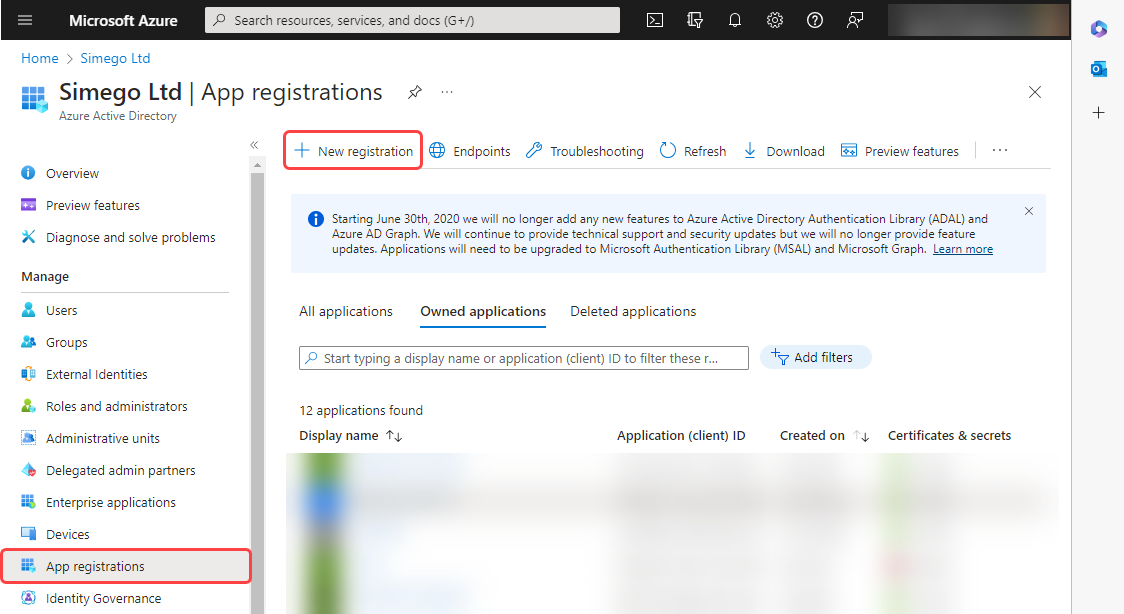
To do this browse to your Azure portal and open Azure Active Directory. Then select App Registrations from the list and click onto New Registration to create a new app.
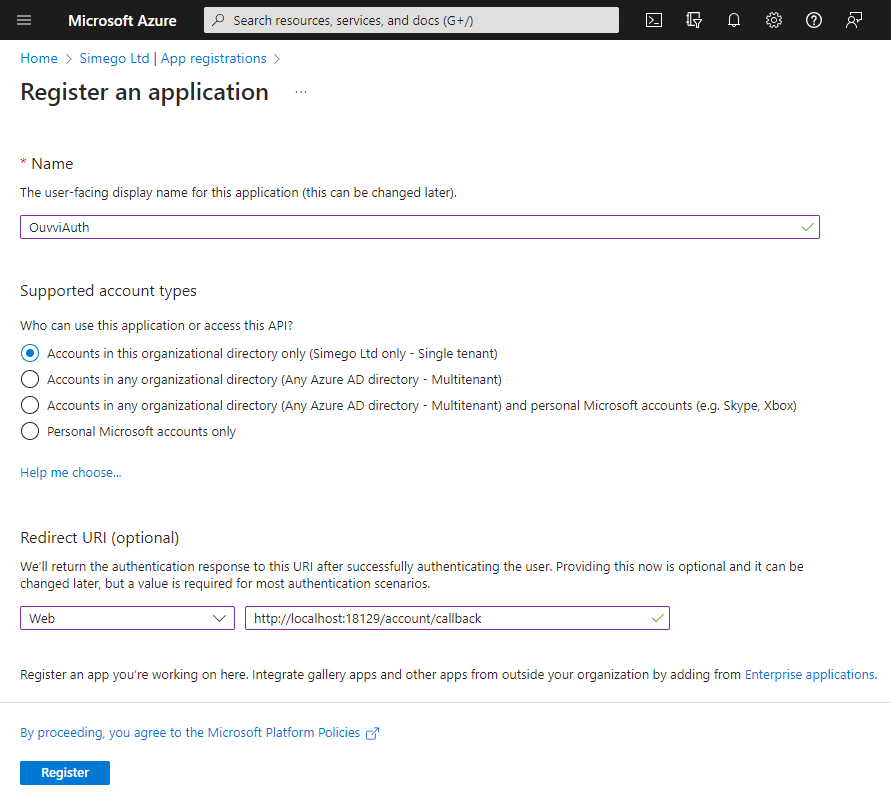
Enter in a name for the app and decide on the supported account types, usually we choose the default Accounts in this organisational directory only.
The redirect should be the URI of your Ouvvi site with /account/callback added on the end. e.g. http://localhost:8080/account/callback, and make sure to select Web from the dropdown.
Client Secret
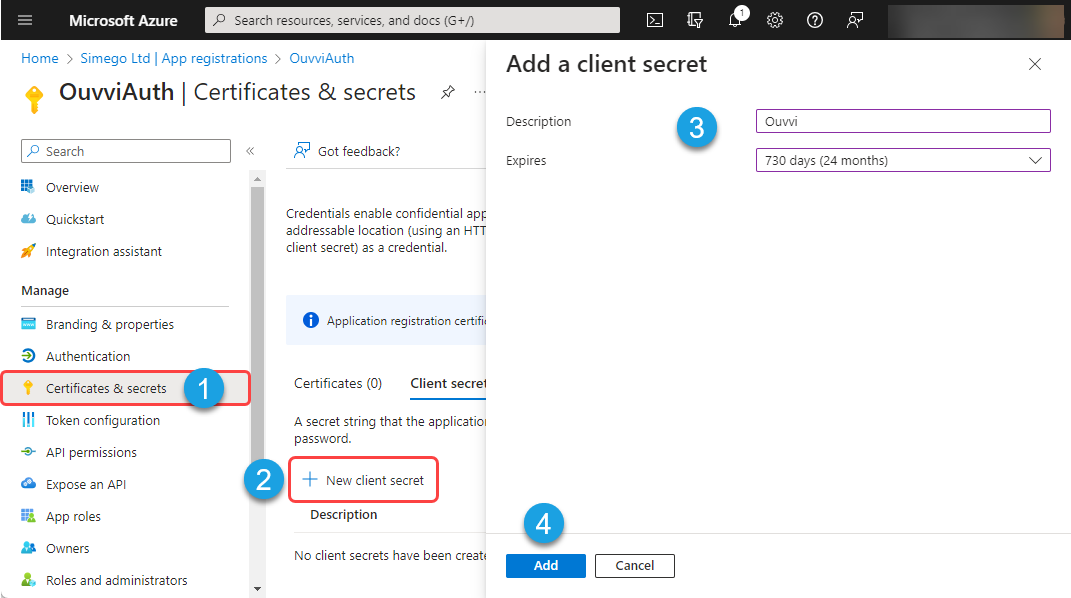
You now need to create the client secret by choosing Certificates & secrets from the menu and then clicking New client secret. Add a description and select the expiry time.
When the client secret expires you will need to create a new secret and install this into Ouvvi.
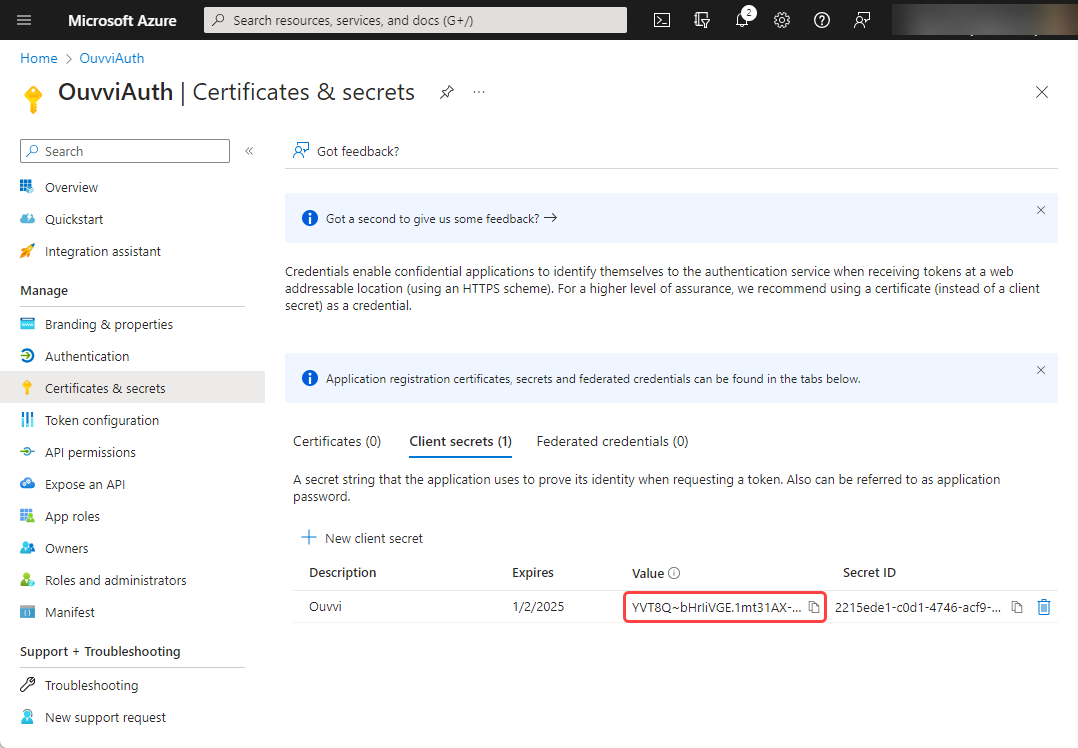
The client secret will be made visible once it has been created. Please make a note of this as you will not be able to retrieve it later.
Client & Tenant ID
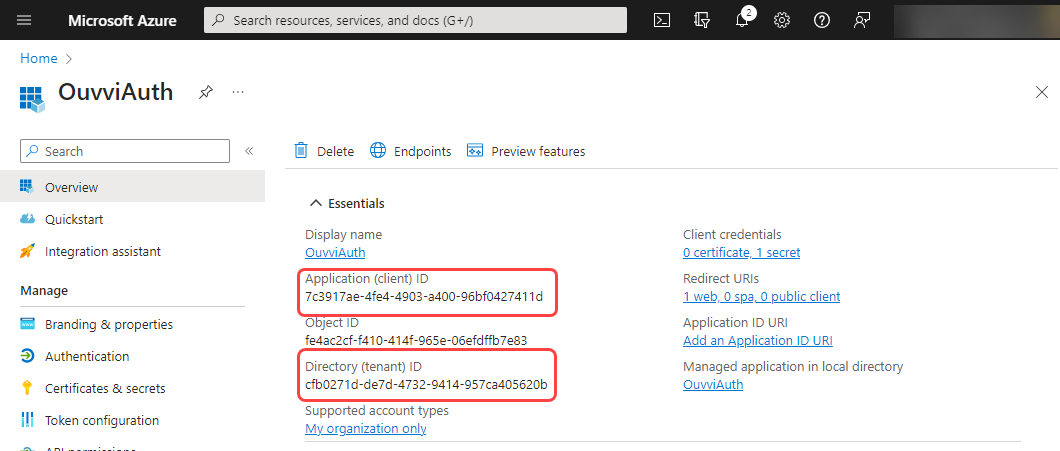
You should also navigate to the overview page and make a note of the Application (client) ID and the Directory (tenant) ID as we will need these to enter into Ouvvi.
Finish Config in Ouvvi
Now navigate back to the Azure AD configuration page mentioned earlier and enter in the Tenant ID and Client ID gathered from Azure.
This will then redirect to the Microsoft login. The account you use to sign in now will be registered as the system admin within your Ouvvi site.
Once you have entered the credentials you will then be prompted to accept the permissions requested by the app, you should see the name of the App below Permissions requested and this should match the name you configured in Azure AD. Click Accept to enable the connection.
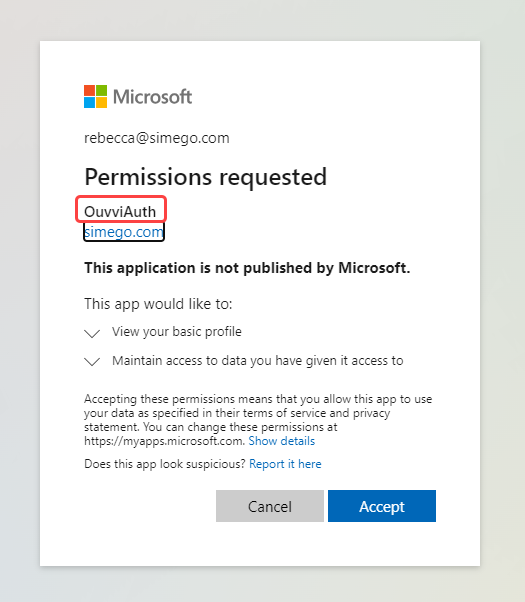
Now finish the configuration by entering the Client Secret and click Save to finish enabling Azure AD Authentication on your Ouvvi site.

This will sign you out of your Ouvvi site and you can click Sign In to be redirected to the Microsoft login page, where you can enter the credentials you just used to authorise the connection to Azure AD.
The original internal account will remain in your user profiles list.
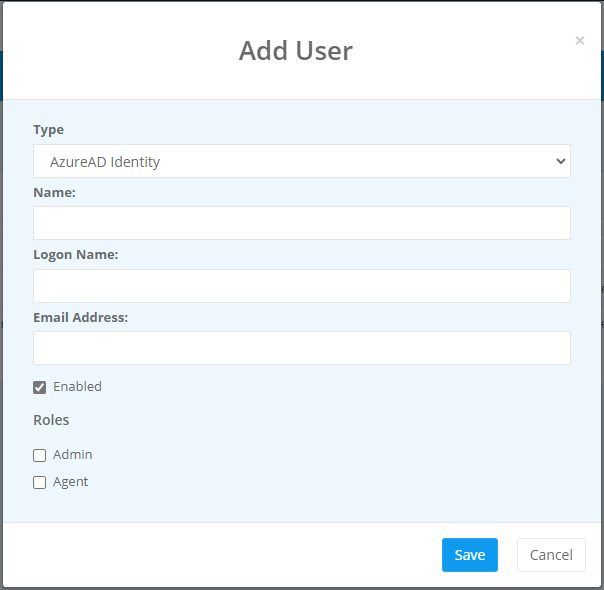
You can then add additional users as needed by making sure that AzureAD Identity is selected as the type and supplying their name and logon name which should be their email address. Make sure the account is enabled in Ouvvi and set the permissions as needed.
