Importing an Ouvvi Tenant
If you have used Ouvvi in the past but have not yet used the Deployment Manager, or if you have previously installed Ouvvi but didn't save the Deployment Manager configuration you can import your existing Ouvvi tenants as needed.
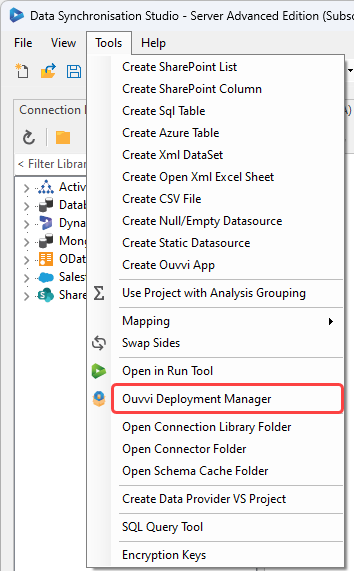
To do this start by open the Deployment Manager. The Deployment Manager is opened from Data Sync, by going to the Tools menu and selecting Ouvvi Deployment Manager.

Once the deployment manager has opened you can either use the Import Tenant button or go to File > Import Tenant to import any Ouvvi tenants you have on your machine or server.
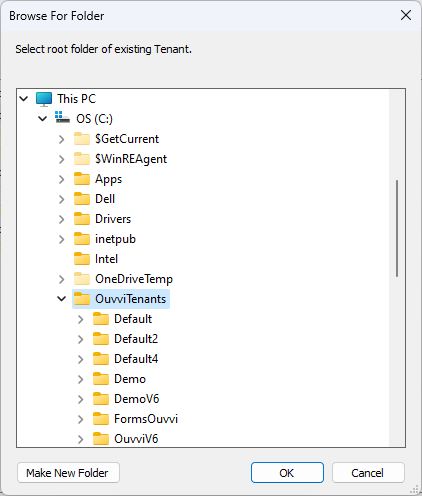
This will open the Browse for Folder window. Use this to search for your Ouvvi Tenants folder and locate the tenant/instance you wish to import.
By default the tenant folder is usually C:\OuvviTenants.

Once you have found the tenant/instance you wish to add click OK and this tenant configuration will be loaded into the deployment manager.
Edit Ouvvi Tenant Settings
We discover as many settings as we can when importing a tenant. However you should review the configuration and set any passwords for the accounts you are using.
To edit your Ouvvi tenant settings, double click on your instance to open the configuration window. Then change any of your configuration settings as required.
Any changes to the configuration will only take affect during install therefore ensure your Ouvvi Tenant is uninstalled before editing any settings if you require changes to the installation. You can read more on editing a tenant here.