Dependency Agent
Ouvvi Agents can be installed on multiple machines, these agents can then be defined as a dependency agent so only Ouvvi steps with the same dependency name will run on this agent. Dependency agents allow you to run projects on specific machines, with specific credentials, just make sure to give the agent a unique name.
You can also add additional agents to a machine that already has an agent. For example you might do this if you need a project to run under specific credentials.
Your Ouvvi Server Web Application must be accessible from the network. If you open the Ouvvi Server Web Application to the network consider the use of TLS/SSL for the site.
Create Service
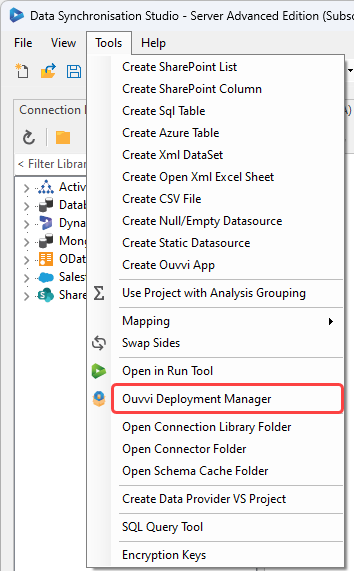
You need to start by creating the service on the machine you want to use. To do this you need to have downloaded and installed Data Sync and then open the deployment manager by opening the Tools menu and selecting Open Deployment Manager.
Then open the File menu and select New Service.
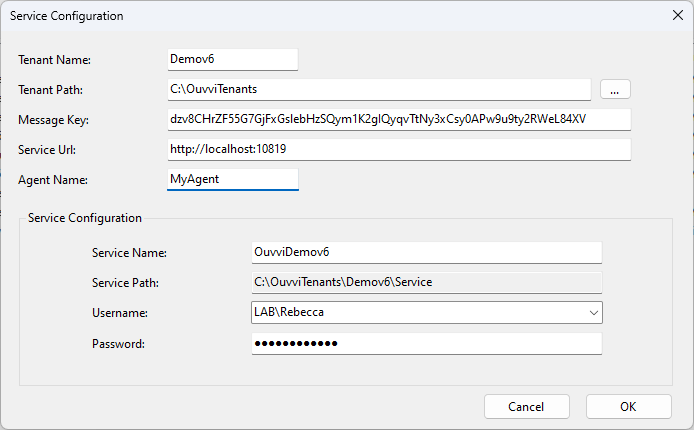
This will open the Service Configuration window where you can specify the details of your Ouvvi tenant and the name of the agent.
| Property | Definition |
|---|---|
| Tenant Name | The name of your Ouvvi Tenant. This will be the name shown in the Deployment Manager. |
| Tenant Path | The path to the Tenants folder to have the Service folder created in |
| Message Key | The message key of your Ouvvi tenant. Can be found by opening the config window for the tenant in the deployment manager. Specific to each tenant. |
| Service URL | The URL to the Ouvvi site. |
| Agent Name | The name of the agent. This should be unique. |
You will also want to specify the user credentials to use on this machine. This should be an account that has permission to access the resources you need.
Once you have completed the form click OK to add the Service to the Deployment Manager.
This will add the new Service to the deployment manager list. You then need to select it, right click and choose Install to install the service on the machine.
Add Service to Ouvvi
You will now need to add the Service to your Ouvvi tenant. To do this open Ouvvi and navigate to the Services table. Then click onto the Add Service Agent button.

Enter in the Agent name you defined earlier and set a dependency name you can use to identify this agent to use in your steps.
Add User to Ouvvi
The next step is to add the user account to the Ouvvi user profiles list with Agent and Admin permission.
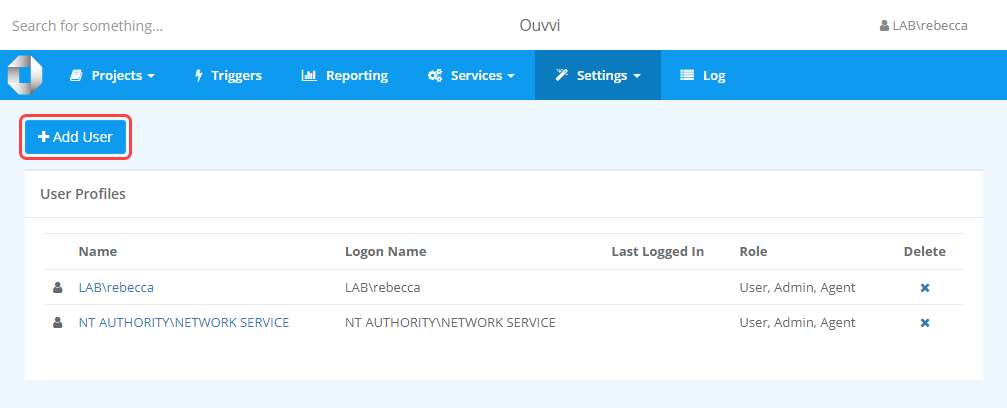
To do this open the Settings menu and select User Profiles. Then click onto the Add User button to open the add user popup.
Windows Authentication
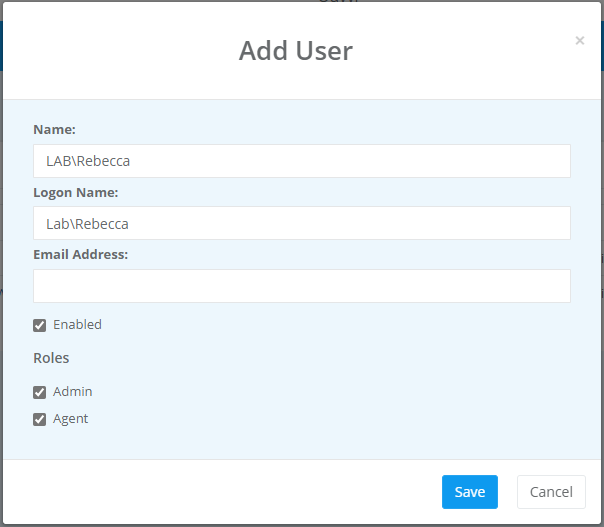
If you are using Windows Authentication simply add the user details and make sure to check the checkboxes for Agent and Admin.
Click Save to create the account.
Forms Authentication
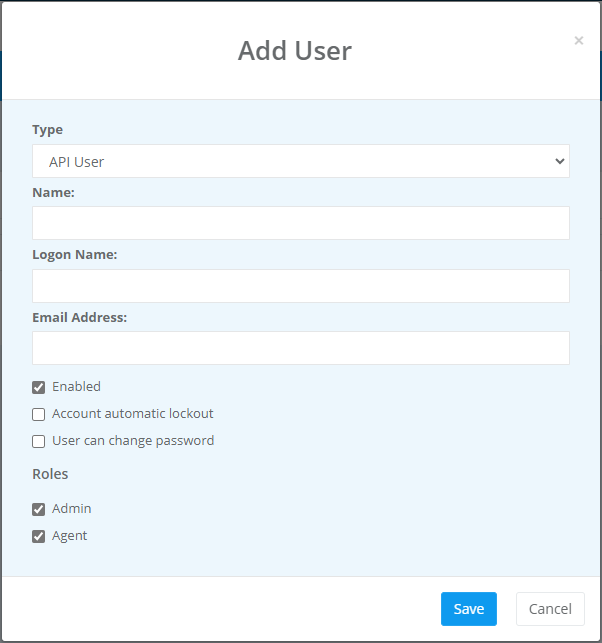
If you are using Forms Authentication then you will need to change the type to API User, and then enter the name and logon name of the account used to run the service.
Make sure to select the Agent and Admin checkboxes. You may also wish to uncheck the automatic lockout and user can change password checkboxes.
Then go back to the deployment manager and right click and select Set Password to add the password for the dependency agent user.
Azure AD Authentication
If you are using Azure AD Authentication then you will need to change the type to API User, and then enter the name and logon name of the account used to run the service. This should be their email address.
Make sure to select the Agent and Admin checkboxes. You may also wish to uncheck the automatic lockout and user can change password checkboxes.

Then go back to the deployment manager and right click and select Set Password to add the password for the dependency agent user.
Start the Service
The final step is to start the service. To do this open the deployment manager that holds your service configuration.
Select the service, right click and choose Start Service from the menu.
You should be re-directed to your Ouvvi site and should see that the new service is now showing as running (green flag).