Execution Context
The Execution Context refers to the user account that is leveraged to run a specific project at runtime. This context plays a critical role in determining the permissions and access rights associated with each executed project.
By default, if no changes are made, the Execution Context will operate as the service identity.
If you are going to change the Execution Context, then to ensure seamless project execution, it is important to verify that the chosen user account has been properly set up in Ouvvi with the appropriate permissions and the DSCache Folder has been re-mapped:
1- Agent and Admin Permissions: The user account should be added to Ouvvi with both Agent and Admin permissions. This will enable the account to execute the project.
2- DSCACHE Folder Mapping and Permissions: The DSCACHE folder needs to be remapped to a location that is accessible by the user account being used and any other user accounts being used within your Ouvvi instance. Additionally, this account should be given Read and Write permissions for this folder, allowing it to access and modify the contents as needed.
Change the Execution Context
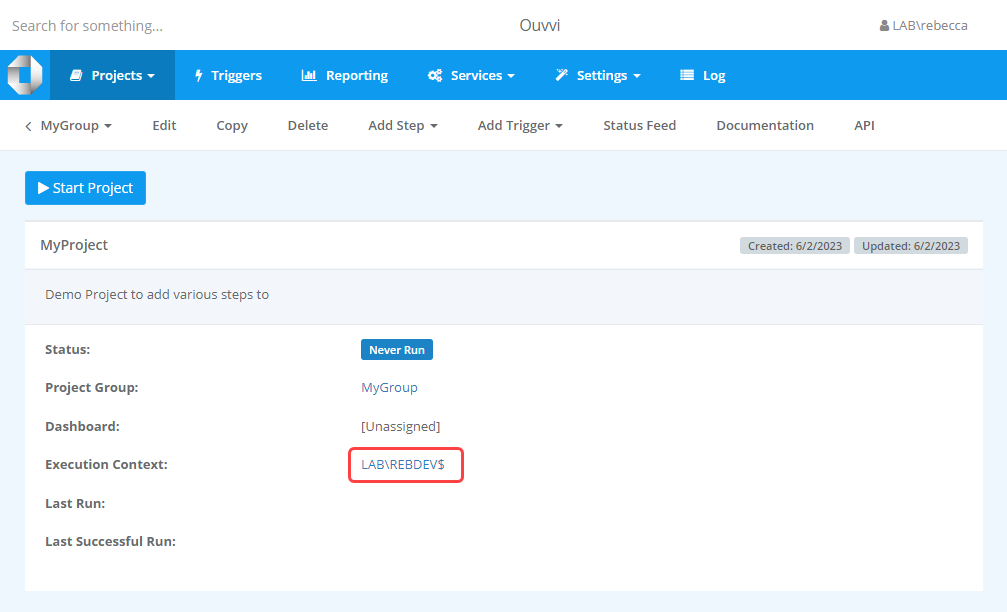
The default context is set to the Service User, which in this example is NETWORK SERVICE which is LAB\REBDEV$. For this example I want to change this to use a user login instead.
You can change the execution context of an Ouvvi project by drilling into the project and clicking on the link next to 'Execution Context'.
This opens the Execution context view, where you can override the default user by entering the credentials of the user account that will be used to run the project steps.
Enter in the username, domain and password for that user and click Save to apply the changes.
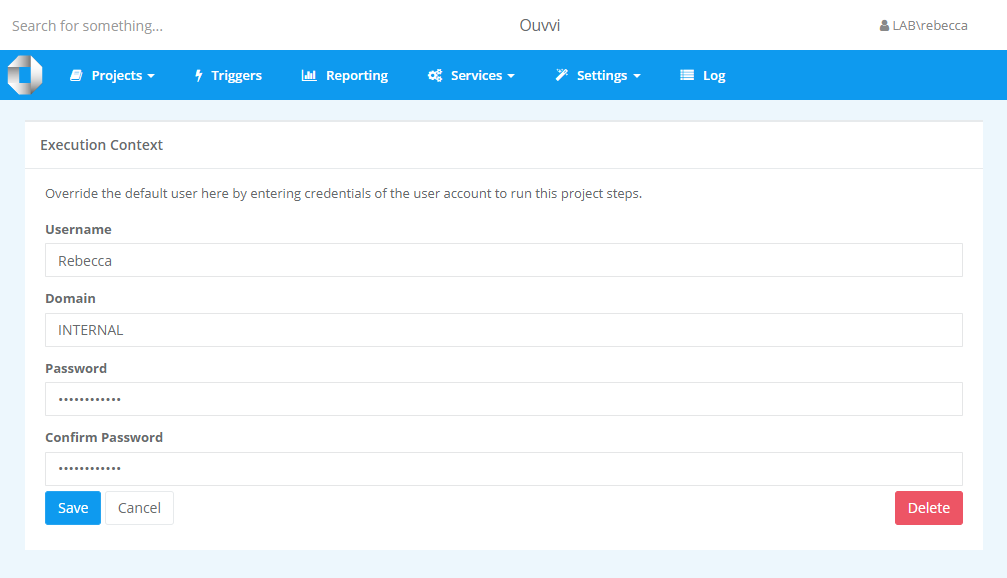
This will update the execution context with the defined users credentials.
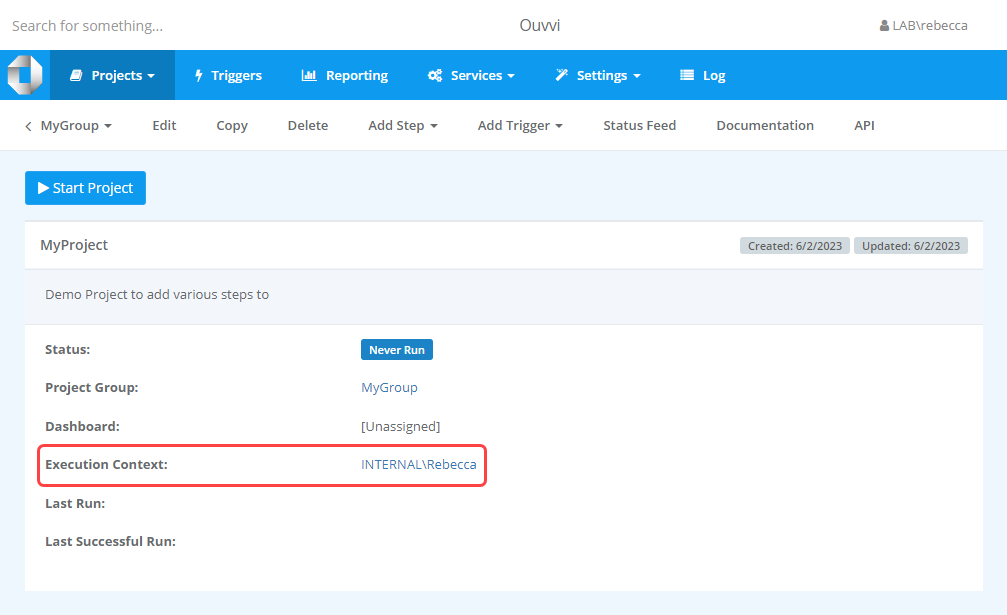
Going forward this project will only run under the context of that user. If the user is removed from Ouvvi, or the user does not have the required permissions then the project will error and fail.
If you want to remove the execution context and revert back to the default, click onto the context link on the project page and then press the Delete button to remove it.
Add User Account to Ouvvi
To ensure this works, you will need to have added the user as a user within Ouvvi with Agent and Admin permissions.
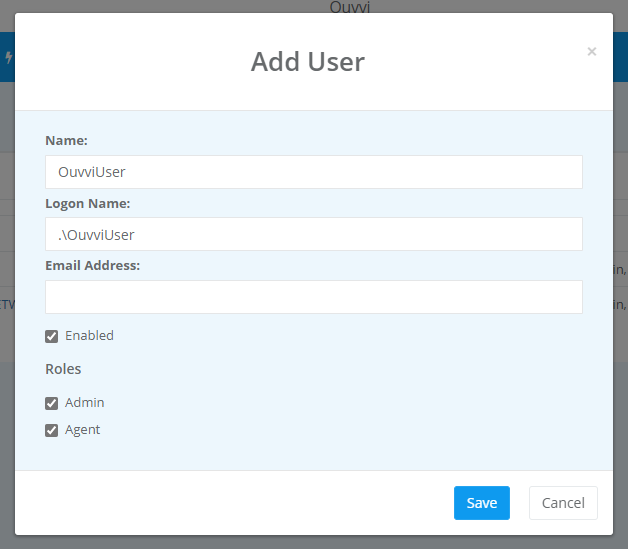
More information on how to add a user can be found here.
Remap DSCache
You will also need to remap the DSCache folder to a common area and ensure that everyone with access has read and write permissions.
DSCACHE is the location of where Data Sync stores temporary files for use during the data load and compare. These are deleted automatically. If you do not re-map the DSCACHE files you will get errors such as Access Denied to Path if the account cannot access the folder.
There are two ways to remap the DSCache from the default to a chosen location, either through Windows Settings or through the Deployment Manager.
When you change the DSCACHE you will need to re-start the Ouvvi Service. To do this please open the deployment manager to stop and restart the service for this Ouvvi instance.
Deployment Manager
The easiest way to change the DSCache path is to open the deployment manager and stop your Ouvvi service.
Then open the File menu and click onto Properties.
In the properties window find the DataSyncCachePath property field and set the destination path for the cache. Click OK to apply the changes.
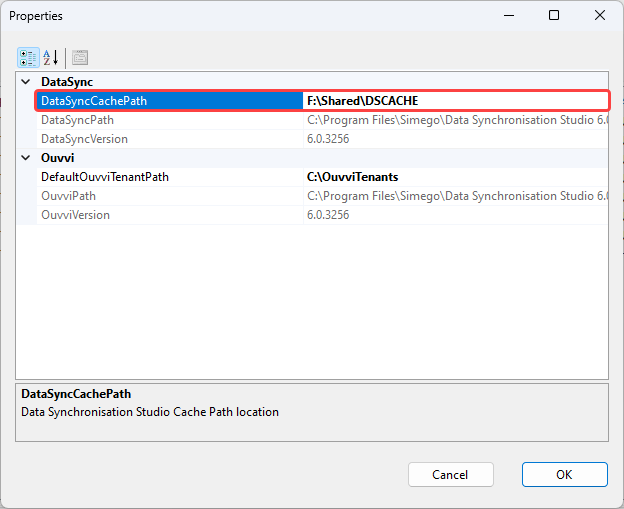
Now make sure to re-start your Ouvvi service and your DSCache has been re-mapped.
Windows
To change the DSCache using Windows you will need to edit the Environment Variables. Start by stopping your Ouvvi service and then open the start menu and go to Settings > System > About and click onto the Advanced System Settings link.
This will open the System Properties window. Click onto the Environment Variables button found under the Advanced tab.
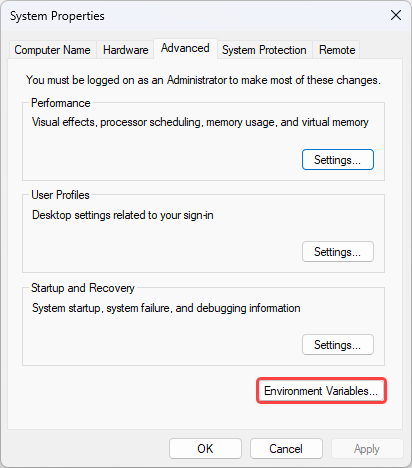
Then click onto the New button to create a new environment variable.
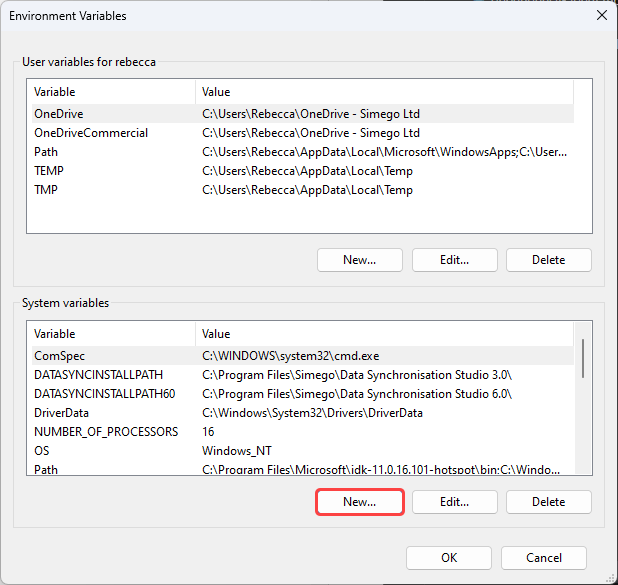
You now need to create a new variable called DATASYNCCACHEPATH and enter in the new path location.
Now open the Deployment Manager and restart your services. The DSCache will have been re-mapped.