Start Project
There are a few ways of running a project in Ouvvi:
- Manually by using the start button
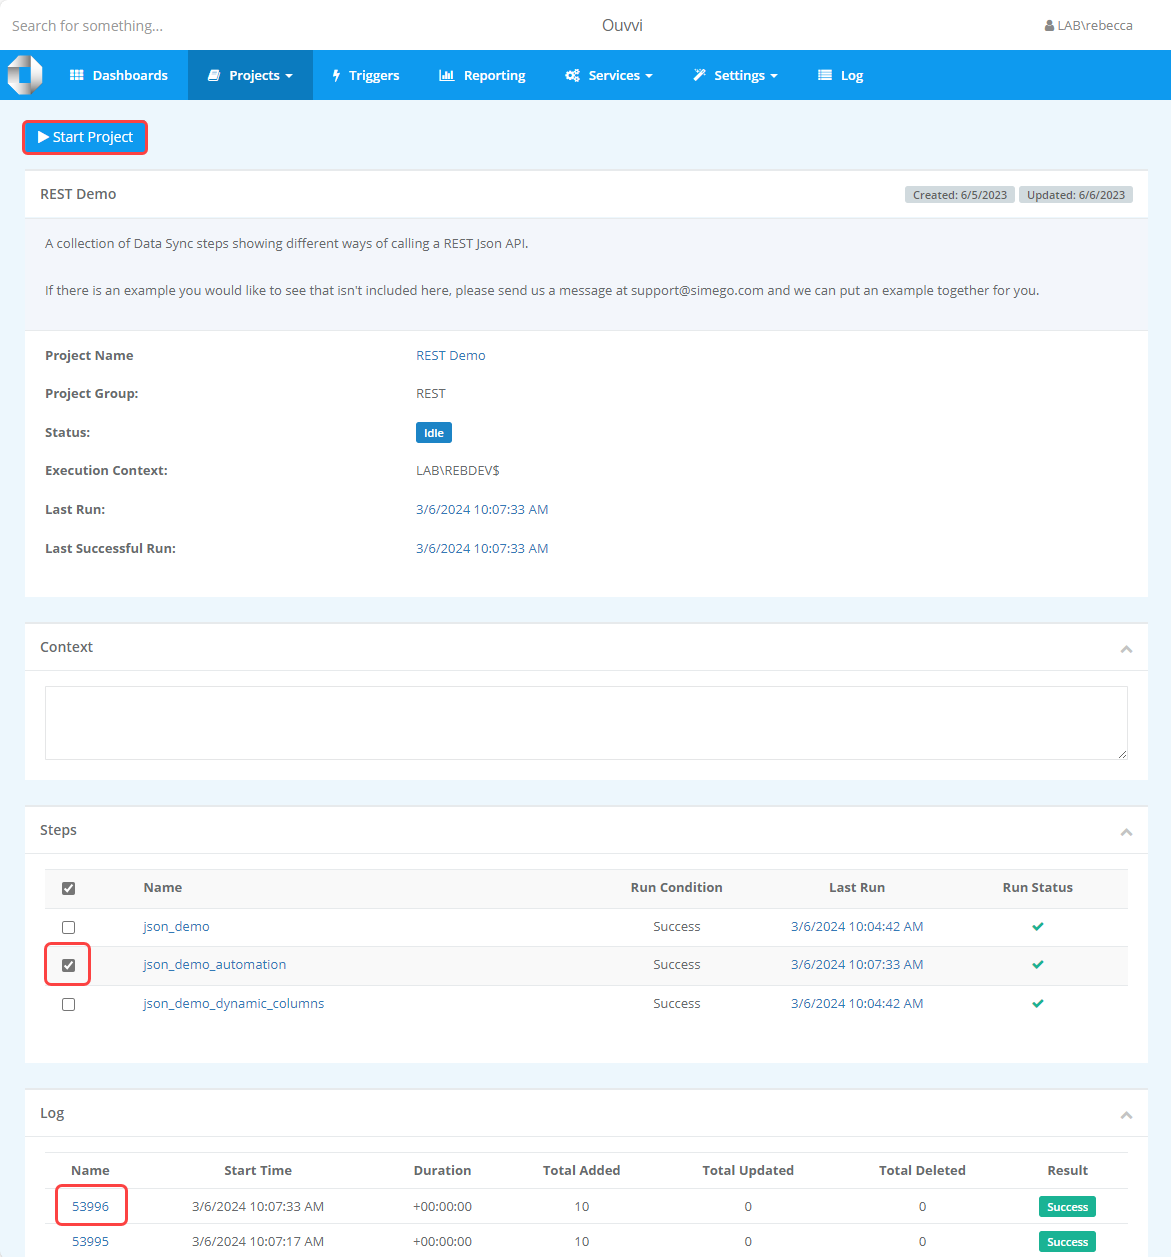
- Manually start selected steps
- By calling a URL
- By using a Trigger
In order to be able to run your projects you must have installed and started your Service, activated the tenant with the license key, and added at least one step to your project.
If the button is disabled (greyed out) this means that either the project is already running, the service is not running or your license key has not been applied to the tenant.
If the button is showing, then you can manually start a project by clicking the Start Project button on the project page which can be found to the left under the sub-menu.

Run Selected Steps Ad-hoc
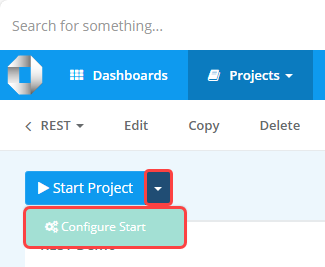
From Version 6.0.3344 you will notice there is a dropdown arrow next to the Start button on the project page, and when clicked will show the option Configure Start.

Clicking on this will take you to a configuration page for this project where you can pass specific context to the steps, and specify which steps you want to run.

Each run will write a log instance, and this can be useful to test a step run without needing to start the whole project or disable the other steps.
Start a project by calling the URL
You can run a project by calling a specific url, for example you might call this from another program or script.
In order to be able to do this you will need the following details:
1 - The URL or your Ouvvi console eg: http://OuvviServer1
2 - The ID of your project you want to run.
To find the specific project ID you can open the project you want to be triggered in your Ouvvi site. If you look at the URL you should see a number at the end. This is the project ID. which in the example shown below is 7.

You can now create the URL you need by adding add the Ouvvi server URL http://OuvviServer1 to the run section /projects/start/ and then the ID of the project you found. For example say the ID was 23, then with the two URL components the full URL needed to start the project is:
http://ouvviserver1/projects/start/23
You can then test this by pasting the URL into an empty browser window and then checking if the project has run in Ouvvi.
Schedule
You can schedule your projects to run by using Triggers.
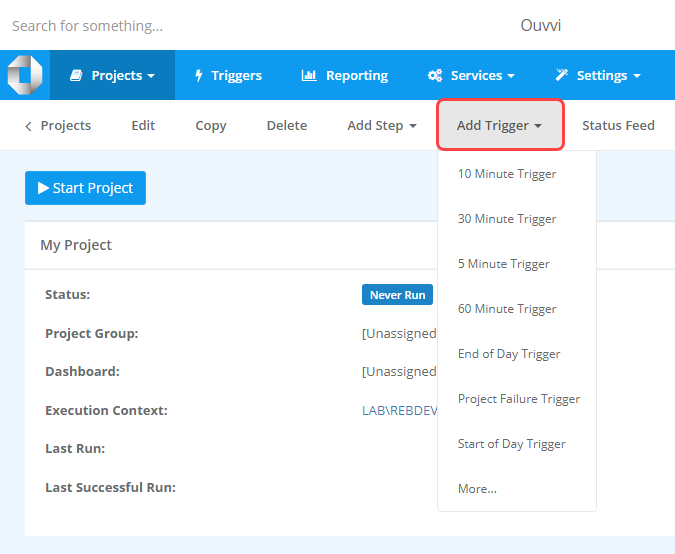
To add a trigger to your project start by opening the project in Ouvvi. Then click onto Add Trigger and select a trigger to add to the project, for example the 60 Minute Trigger.

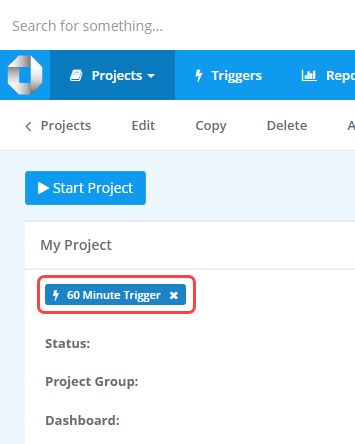
This will add a label to the top of the project with the name of the trigger. This lets you know that there is a trigger applied and it will attempt to run depending on the conditions of the trigger.

If there isn't a suitable trigger available in the list then you can create a new Trigger.
Triggers can be reused across projects and each project assigned will be started when the trigger runs.
Adding multiple triggers like 10, 30 and 60 minute triggers will only trigger the project once on the trigger interval.