Ouvvi Deployment Manager
The deployment manager is our way of simplifying the installation of Ouvvi. It provides a single location to install and manage your Ouvvi tenants, and allows you to quickly browse to each site and make changes as needed.
Accessing the Deployment Manager
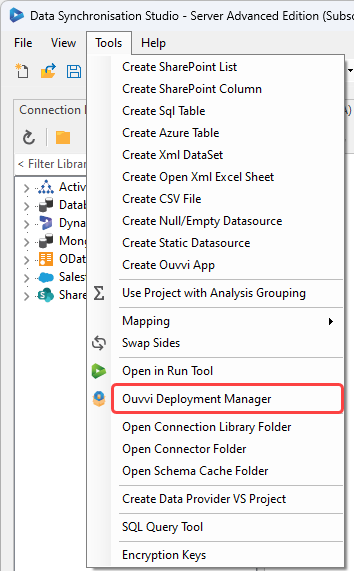
To access the Deployment Manager, open Data Sync and navigate to the Tools menu. From there, select Ouvvi Deployment Manager.

Latest Version Information
When you open the Deployment Manager, you'll find the latest version number of Ouvvi available for updating your tenants in the bottom left corner of the window. The version displayed depends on the most recent Data Sync installation you performed.
To ensure you have access to the latest version, please download the latest Data Sync from our website here.
Tenants
The tenants tab provides an overview of all the Ouvvi tenants you have created or imported within the Deployment Manager. It displays essential details such as the tenant name, folder path, website name, AppPool account, site URL, service name, service status, service user account, and the version of Ouvvi running on that site.

Toolbar Options
The toolbar, located below the menu, offers quick access to essential functions.
From left to right, the toolbar options are as follows:
- New Tenant: Create a new Ouvvi tenant.
- Import Tenant: Import an existing Ouvvi tenant.
- Save: Save your Deployment Manager configuration. Use this after adding or importing a new tenant to ensure it remains in the list.
- Refresh: Refresh your configuration if you encounter any display issues or if a newly imported tenant is not appearing.
- Start Services: Start the services of a selected tenant.
- Stop Services: Stop the services of a selected tenant.
- Delete Tenant: Remove a tenant from the Deployment Manager. Note that this action only removes the tenant from the list; the tenant files remain on the computer. For complete removal of a tenant, please refer to our Remove Tenant guide.
Detailed instructions on creating a new tenant and importing a tenant can be found on their respective documentation pages: Adding a New Tenant and Importing a Tenant.
Save
The save button saves your deployment manager configuration. You should use this after adding or importing a new tenant to ensure they remain in the list. Without saving, you would need to re-import the tenant each time you want to manage it.
Refresh
The refresh button, will refresh your configuration. If you make changes to settings and they are not immediately visible or a newly imported tenant does not appear, click the Refresh button to resolve the issue.
Start/Stop Services
Once you have installed your Ouvvi tenant and configured the services within the site you can start and stop them as needed from the deployment manager.
Just select your tenant from the list and click the green play button to start the services, or if they are already running the red square button to stop the services.
Stopping services are necessary when resetting the queue, making changes to the service user account, or modifying the tenant's configuration. In some cases, your services may stop due to system failures, and you can restart them using the green play button.
Delete Tenant
To remove a tenant from the Deployment Manager, select the tenant instance and click the red X button. Please note that this action only removes the tenant from the list and does not delete the tenant files from the computer. For complete tenant removal please see our Remove Tenant page.
Logging
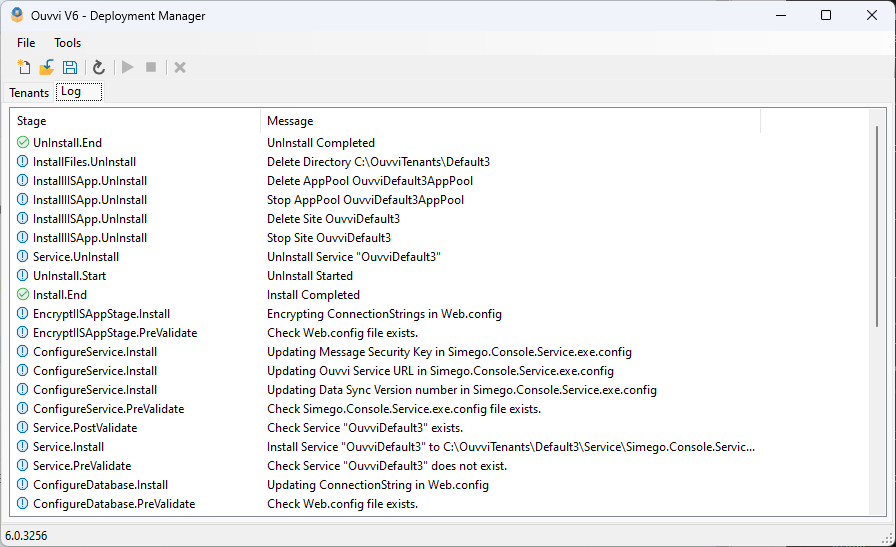
The deployment manager records when a tenant is installed and uninstalled within its own log records. You can access this log by clicking onto the Log tab beneath the shortcuts toolbar.

The log provides valuable insights into any errors encountered during the tenant installation process. Typically, errors are related to permission issues, such as writing to the tenant folder or database.
Installation
We have guides on installing Ouvvi available from our Installation page which covers a few of the different installation options.