Export
There are two types of exports for Ouvvi Apps, one is an export to create a zip file to copy the apps into a new Ouvvi tenant and the other is to export the data contained within the Ouvvi App.
Export/Import the App (Solution File)
The exporting of an app to enable it to be imported follows a similar process to the normal Export and Import of your Ouvvi system but is restricted to the Apps configuration only.
Export
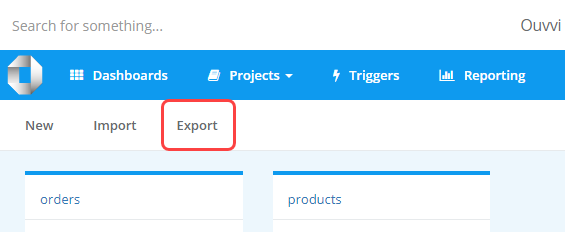
To export the Apps configuration open the Settings menu and select Apps.
Then select Export from the sub-menu to open the export options.

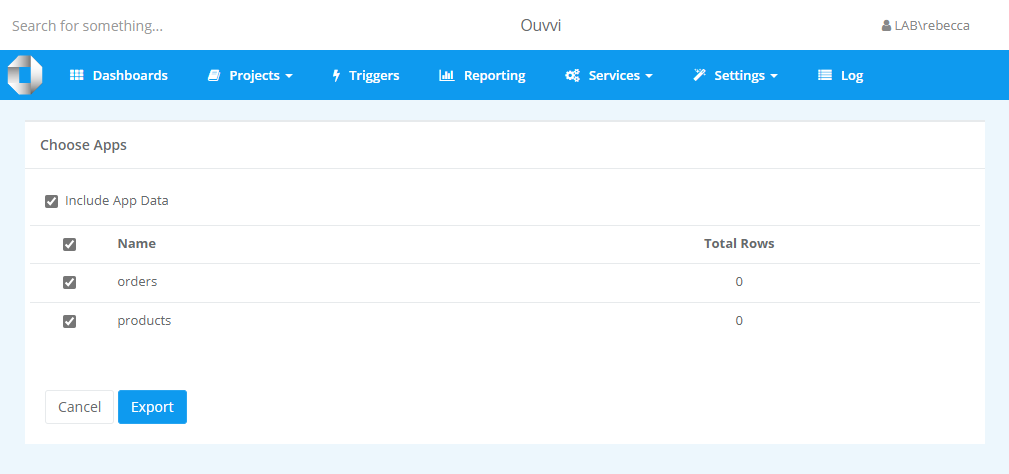
You can now select the checkboxes against the apps you want to export, or if you want to select all check the checkbox next to the column titled Name. This will select all of the apps in the list.
You can choose to include or exclude the App data by checking or unchecking the Include App Data checkbox. Checking the checkbox will include the data, unchecking the checkbox will exclude the data.

This will download a zip file that can then be imported into another Ouvvi tenant.
Import
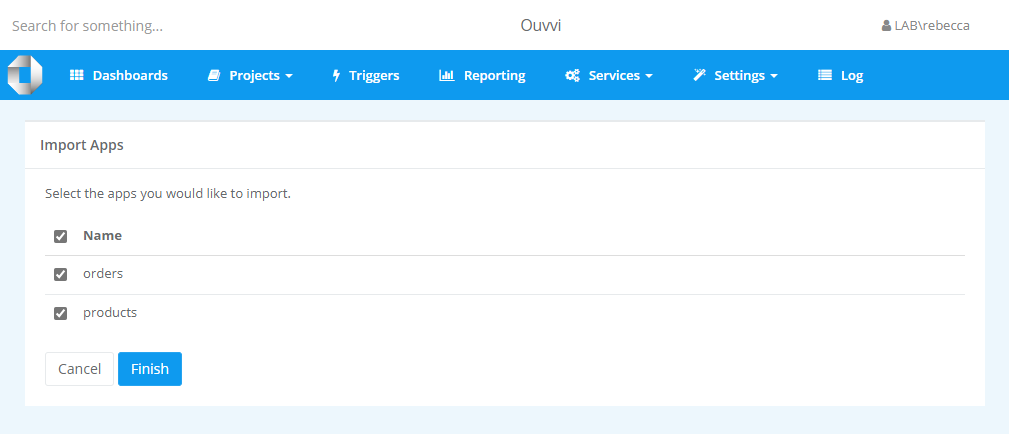
To import the zip file, open the Settings menu, select Apps, and then click the Import button from the sub-menu.
Click onto the Choose a File button and browse for your file. Then click Next. You can deselect any apps you don't want to import from the file. When you are ready to import click Finish and the apps will be imported.

Export the Data
Once you have synchronised data into your Ouvvi Apps you can export it either by using the App within a Data Sync project or export it in a variety of formats from the App directly.
You can apply filters to the exports to reduce the amount of data being returned by appending them onto the URL you use to generate the export. This is explained in more detail below.
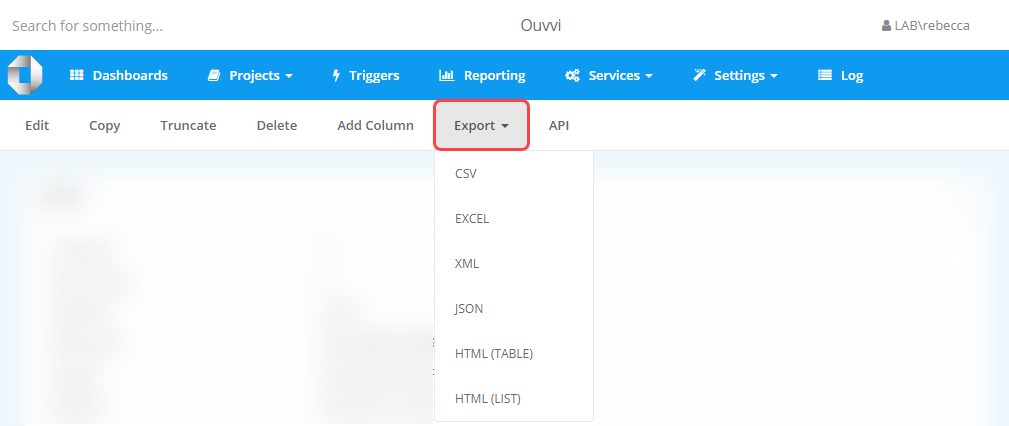
To export the data from the app, navigate to the app overview page of the app you want to export. Then click onto the Export button in the sub-menu and choose the output format you want.

Filter Exports
You can filter the data being returned by adding different operators to the export URL. A few examples are shown in the table below. You can use the URLs generated to feed sorted data into apps like PowerBI.
| Operation | Description | Example |
|---|---|---|
| limit | Limits the number of results returned | http://localhost:8080/apps/xml/myapp?limit=1000 |
| columns | Specify which columns to return | &columns=Column1,Column2 |
| filter | Filter the results logical: "eq", "ne", "gt", "ge", "lt", "le" operators: "and", "or" | filter=Column1 eq sent |
| orderby | Sort the results ascending | &orderby=Column1 |
| orderby | Sort the results descending | &orderby=-Column1 |
| system | Include the system internal columns | &system=true |
| title | Rename the table | &title=My+Table+Name |
Export Types
You can find examples of the different export URLs for each format below:
CSV
The document endpoints to allow for downloading App data will look something like this:
http://localhost:8080/apps/csv/myapp
Excel
The document endpoints to allow for downloading App data will look something like this:
http://localhost:8080/apps/excel/myapp
XML
The document endpoints to allow for downloading App data will look something like this:
http://localhost:8080/apps/xml/myapp
JSON
The document endpoints to allow for downloading App data will look something like this:
http://localhost:8080/apps/json/myapp
HTML
You can export the data in a HTML format as either a table or a list. Apply any of the operations in the table above to return only the data you need. The document endpoints to allow for downloading App data will look something like these:
Table: http://localhost:8080/apps/html/myapp
List: http://localhost:8080/apps/html/myapp?&pivot=1