System Settings
The System Settings can be accessed by opening the Settings menu and going to System Settings. These allow you to modify or add to your Ouvvi configuration.
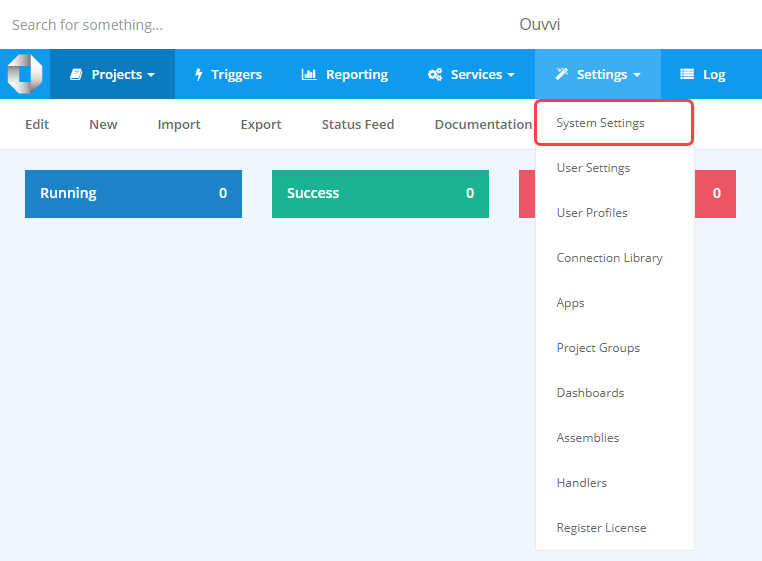
After you have made all of the changes you need to please make sure to click Save to apply the updates.
At the top of the page below the toolbar menu, there are a series of shortcuts that will jump to the corresponding section. However, there are three that link to different pages, these are:
- Encryption Key : Enables you to install a encryption certificate and key to encrypt your projects and data.
- Azure AD : Enables you to configure Azure AD Authentication for your Ouvvi site.
- IP Address Filters : Enables you to restrict access to the Ouvvi site by filtering IP addresses.

Below each section available within the System Settings will be discussed. The settings mentioned above will be covered on their own pages.
Administration & Support
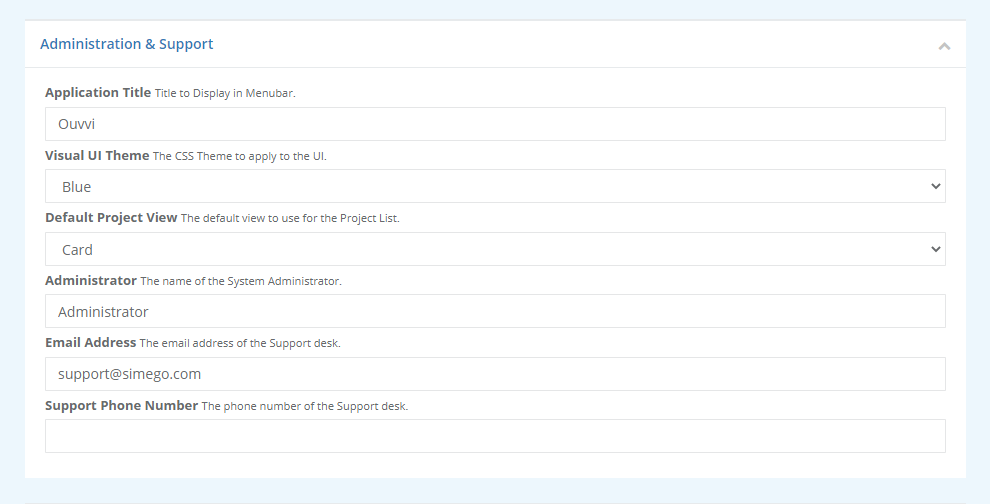
In this section you can configure the name of your Ouvvi Instance, change the colour theme, change the view, and set the system administrator details.
The email address entered here will be the default from address if you send any emails from your Ouvvi Server. This is also the email that will be displayed if there is a permissions issue whilst a user is browsing the site.
Please make sure to enter in the correct contact details so that your Ouvvi users can reach the right team if there is an issue.
Regional Settings

Set the locale to your preferred region to specify the way Ouvvi displays numbers, dates and time. You can also set the default time zone of your Ouvvi instance.
SMTP Email
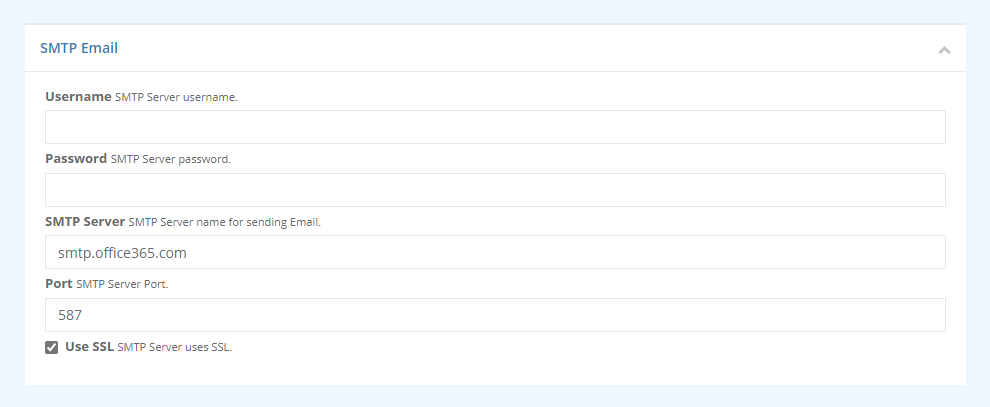
Use this section to configure your SMTP settings so that you can send email reports etc.
Ouvvi does not support anonymous server settings so you will need to enter in valid user credentials
| Parameter | Value |
|---|---|---|
| Username | Your SMTP Server Username. |
| Password | Your SMTP Server Password. |
| SMTP Server | The SMTP Server name for sending emails. For outlook this is smtp.office.365.com. |
| Port | The SMTP Server port. For Outlook this is 587. |
The checkbox specifies whether your SMTP server uses SSL or not.
If you have entered details for both SMTP and Graph, Ouvvi will use the Graph API in preference to send emails.
Office365 Graph Email
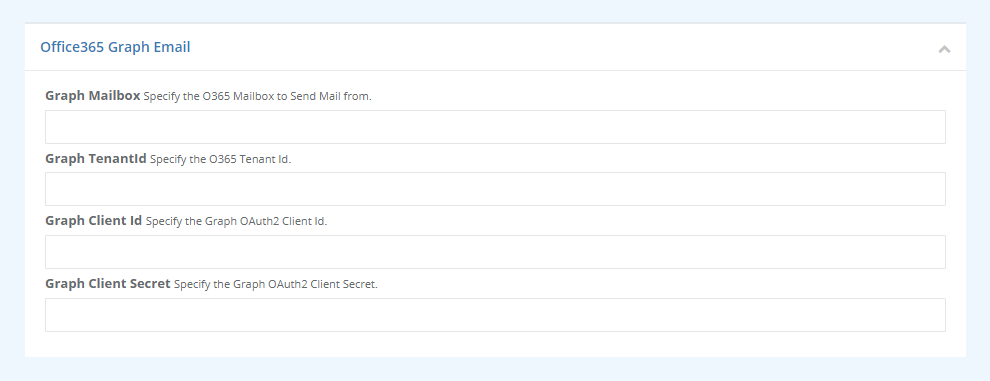
This section can be used to configure the office 365 mailbox to send email messages from using Graph API. You will need to have configured an Azure App to allow access via Graph API.
If you have entered details for both SMTP and Graph, Ouvvi will use the Graph API in preference to send emails.
Once you have created the Azure App and applied the required permissions you can specify the details required to connect.
You can find out more
| Parameter | Value | |---|---|---| | Graph Mailbox | The mailbox to send emails from. | | Graph TenantId | The Tenant ID from your Azure AD app. | | Graph Client ID | The OAuth2 Client ID from your Azure AD App. | | Graph Client Secret | The OAuth2 Client Secret from your Azure AD App. |
Triggers

Here you can define the start of day and end of day time for your operations. These are set to 8am and 6pm by default and will be used in triggers such as StartOfDay. If you need projects to run earlier or later than these times, please change them to meet your requirements.
Services
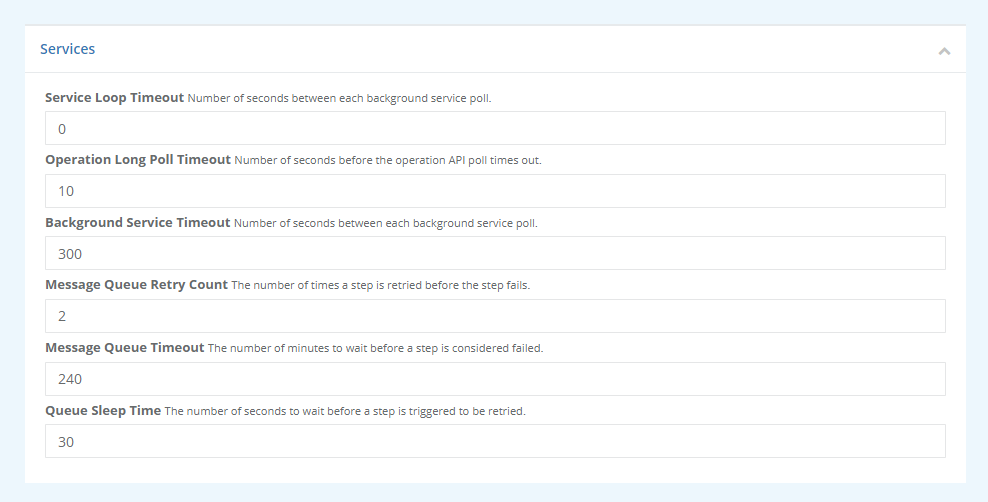
In this section you can set the timeout's, default retry count and the queue sleep time.
| Timeout | Definition | |---|---|---| | Service Loop Timeout | Define the number of seconds between each background service poll. | | Operation Long Poll Timeout | Define the number of seconds before the operation API poll times out. By default this is set to 10 seconds. | | Background Service Timeout | Define the number of seconds between each background service poll. By default this is set to 300 seconds. | | Message Queue Retry Count | Define the number of times a step should be retried before it fails. By default this is set to 2. Set it to 0 if you do not want to retry any projects by default. | | Message Queue Timeout | Define the number of minutes to wait before a step is considered to be failed. If you expect to have a long running step, change this so that it does not return failed before completing. By default this is set to 240 minutes. | | Queue Sleep Time | Define the number of seconds to wait before a step is marked to be retired. |
Logs

This section can be used to define the log retention time and what sort of messages to log.
You can choose to write Trace, Information, Warnings, Errors, and Audit events to the log.
By default the logs are kept for 30 days, after this they are deleted from the database. If you want to store the logs for less or more time, please change this value as you need to.
Data Synchronisation Studio

This section shows the installation location of Data Sync and allows you to change the default for saving data changes to Change Sets. By default data changes are not saved to the change sets.
Connection Library
In this section, you have the ability to designate a specific location for storing your connection library files. If you don't specify a location, Ouvvi will default to storing these files in the Ouvvi database.
This can be utilised to streamline your project development and uploading process by enabling both Ouvvi and your local Data Sync to share the same connection library.
Furthermore, this can be beneficial in a DevOps setup where you might need to switch the connection library among different environments like DEV, PROD, or UAT. By using the Export and Import function, you can easily migrate your configuration between instances. Afterward, all you need to do is direct Ouvvi to the relevant connection library location based on the selected instance.
This provides flexibility and convenience in managing your connection library across various environments and use cases.