OData OAuth
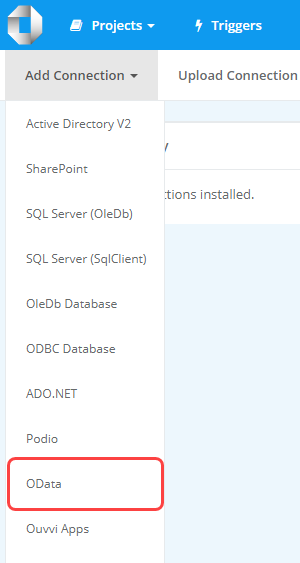
To add an OData connection to the connection library in Ouvvi select the OData option from the list.

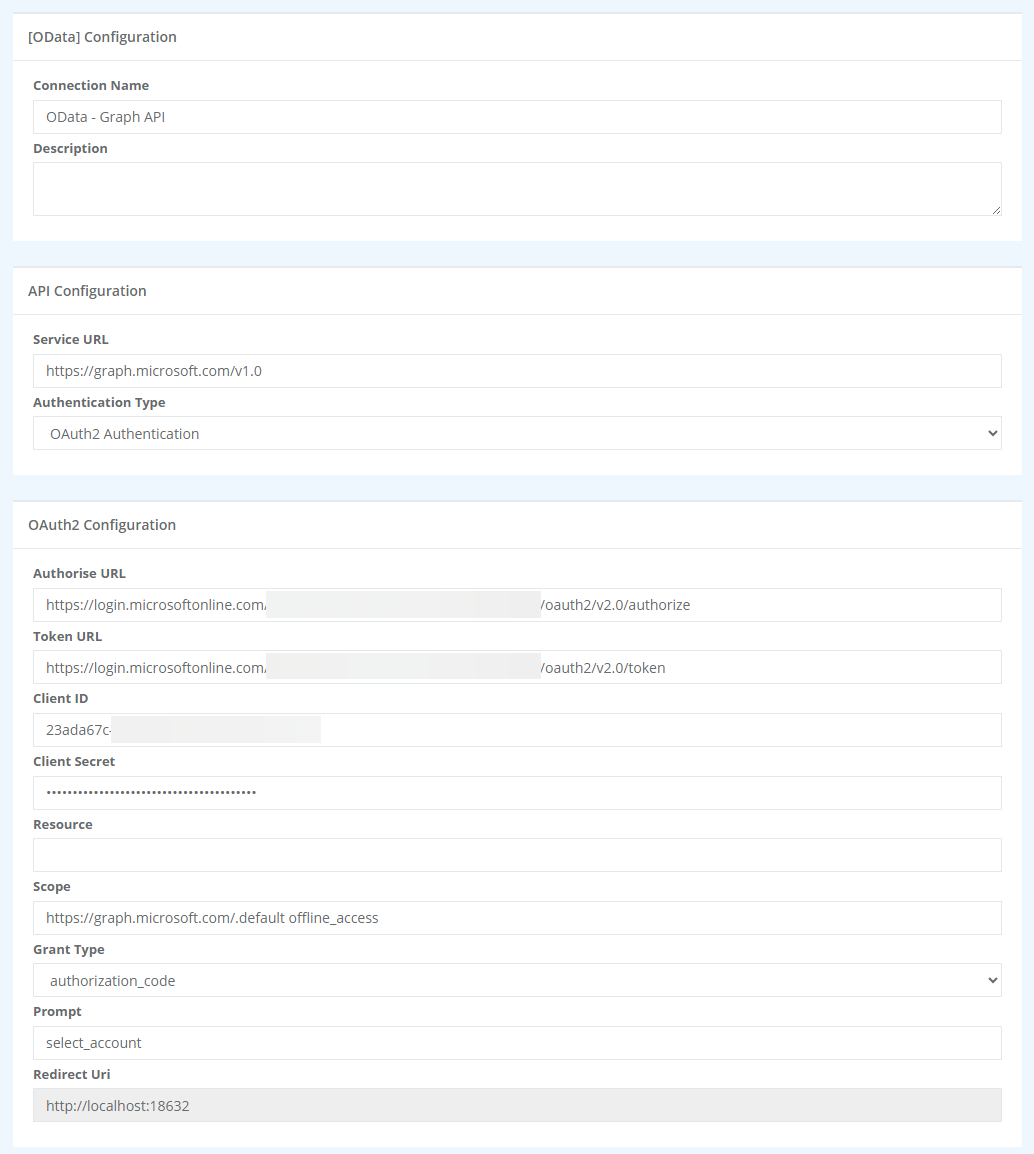
This will open the connection page where you need to start by entering a name for the connection and an optional description. You then need to define the API by entering the Service URL, the Authentication type needed and then configure the credentials.
There are two authentication types available: OAuth2 Authentication and Windows Authentication. If the API requires windows authentication then you will need to enter the username and password required to connect.
If the API requires OAuth then you will need to complete the fields as described in the table below. What is required in each field will depend on the API you are connecting to. The screen capture shows an example of connecting to GraphAPI with the OData connector.

| Parameter | Value |
|---|---|
| Authorise URL | The URL to authorise the connection. |
| Token URL | The URL to get the token. |
| Client ID | The client ID needed to connect. |
| Client Secret | The client secret needed to connect. |
| Resource | The resource to connect to (if required). |
| Scope | The scope. |
| Grant Type | The grant type to use e.g. authorization_code |
| Prompt | For Microsoft resources you can use select_account to pick the account to authorise or you can leave blank to use the current signed in user |
Make sure you register the redirect URL e.g.http://localhost:58699/settings/connections/edit/[name] with your service provider.
To save the connection click Authorise, the browser will redirect to authenticate the connection and if it is successful the connection will appear in the Ouvvi Connection Library list.