SharePoint OAuth Connection
To create a connection to SharePoint Online you can either use the Simego OAuth Azure App or you will need to create an app to enable the connection via OAuth. For details on creating the App in Azure or in Power Platform please see the Data Sync connection docs.
Simego OAuth
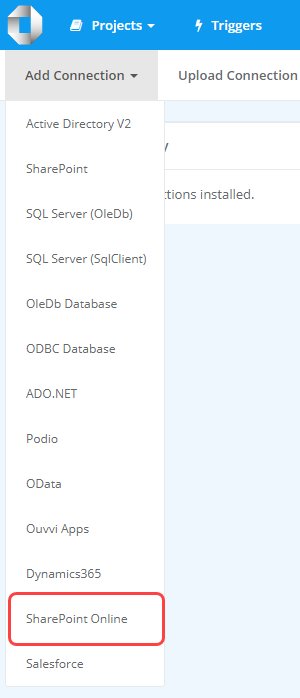
The easiest way to connect to SharePoint is to use the default Simego OAuth. This uses a public Azure app to enable the connection between Ouvvi and SharePoint. You can get started creating the connection in Ouvvi by selecting the SharePoint Online option from the list.

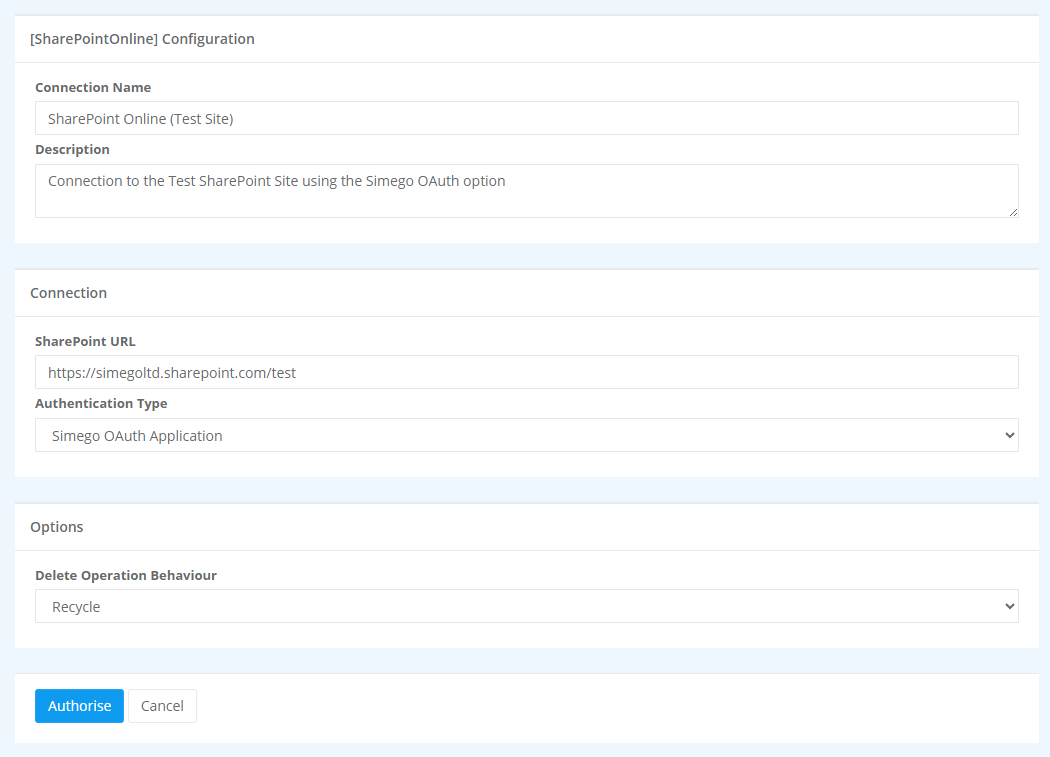
Then enter in a name for the connection, an optional description, and the URL to your SharePoint site. This should be to the root of the site in the format http://<sharepointurl>/<site1>/<site2>.
You can then choose the default delete operation behaviour. Selecting between Recycle and Delete.

Once you are done click Authorise, this will redirect you to the Microsoft login page. Log in to your Microsoft account used to connect to SharePoint to enable the connection. Once this is complete it will redirect back to the Ouvvi connection library and the connection to SharePoint will be available in the list.
Custom OAuth
If you are wanting to use the Custom OAuth option then once the app has been created you can create the connection in Ouvvi by selecting the SharePoint Online option from the list.

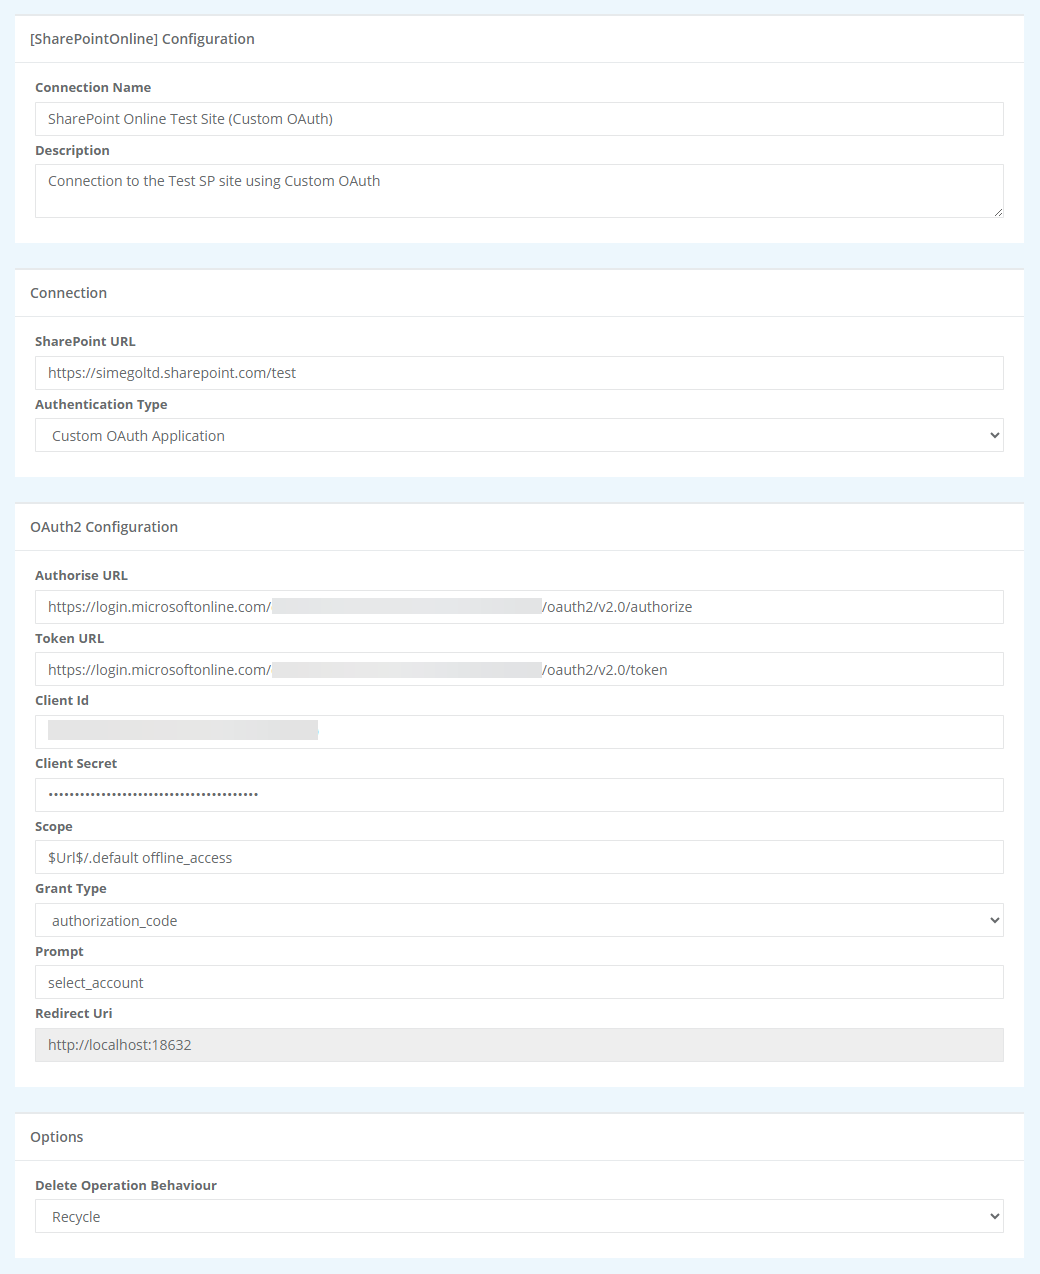
Then start by entering in a name for the connection, an optional description, and the URL to your SharePoint site. This should be to the root of the site in the format http://<sharepointurl>/<site1>/<site2>.
You will then need to change the Authentication Type to Custom OAuth Application, and complete the OAuth 2 Configuration fields with the required information.
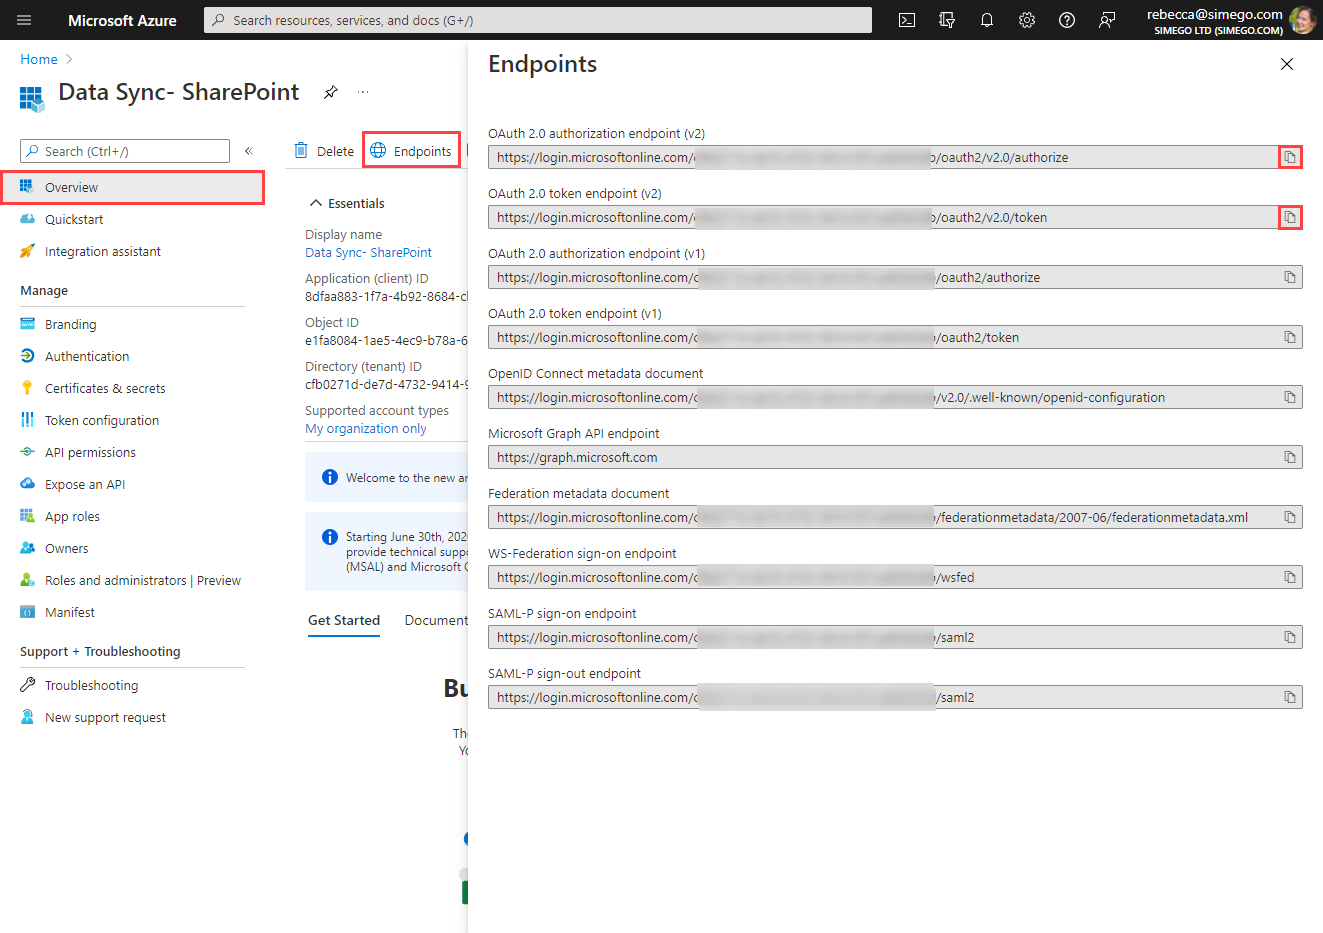
The Authorise URL and Token URL can be found by navigating to your app in Azure and clicking the endpoints button. You need to copy the V2 endpoints for each, as shown in the screen capture here:

The Client ID can be found on the App overview page in Azure, and you should have made a copy of the Client Secret when you generated it.
The scope should be set to $Url$/.default offline_access.
If you added permissions that required admin approval and you are not an admin user, you may receive an error stating admin approval is needed when trying to authorise the connection. To get around this remove the value found in the Prompt field and leave it blank.

To finish select the delete operation behaviour and click Authorise. This will redirect you to the Microsoft login page. Log in to your Microsoft account used to connect to SharePoint to enable the connection. Once this is complete it will redirect back to the Ouvvi connection library and the connection to SharePoint will be available in the list.