For Each File
For Each File is a great tool to use when you have a folder that is updated on a regular basis and the files within this folder need to be integrated into a database. This step will run a specified Ouvvi project for each file found in a directory.
Configuration
To create this step select For Each File from the list and enter in a name for the step. Then define the path to the directory to look for the files, the Ouvvi project to run and whether the context to be passed to the project is the full path, relative path or just the filename.
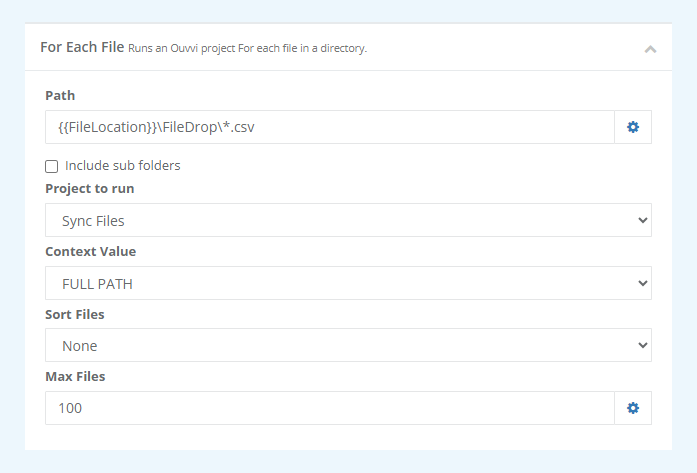
The descriptions for each parameter can be seen in the table below:
| Parameter | Description |
|---|---|
| Path | The path to the directory. Enter in a user setting for the path or manually enter the path. |
| Include sub folders | Check the checkbox to include subfolders in the upload. |
| Project to run | Choose the Ouvvi project to run from the drop down list. |
| Context Value | Determine the context value by choosing one of the following from the dropdown menu: Full Path, Relative Path or Filename. |
| Sort Files | Choose to either sort the files by Name, Name (desc), Created or Created (desc), or not sort the files. |
| Max Files | Sets the maximum number of files to process per run of |
Below is an example of how the whole process for the For Each file step can be set up and used.
The scenario for this example is to import the files into a SQL table, then delete the files from the directory once the import is complete. If the sync fails then the file is moved to a failures folder, so that can be processed separately.
Create User Setting
To help with this process we recommend using User Settings. These are settings that can be called upon with a user defined name throughout your Ouvvi site. For this example, as we are using a specific file location repeatedly, we can define the directory path within a user setting. In this case it has been called FileLocation, and means we can use it within our step configuration by using the run-time expansion {{FileLocation}} rather than typing the full path each time it is needed.
This also means that if at a later date the directory location changes, you only need to update the directory path within the user setting rather than in each project and step.
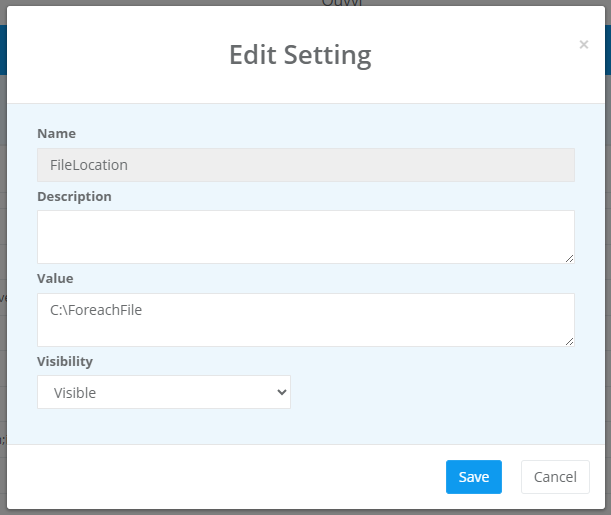
For more information on user settings please visit the page here.
Create the Processing Project
The For Each File step will trigger a defined project that will process the file upload and deletion. To create this processing project please follow the steps below:
1. Log Message
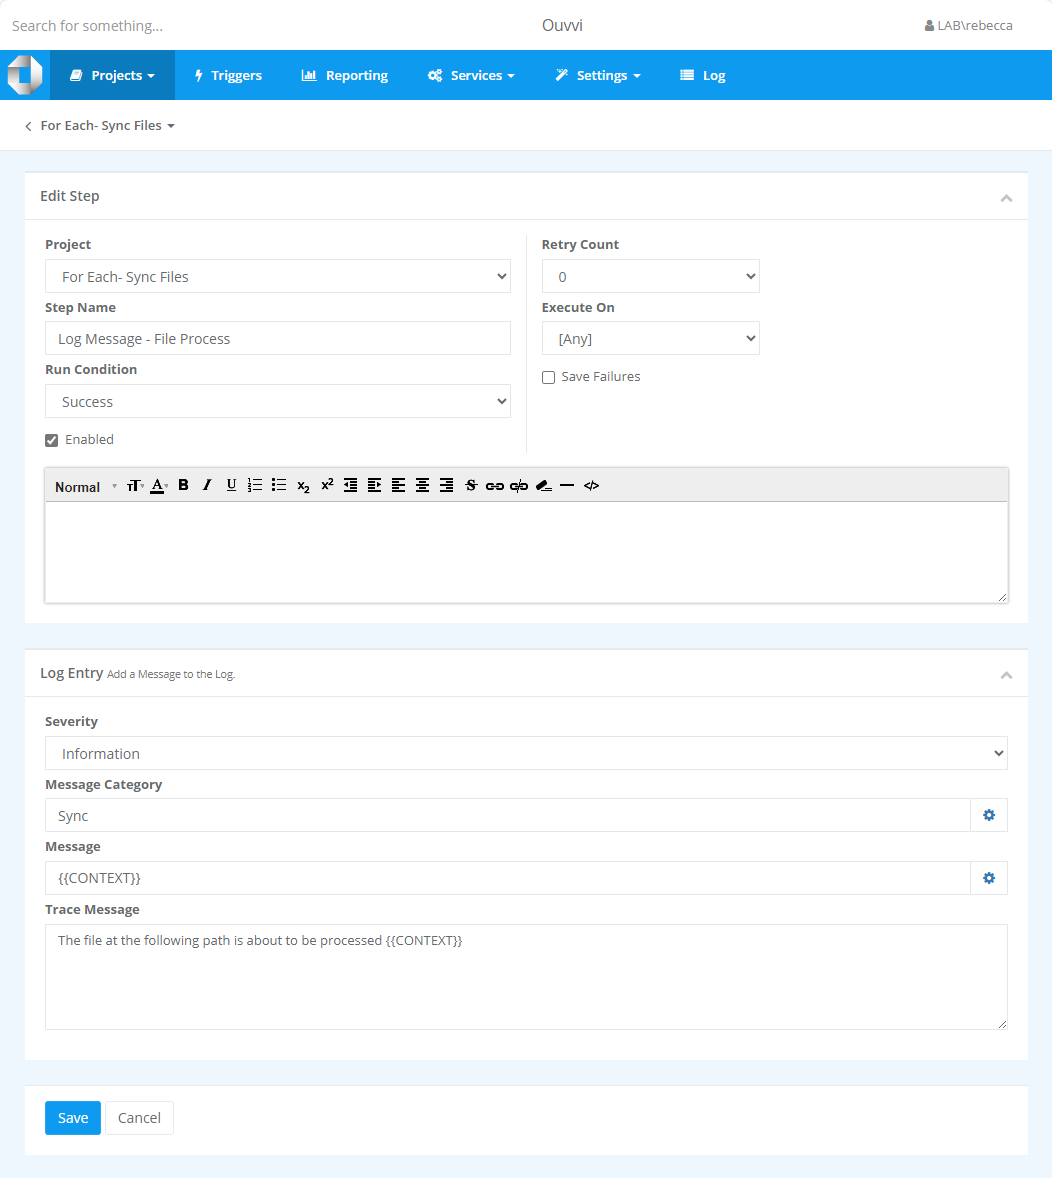
The first step in the processing project should be a Log Entry step, to add a message to the log that shows the path of the file about to be processed. This will help you identify which file was being processed if an error occurs so that you can look into the issue further.
2. Data Sync Project
The second step is to add a Data Sync project that will synchronise the file to the SQL table.
As a reminder, for this example we are using CSV files in a directory that will be synced to a SQL Table.
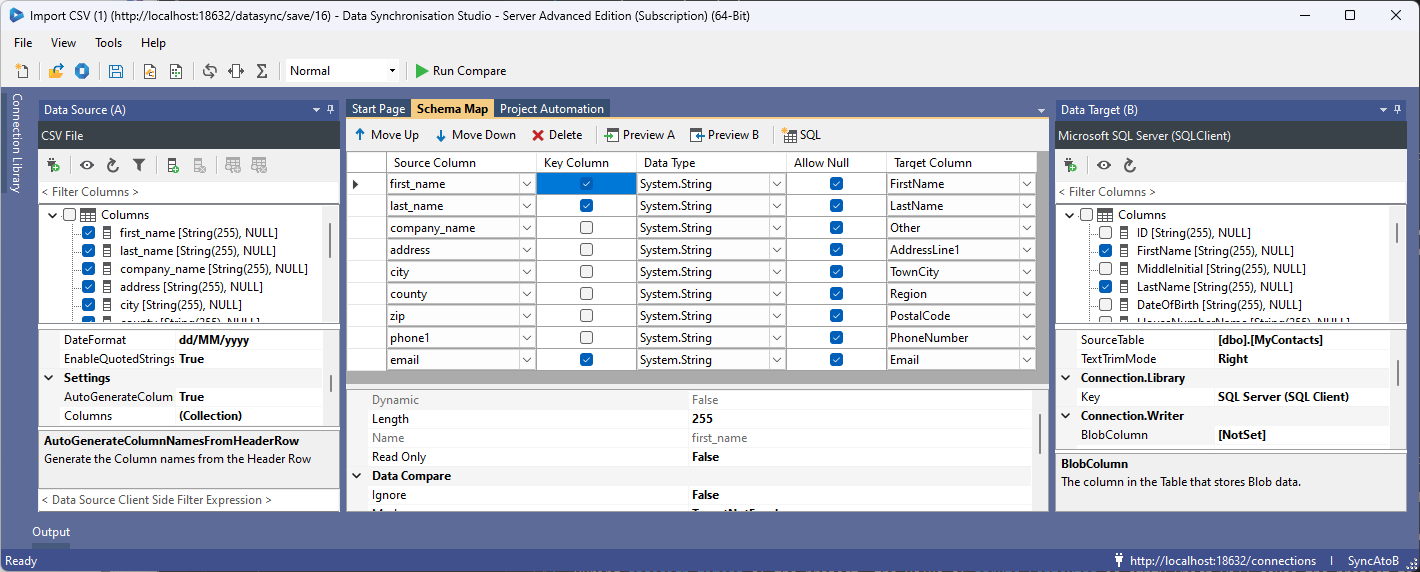
For this to work, Ouvvi will update the project at runtime with the value of {{CONTEXT}} from the project properties.
At runtime Ouvvi will inject this {{CONTEXT}} value into the Data Sync Project Properties property named Auto_Context.
We will then use Project Automation to get this value and update the source CSV Connection filename so that the project will process the correct file.
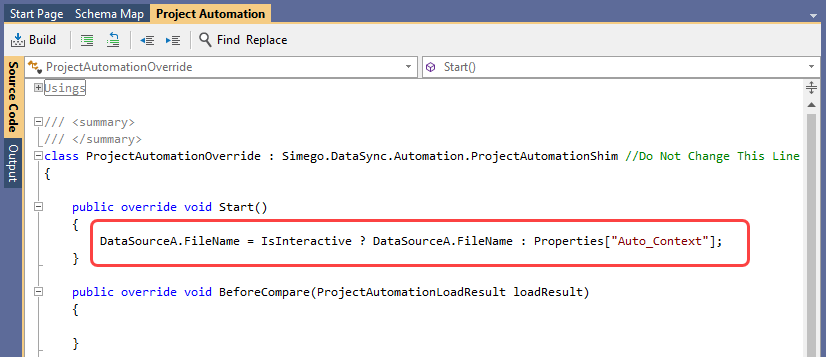
During design time of the project, the value of Auto_Context is empty which will cause the project to error. Therefore we need to specify within Project Automation that the FileName property is only set by Auto_Context when we are running Data Sync from Ouvvi. This can be achieved using the IsInteractive project property, which tells us if we are running in design mode or not.
In Project Automation set the FileName property of the source connection to the Path that is supplied by the Auto_Context project property value with the code below:
public override void Start()
{
    DataSourceA.FileName = IsInteractive ? DataSourceA.FileName : Properties["Auto_Context"];
}
3. Delete the File
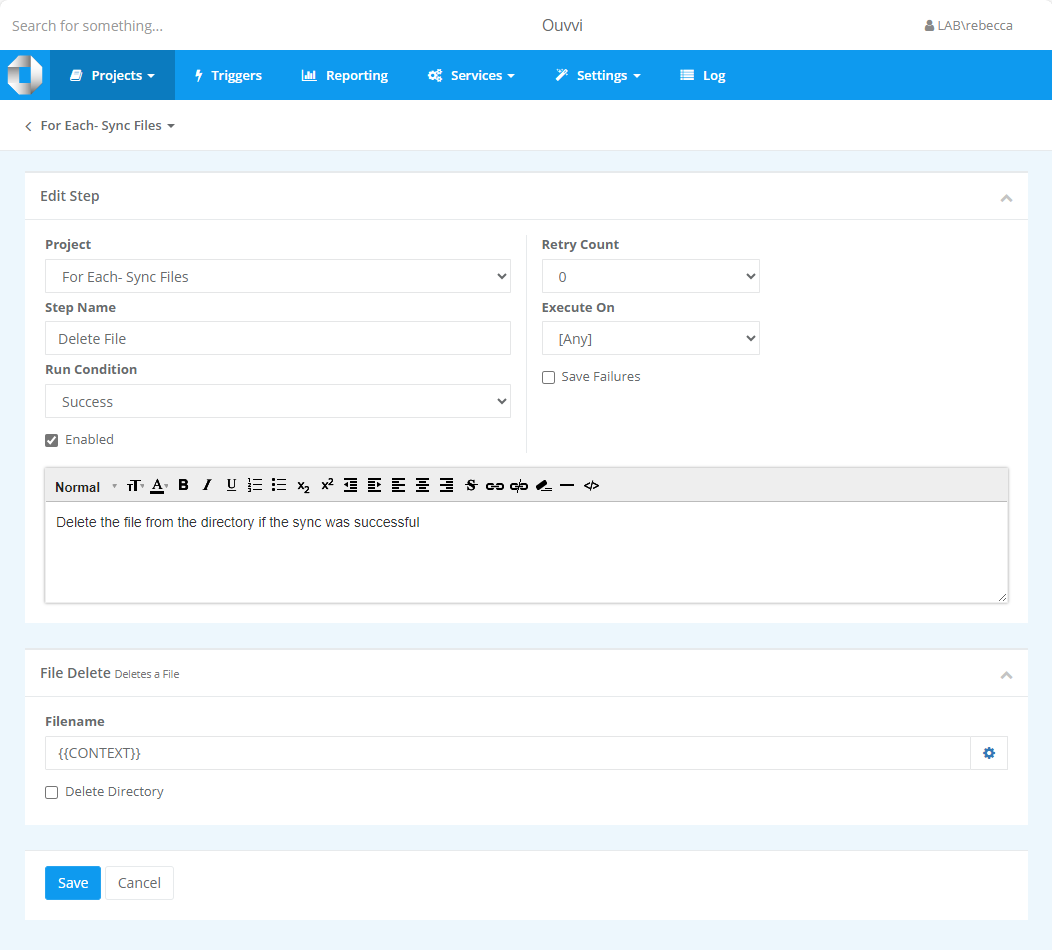
The third step is to add a File Delete step, to delete the file after processing by calling the {{CONTEXT}} value of the project.
You should also change the run condition of the step to Success so that the file is only deleted if the previous Data Sync step was successful.
4. Failure Folder
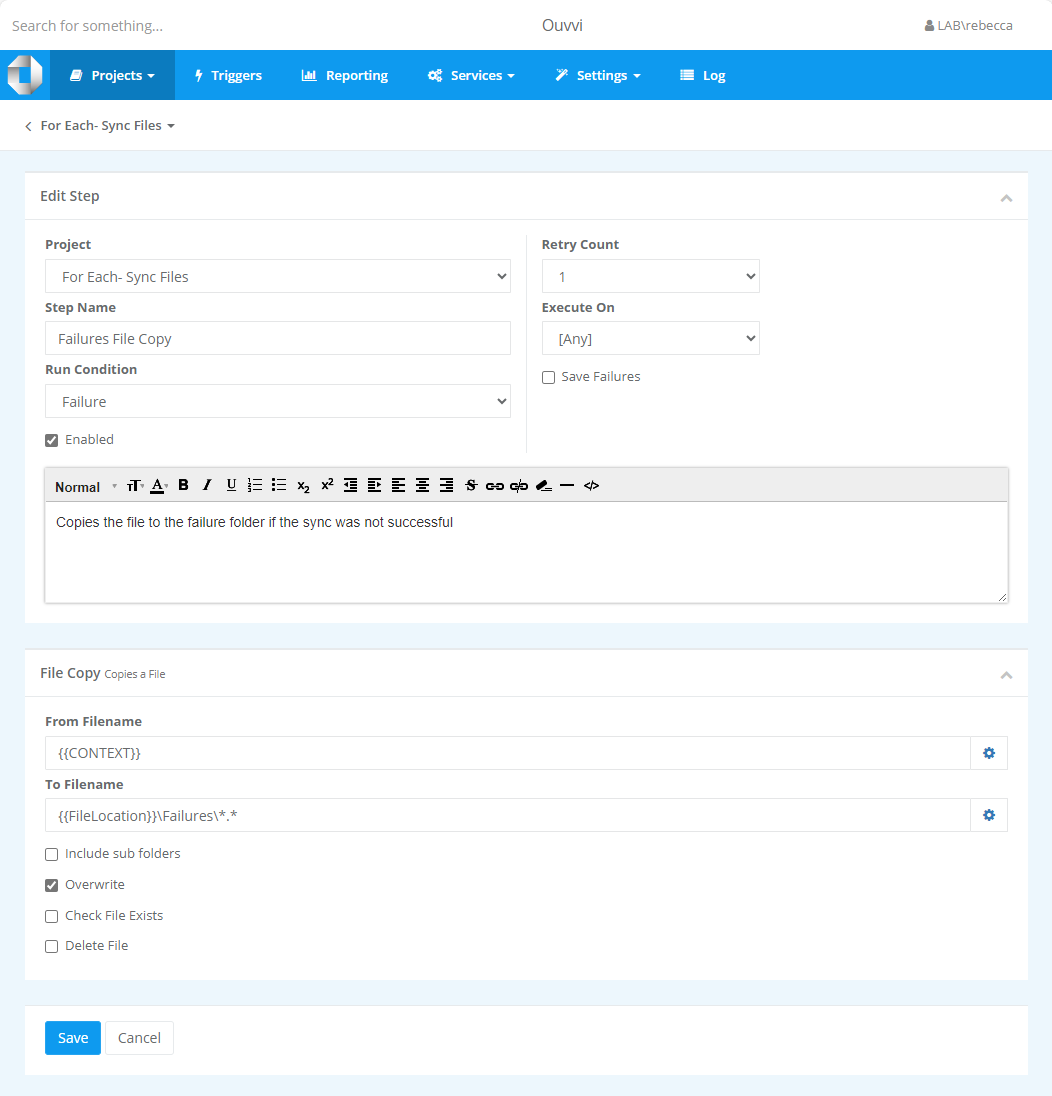
The fourth step is a catch for if there is an error, to move the failures to the failure folder. For this we use the File Copy step, which will call the {{CONTEXT}} value and only run if there is an error.
In the step configuration we need to change the run condition to Failure so that it only runs when another step has failed.
5. Overall Project
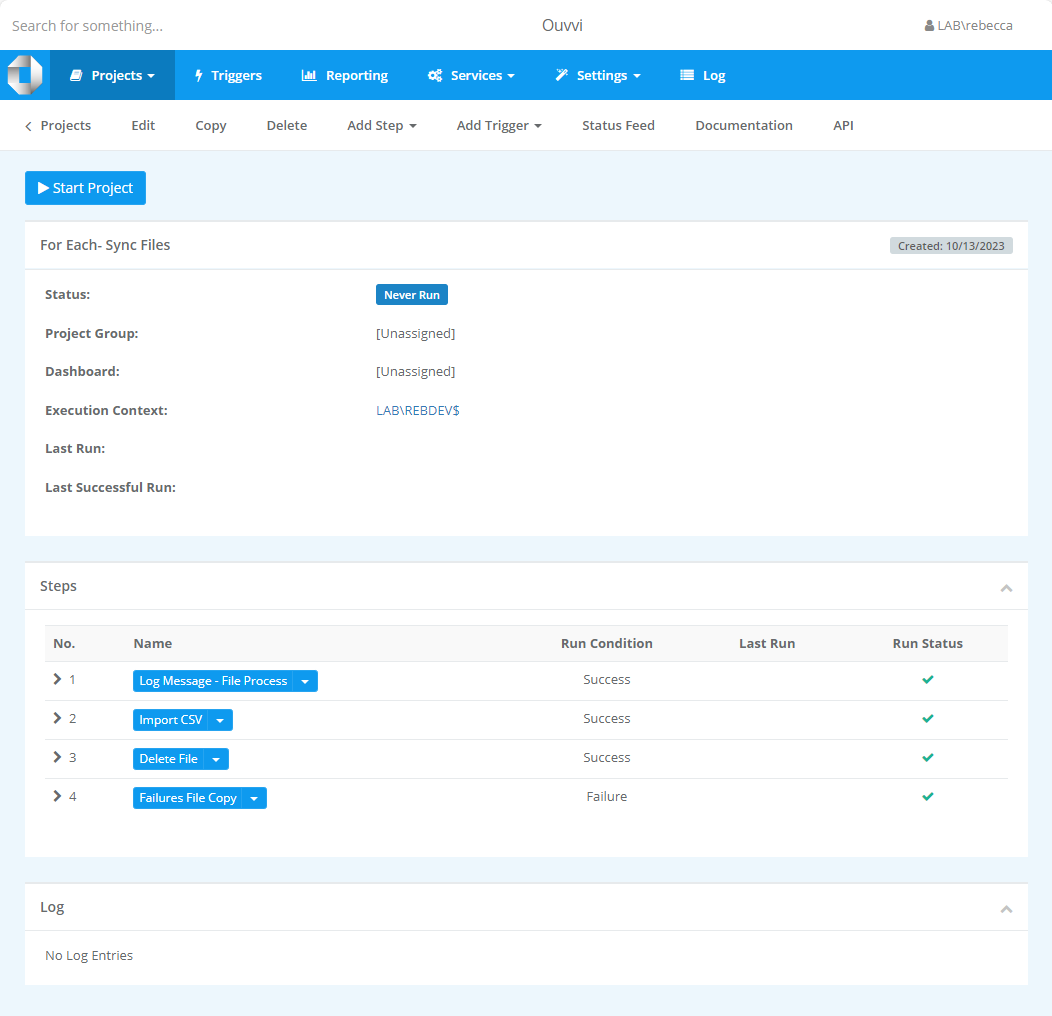
The overall working project should look similar to the screen capture below:
Configure the For Each Project
For Ouvvi to gather and pass the context value of each file in the directory to the processing project, we need to configure the For Each Step. This step will look into the file directory, defined by the user, and pass the value of context (Full Path, File Name or Relative Path) onto the processing project we configured earlier. It should be contained within its own separate Ouvvi Project.
The project should look something like the screen caputer below, where we use the user setting FileLocation to add the path to the directory.

Add a Trigger
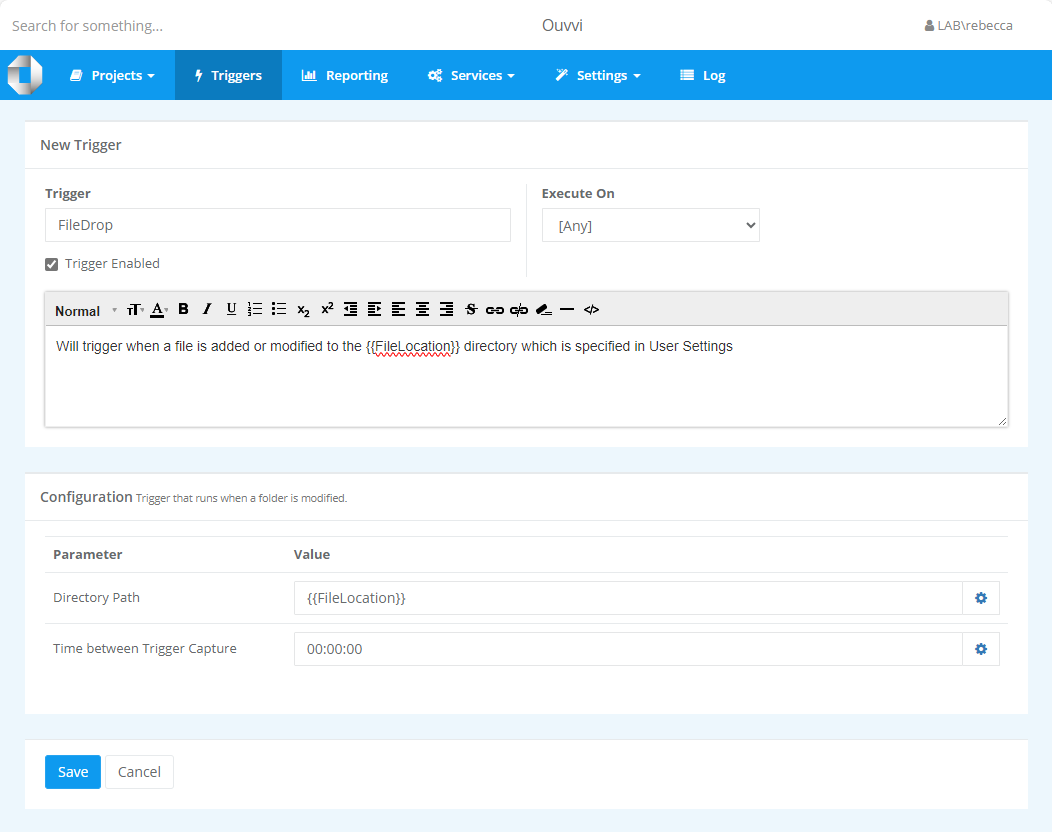
To finish we can add a Folder trigger to the For Each project, this will start the project run every time a new file is added to the directory. The Folder trigger detects changes in the modified date of the files in the directory folder.
Please note that the modified time of the files in the directory needs to be greater than the last time the trigger fired. Copying files into the directory may not modify the modified date/time and therefore may not fire the trigger.
The Time Between Trigger Capture is to prevent the trigger from firing multiple times if a large file is being loaded into the file directory. You can set this to be any length of time you prefer, in the screen capture below we have gone for 5 seconds.
Test
We then recommend testing that everything has been configured correctly by using a test file. Adding a file to the folder should cause the process to start (this can take 30 seconds). The log should then show the log step writing the file path to the log, the data sync step processing the file additions, the delete step deleting the file/s from the directory and the failures step being skipped if project did not fail.